-
Help Support Hardline Crawlers :
You are using an out of date browser. It may not display this or other websites correctly.
You should upgrade or use an alternative browser.
You should upgrade or use an alternative browser.
71 CJ5 build
- Thread starter wayne86
- Start date
P
If its free, its P
wayne86 said:What's your instagram name?
hardlinecustom
wayne86
Well-Known Member
Been busy throwing some aluminum at the rig the last couple of weeks. I just have to finish the driver's side. I couldn't resist getting a few pics with the hood and cowl on though.


poolman
Well-Known Member
- Joined
- Dec 21, 2012
- Messages
- 4,132

P
If its free, its P
Lovin it 
wayne86
Well-Known Member
Thanks guys! I've got all weekend again to work on it so hoping to wrap up the panels and get started on the dash.
wayne86
Well-Known Member
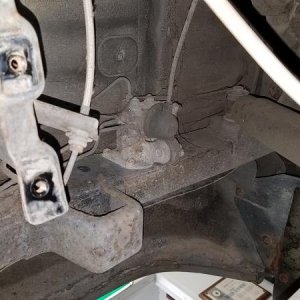
Exterior panel work all done. Dash is all that's left. spent a little time putting the buggy to ride height to check some things out. I am not real sure where i'm going to put my front bump stop mounts. without coils on the shocks it's hard to tell how much clearance I have. I came up with a solution for the rear that is pretty simple. The carboard templates are at a buddy's getting cut out now. I'll burn them in and return to the front for a solution. I realized as I was posting these that the axle tube is 3.25" and not 3". I'll have that fixed.


wayne86
Well-Known Member
Finally finished up my rear bumpstops. It's been a busy spring. I sell fertilizer so it's a busy time of year. I'm also going on my own this year. Today is my last day working for somebody else! I'm pretty excited about that!


wayne86
Well-Known Member
I thought I would note that the slugs I put in the bump cans worked well to keep the cans from warping during welding. They were a MFr to get sledged out but the Radflo bumps went right in afterwards. I thought I would share that little tech tip to save somebody from having to cut up a perfectly good can because the bump wouldn't fit after welding. I remembered reading a thread here somewhere where the guy couldn't get the bumpstop in after welding. I'm glad I remembered that!
ridered3
Not Rigless
Congrats on the new endeavor and best of luck to you on being your own boss.
Glad to see you keep chipping away on this build.
Glad to see you keep chipping away on this build.
wayne86
Well-Known Member
ridered3 said:Congrats on the new endeavor and best of luck to you on being your own boss.
Glad to see you keep chipping away on this build.
Thank you I appreciate that!
wayne86
Well-Known Member
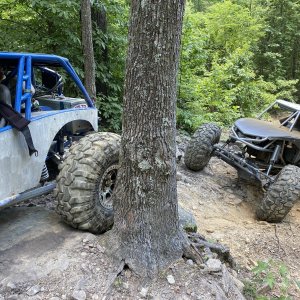
Wrapped up the bumpstop project Sunday. Also beefed up the ram mount so it didn't rip off the truss. The Artec truss has the holes in it so my brackets didn't have much weld holding them on. Got em boxed in and much stronger now. Added a few outside pics since it was such a nice day.


wayne86
Well-Known Member
Since I'm almost done with the fab work my buddy Ryan said to bring it to his shop so we could knock out the rest of the projects with his plasma table. We did the front bumper, the trans cooler mount, and the battery box over the weekend. It feels like the most progress I've made in a long time. While it's there we are going to go ahead and knock out the dash, weigh it for coil springs, and probably wire and plumb it.


P
If its free, its P

wayne86
Well-Known Member
I put a good day in Saturday on the rig. I got the Atlas support ring welded in, welded the tabs in for my firewall, and a couple other small things. Sunday smacked me upside the head with all kinds of issues with plumbing. I didn't plan ahead far enough and the fittings I had made would hit the cowl bar I added to make the firewall. So I trimmed down the orbital mount and flipped the orbital on it's side. Well, the hoses weren't made for that orientation so I have change that up. Then the reservoir position wouldnt work because of the giant 12 AN feed line fitting so I cut it out and relocated it. Then I thought I'd start fresh with the fuel kit I got from WOD. Everything went pretty smooth until I realized I was short the fittings for the fuel filter and fuel pump. I think I have extras that will work but at that point I was so frustrated I called it a day. Maybe things will flow smoother this weekend.
Does anybody know what the site gauge fittings are on the back of the atlas? I think it's quarter inch NPT with a 6AN adapter for the Advanced adapters sight gauge kit. I bought it used and it didn't have the fittings for the Atlas.
Does anybody know what the site gauge fittings are on the back of the atlas? I think it's quarter inch NPT with a 6AN adapter for the Advanced adapters sight gauge kit. I bought it used and it didn't have the fittings for the Atlas.
wayne86
Well-Known Member
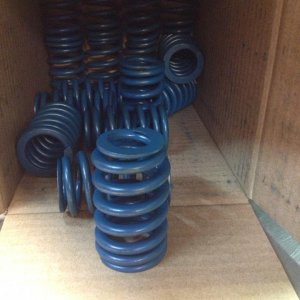
My buddy borrowed some four corner scales to get some weights so we could order coil springs. WOD hooked me up with some QA1 springs for the Radflo shocks. Still need to charge the shocks and set the springs right. I'm pretty pleased with the weight.


Installed the cutting brake as well. Now I can do front digs and burnouts!

Installed the cutting brake as well. Now I can do front digs and burnouts!
wayne86
Well-Known Member
Starting to throw some wire at it. I am paying a friend to do it. I have no business doing the wiring. I will work on the other small details while he plugs away at that.

wayne86
Well-Known Member
We are in the home stretch on the build now. I finally got the brakes plumbed up after spending way too much time and money trying to figure out what I wanted to do and how to do it. We have a hose and line company called Power Components here in Ft. Wayne that has been very helpful with all of my plumbing needs. My break setup is CNC dual masters. The front MC is 1 1/8" and the rear is 1" with a balance bar. After reading quite a bit I'm convinced those size are way too big but I didn't see a lot of tech around it. Those are the sizes I was recommended by kar-tek. I then adapted the 1/8 NPT fittings to -4 AN/JIC style fittings and ran all of my lines that way. I ordered all of the adapter from Summit Racing. I really hope this setup works. I can always try a smaller master I suppose. Does anybody have any comments/opinions? My calipers are factory dodge one ton calipers in front and K10 half ton calipers in the rear.
I had to order a 48" throttle cable because the 36" just wasn't quite long enough. I'll have everything done except for final wiring and exhaust this week. Next week it gets exhaust and it should be ready for a shakedown. Trying to make a WindRock trip Labor Day weekend. I'll tear it down for paint this winter.
The pressure switch for tail lights is mounted to the front side of the panel with a rivnut.
wayne86
Well-Known Member
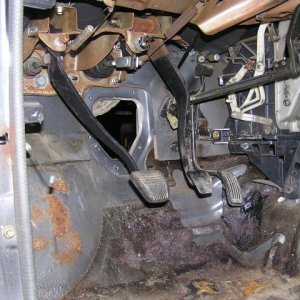
Getting closer to the finish line now. Brandon Haynes helped me out on my exhaust. Another friend and I busted out the trick throttle cable mount for the Kar-Tek pedal and mounted the rear tail lights. Still waiting on him to finish wiring, but it shouldn't be long now.


We put the headers on backwards to clear the driveshaft and starter on the passenger side. It worked out well and I think looks pretty killer.


We put the headers on backwards to clear the driveshaft and starter on the passenger side. It worked out well and I think looks pretty killer.