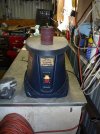
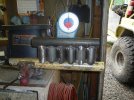
• Help Support Hardline Crawlers :

So i bought a 51 Whilly

does that meen i can supply said free paint, and choose the color scheme of hips new ride?


Hip you arrange what you have to with gramma( i know it's not easy on a minutes notice.), for any weekend you want to go wheelin :cool: 
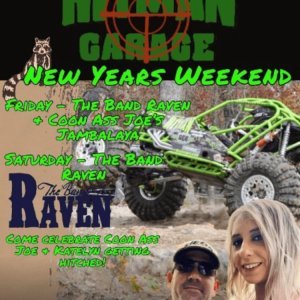
. i will be there buddy...
tow rig,and trailer make it easier for me to say yes to wheelin anyday.. im probably not gonna be able to go to the rocks in august(lack of funds,but still have the week off).
and dont feel bad. i dont call anyone anymore :flipoff:
 
welding aluminium was not in the stars

Sam and i tried to figure out a way to hook up what i borrowed to what i got and it wasnt gonna happen.

So i made some brackets...
 

Attachments

  • P1000024.JPG
    P1000024.JPG
    65.1 KB · Views: 664
  • P1000025.jpg
    P1000025.jpg
    46.7 KB · Views: 659
  • P1000027.jpg
    P1000027.jpg
    62 KB · Views: 657
Just torched and de-slagged for now, ill final fit when i have the ends here. the uppers are gonna have room for multiple sets of holes for dialing in then ill reshape/make another final.

the lowers are much easier. 4 shorter and four longer.

View attachment 20525

View attachment 20527


yeah i coulda bought some brackets but with the money i saved i got this:D
 

Attachments

  • P1000028.jpg
    P1000028.jpg
    35.9 KB · Views: 638
  • P1000029.jpg
    P1000029.jpg
    48.5 KB · Views: 639
  • P1000030.jpg
    P1000030.jpg
    61.5 KB · Views: 645
tig setup question?

it worked much better on the cardboard template:awesomework:

the flapwheel is faster but once you get it close it makes the radius perfect. of course the large spindle is 3" and a dana 60 tube is 3 1/8" but its easy to sand to a scribe line.

need to get better sandpaper the **** on it just crumbles off.

So what does it take to get the aliminium bracket tacked at home?

can i power a tig torch from an AC DC buzzbox and regulate the gas thru the mig regulator?

Does anyone have a portable enough setup that could bring it over?

My neighbor has all the stuff but its brand new unopened so until his shop gets built im SOL. He poured the slab last week.

i can borrow welding stuff from work so if anyone knows a good setup let me know what all i would need to borrow.
 
York Bracket

well the bracket made it to the back of my truck, we will see if i have it clamped into place well enough:redneck:
 

Attachments

  • P1000031.jpg
    P1000031.jpg
    54.9 KB · Views: 601
  • P1000032.jpg
    P1000032.jpg
    57.7 KB · Views: 592
  • P1000033.jpg
    P1000033.jpg
    46.5 KB · Views: 595
Last edited:
another shot of the installed unit.
View attachment 20608

View attachment 20609

this leads to another minor issue. the back brace no longer reaches its original location. now i get to play with fire to make a different brace to an alternate location.:FIREdevil:
 

Attachments

  • P1000039.jpg
    P1000039.jpg
    62.4 KB · Views: 588
  • P1000040.jpg
    P1000040.jpg
    65.2 KB · Views: 583
One of the HTs at work his name is travis.... good kid only took one case of miller lite.

he was split between comshaw jobs. some chief had him welding two 55 chevy truck front fenders together. i was like WTf why is he welding them together is he making a mail box or something, turned out i was right. making the headlight hinge for the opening....

tonight im making the back brace, fire and an anvil.....:awesomework:
 
well that didnt work

the fire and anvildidnt work out so well, best leave that blacksmith stuff to the proffessionals. but i can cut and weld:fawkdancesmiley:
 

Attachments

  • P1000041.jpg
    P1000041.jpg
    90.9 KB · Views: 571
  • P1000042.jpg
    P1000042.jpg
    58.2 KB · Views: 574
made a little more progress, made some center link brackets and a small truss to weld them to for the rear end today.
 

Attachments

  • P1000046.jpg
    P1000046.jpg
    40.1 KB · Views: 544
  • P1000047.jpg
    P1000047.jpg
    45.6 KB · Views: 549
  • P1000048.jpg
    P1000048.jpg
    44 KB · Views: 554
  • P1000049.jpg
    P1000049.jpg
    47.9 KB · Views: 553
spent some time solidifying the chassis.


now i need to spen another day bending tube. by the end of the week ill have a bunch of small tube between the rails.
 

Attachments

  • P1000061.jpg
    P1000061.jpg
    62.4 KB · Views: 517
  • P1000062.jpg
    P1000062.jpg
    61.9 KB · Views: 514
  • P1000063.jpg
    P1000063.jpg
    67.4 KB · Views: 509
Progress

mini spreaders
 

Attachments

  • P1000071.jpg
    P1000071.jpg
    55.3 KB · Views: 467
  • P1000072.jpg
    P1000072.jpg
    63.2 KB · Views: 464
  • P1000073.jpg
    P1000073.jpg
    67.1 KB · Views: 463
  • P1000074.jpg
    P1000074.jpg
    59.3 KB · Views: 462
Last edited:
old school

bought this when i was 19.
 

Attachments

  • P1000002.jpg
    P1000002.jpg
    49.6 KB · Views: 452
  • P1000067.jpg
    P1000067.jpg
    17.2 KB · Views: 453
  • P1000068.jpg
    P1000068.jpg
    22.7 KB · Views: 452
trying to get it to show the pearlesnt in the paint. neon light does it no justice. first time it has even been photographed with a digital.

just seeing if anyones actually paying attention.:fawkdancesmiley:
 
Last edited:
Top