• Help Support Hardline Crawlers :

Toy Story

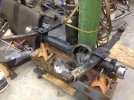
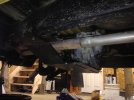
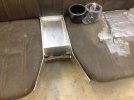
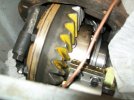
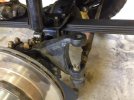
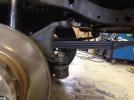
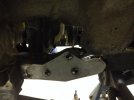
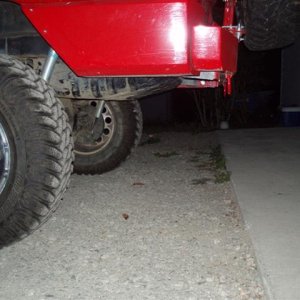
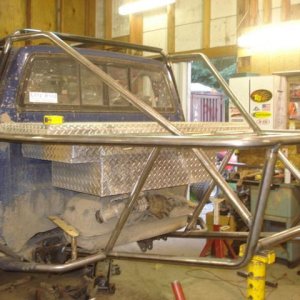
Ok, getting a few more things done on this. I got a little lazy for a few weeks but now I am back on it. I have also been running down parts and building some cool stuff. Thanks to lots of great folks on here, this little truck is looking sweet. I was able to get the 5 speed and new clutch back in and test fit the custom skid plate. I also got the front axle all cleaned up with the extra brackets removed, rebuilt the front spring packs. I used the factory front main and 2nd leaf, then used a factory rear main and 2nd leaf. I cut the eyes off the rear mains and bolted them up to the factory front pack. Im thinking it will help bring the front off the deck and make room for the 34s.
 

Attachments

  • photo 41.jpg
    photo 41.jpg
    73.4 KB · Views: 217
  • photo 42.jpg
    photo 42.jpg
    54.2 KB · Views: 216
Get some lift shackles for the front.

Whats that bracket/flatbar coming off the back of the passenger side over that jackstand?
 
Get some lift shackles for the front.

Whats that bracket/flatbar coming off the back of the passenger side over that jackstand?

Ya working on the shackles now. Not sure what bracket/flatbar thing you are talking about? On the axle?
 
Worked on a little custom center console before I send the seat out to get covered. It will have a switch panel and 2 beverage holders.
 

Attachments

  • image.jpg
    image.jpg
    53.3 KB · Views: 197
Welp, now the diffs should live a happy service life, provided they are properly broke in...some before shots (when received). :yikes:
 

Attachments

  • Differential setups 005.jpg
    Differential setups 005.jpg
    46 KB · Views: 216
  • Differential setups 003.jpg
    Differential setups 003.jpg
    51.3 KB · Views: 206
  • Differential setups 001.jpg
    Differential setups 001.jpg
    46.3 KB · Views: 207
  • Differential setups 002.jpg
    Differential setups 002.jpg
    53 KB · Views: 210
Aaaand after...:cool:
Front first, then rear with TJM locker...
 

Attachments

  • Differential setups 020.jpg
    Differential setups 020.jpg
    56 KB · Views: 220
  • Differential setups 021.jpg
    Differential setups 021.jpg
    62 KB · Views: 218
  • Differential setups 024.jpg
    Differential setups 024.jpg
    51.1 KB · Views: 212
  • Differential setups 019.jpg
    Differential setups 019.jpg
    70.6 KB · Views: 212
  • Differential setups 023.jpg
    Differential setups 023.jpg
    52.6 KB · Views: 215
  • Differential setups 006.jpg
    Differential setups 006.jpg
    70.1 KB · Views: 217
Locker has been leak-checked and is good to go...:awesomework:

Kev you rock man! Thanks a lot, this really puts my brain at ease. See you monday!

Throw that thing together and come to walker sunday.

Not this weekend Mark, I got a new dirtbike to ride over east. Im pickup up these 3rds monday and then Ill start slapping the yota together. More to come! Ill be out with you guys soon.
 
Not a problem Nick! :awesomework: Glad it was caught before they got ran! They'd have made it about 20 miles before chewing up to nothin'!!! :haha:
Enjoy your weekend, and be safe brutha! :cool:
 
hijack:
Can you tell how you accomplished this Kev?
for the dumber of us :)
cheers
Well, I took a painted picture, studied it, took **** apart, measured, adjusted, and reassembled, torqued, and rechecked with a new painted picture!!! :haha: :fawkdancesmiley:
Naw, If you look at the before pics, the paint had a very sharp line in the valley of the gear teeth, with an arrow-like pattern pointing outward. In laymen's, if the 'arrow' or 'D' pattern is pointed out (or away from the valley), the pinion needs to move out (it's too deep)...if the 'arrow' or 'D' pattern is pointed inward, the pinion needs to move in (it's not deep enough--you've heard this before, right!? :nutkick:) The amt changed is somewhat of an educated guess based on original painted pattern and experience.
...Pretty simple, even for dumber folks like us! :haha::awesomework:
 
Last edited:
Did a bit of work over last weekend and a little this week. Waiting on a few more parts to show up but It is coming back together good. The wheels are out getting powder coated, getting a few more things cut out on the plasma table, I got the Sky less drop pitman arm coming to finish out the steering. Gotta install drivelines and a few missing bolts here and there and take it to the exhaust shop. More to come....
 

Attachments

  • photo 43.jpg
    photo 43.jpg
    70.5 KB · Views: 146
  • photo 44.jpg
    photo 44.jpg
    57.8 KB · Views: 141
  • photo 45.jpg
    photo 45.jpg
    59.4 KB · Views: 141
  • photo 46.jpg
    photo 46.jpg
    75.9 KB · Views: 147
  • photo 47.jpg
    photo 47.jpg
    53.9 KB · Views: 139
  • photo 48.jpg
    photo 48.jpg
    60.3 KB · Views: 143
  • photo 49.jpg
    photo 49.jpg
    55.6 KB · Views: 140
  • photo 52.jpg
    photo 52.jpg
    41.8 KB · Views: 138
Last edited:
Top