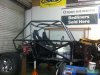
Bought this buggy a couple months back from Bluzuk80. When bought the stearing pump was out and both rear shocks where shot. I brought it home and fixed the pump and he sent me some new rear shocks. My original intent was to was to fix those two things and wheel it, but the more I went thru the buggy the more things I found that need attention before I take it out. With me living in Florida and having to drive 5hrs just to wheel I can't take the chance of breaking when it can be provented. So here we go.
-
Help Support Hardline Crawlers :
You are using an out of date browser. It may not display this or other websites correctly.
You should upgrade or use an alternative browser.
You should upgrade or use an alternative browser.
Buggy rebuild
- Thread starter bbounds
- Start date
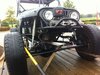

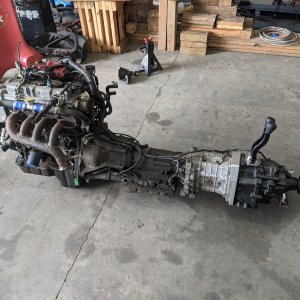
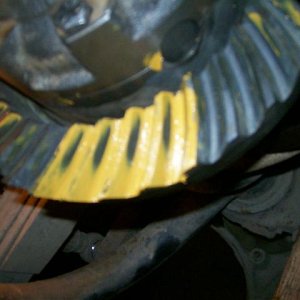
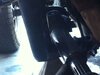
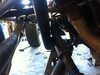
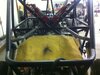
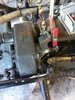
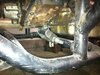
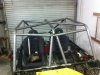
I took the buggy to my buddies shop Southern Custom in Alachua, Fl. We started with tearing out the interior. The shifter was attached to the sheet metal only and there was no bracing for the sheet metal to attach to, so it was flopping around and made all kinds of noise. The wires that where going to the battery where just punched thru the sheet metal with know wire lume or anything to prevent them from being frayed. So we decided to just tear out the existng metal and start over since there wasn't very much to start with any way. We then decided to jack the buggy up to make sure we didn't have any clearence issures. Turns out when the front shocks are fully extended the yoke's completly bind on each other and the drive shaft hits the chassis (NOT GOOD). We also notice that there is about 1/8 of an inch between the yoke on the front t-case and transmission so you can only fit a 1310 yoke on the t-case itself. The t-case was leaking so we decided to pull the case seal it up and reclock it which will give us plenty of room for the yoke and t-case and also put the other yokes at a better angle. we also shimmed the carrier bearing to give us more more room from the chassis. The problem we ran into was with the t-case clocked it now hits the chassis. After scrathcing are heads for a while we notice that the whole motor is is crooked in the buggy, so to make that work we will now be changing the motor mount brackets to straighten the motor up and give everything the clearence it needs to work properly. With that figured out we decided install the new air shocks in the rear. The shocks are 16" king air shocks with a 5/8 heim on the bottom so we are going to have to change the bottom mounts. My buddy really didn't like the angle of the shocks to begin with and that they where mounted right on the chassis with no crush points built in. We also noticed that they where a full inch difference where they where mounted on the chassis so might as well add some tube and relocate how they hook up at a better angle. This is where we are at now. We will also be adding some bracing to the link mounts and thru out the chassis to strengthen it up a bit, re-working some tube up front to make the CJ hood and grill work, installing Reid knuckles with high steer arms, installing a new belly pan and pan around the oil pan because the one on it now is a joke. I was planning on bringing it to RBD but with all the extra stuff we found it will probably won't happen. I will be updating with pics and findings as I get to those points.
Attachments


bluzuk80
Well-Known Member
Will be a sure enough nice rig when you get it all fixed up. Good luck 
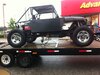
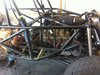
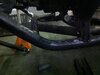
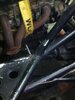
Went to RBD in the Ranger had a great time. Now back to work!! Moved motor mounts to straighten t-case for clearance. We also raised motor about 2" and 1" forward to give us more clearance on our belly pan since the transmission was actually laying on the front link bar. We now have about 3" of clearance. We also finished the rear shocks added bracing front and rear. We also extended the transmision mount to give us the right angles. The rear link bar was bent because it had no bracing so we cut it out and put some 2" by 1/4wall and added bracing it shouldn't bed now.
Attachments
Lil ugly
Well-Known Member
Not quite as much work as building a buggy from scratch but sounds like it is close to it. Has your brother picked up his chassis from PJ yet?
I am still gathering parts and trying to get the rig I stripped down finished up and out of the garage so i can start on my buggy.
I am still gathering parts and trying to get the rig I stripped down finished up and out of the garage so i can start on my buggy.
Lil ugly
Well-Known Member
February is a quick schedule. I dont expect to have mine done until early 2014 at best. It is going to suck being without a rig for that long.

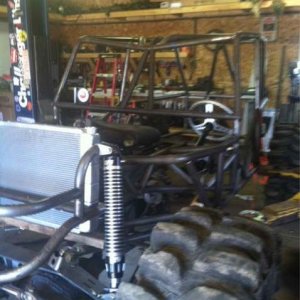
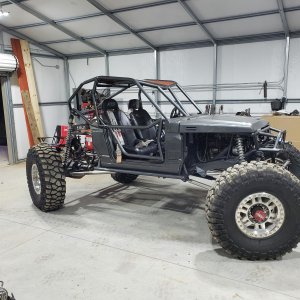
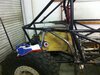
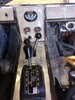
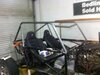
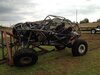
Got some more work done on the buggy!! We have the inside complete except for spray and we went ahead and rebuilt the cage to give it a little more layed back look. The front will be done this weekend as well as adding a truss to the front axle. Wont be long!!
Attachments
Lil ugly
Well-Known Member
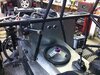
Looks good. What is the guage in upper center of your console? Cannot tell in the pic. Are you going to have to add any more support to your steering wheel shaft or is it pretty solid like it is?
It's a stereo, I got it from the thread on hardline. http://www.islandmarineelectronics.com/Milennia-PRV16-AMFM-Marine-Stereo_p_3817.html
Danimal
Well-Known Member
Looks good BB! You've been putting some hours in that thing but its all good mods/improvements. The new upper tubwork looks way better. Looking forward to the FL crew getting togother and doing some out of state trips. Keep up the good work man, your almost there.. 
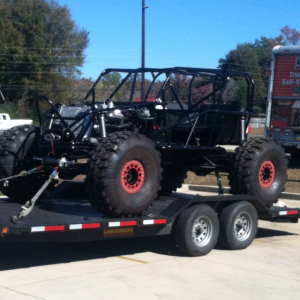
PS- I saw your new rims and tires when I was checking out Eds new Mo-fab, love those 43 sx's
PS- I saw your new rims and tires when I was checking out Eds new Mo-fab, love those 43 sx's
Lil ugly
Well-Known Member
bbounds said:It's a stereo, I got it from the thread on hardline. http://www.islandmarineelectronics.com/Milennia-PRV16-AMFM-Marine-Stereo_p_3817.html
Very nice. I like it. May have to go that route myself.

Technician
Well-Known Member
- Joined
- Jan 11, 2013
- Messages
- 931
Where u at in Florida?