• Help Support Hardline Crawlers :

Blacksheep Q & D redo

blacksheep10

XBJRA champ/ 555 and team Nasty codriver
Joined
May 22, 2007
Messages
10,442
Location
Kansas, where we know how to wheel, nowhere to go
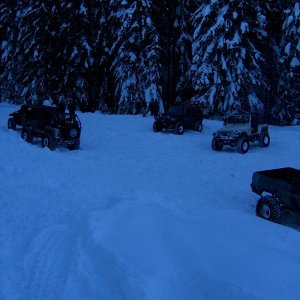
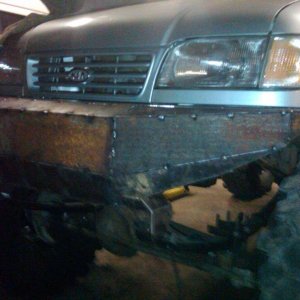
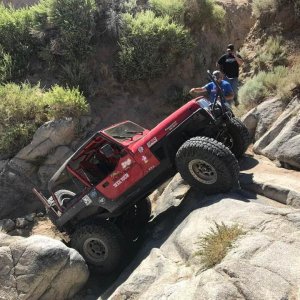
all right, getting Quick and Dirty time. I want to wheel now. I am doing it strong, not pretty. pretty is for customer's rigs and my buggy when I get there. Okay, finished the transfers crossmember tonight. what a bitch, but I'm confident its done right. :spin:
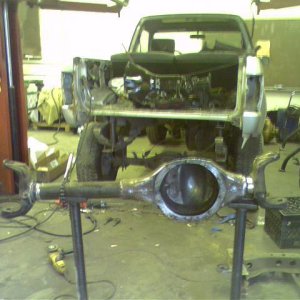
Okay, same basic deal as cabot's, 2 bushings on the right, one on the left.
crossmember1.jpg

so that the transfers didn't try to break apart from each other (aluminum case) I braced the cases to the crossmember in several places.
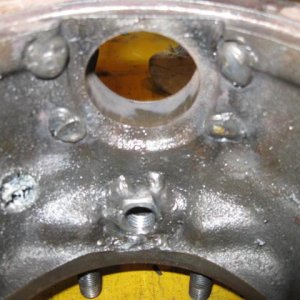
on the back of the front output:
crossmember4.jpg

crossmember3.jpg

also the left side of the 205 at the rear
crossmember5.jpg

and the 231 to 205 plate
crossmember6.jpg

the front tube of the crossmember goes between the 2 cases, or more like under the 231. it has 2 tubes going back to the 205/231 adapter where it bolts into the 205 face bolt holes and 2 tubes going to the 350/231 plate with nuts welded inside them to bolt to.
crossmember7.jpg

then I took a factory support rod that goes from the bellhousing to the side of a 205 and modified it. I bolted it on the top bellhousing bolt hole and welded a 5/8" nut to the 350/231 adapter. I shortened the the strut rod and tightened both bolts. as luck would have it, they pulled tight right next to each other, so together they got welded. like i said, Q&D baby :flipgotcha:
supportrod.jpg
 
the above **** will all get taken out, finish welded (it is all tacked, some better than others) and painted and reinstalled tomorrow night.
steering:
put on my de ram, made new arms, put a bridge/ram guard on the front to bash **** with and the tie rods are .250 wall 1.75". the rod ends at teh cylinder are 3/4x7/8" chromo and the arms are 3/4x3/4 chromo. little overkill, but **** it, what I had.
steering.jpg

steering4.jpg

I connected the bridge to the link bridge at the center point where the links converge so that the ram mount was braced and the link bridge was braced as well. I used 3/4" plate and cut an eye in it to put my winch hook in for front end suck down. the plate is the full piece, the tube is coped around the plate.
steering3.jpg

steering4.jpg

steering2.jpg

here are the new wheels I got done last night
newwheel.jpg

still lots to do, but gaining. hope to do shifters tomorrow night after I weld up the crossmember. that should make it easier to take in and out as needed. I hate killing it, getting out, climbing under, shifting it, getting back in, start in gear, get where I'm stuck, shut off, repeat :spin: :drinkers: :D
 
I really like the way you mounted the DE and used its "stock" mount without cutting and such. Looks real good man !!

theres alot of sheeiot under you doubler, I thought you were going DS drop with the 231, so is it/ it appears to be 231/205 on the pass side ?

Im dumb on all the doubler ****.... :flipoff1:
 
I was going Drivers drop, that is what I bought the doubler kit for. a ford has a circle 6 case. the box 4 rox shaft is not long enough for a fig 8 case....or is it? :D It took 2 new plates and some ingenuity, but I got the chebby case with a 31 spline ford input in it to go. I only had to leave out 1 bolt, and that is taken care of by the rod between the 2 cases above teh crossmember that goes through the other plate I made with a plasma cut hole and slag hanging out of it :D. Q&D baby.
 
You really need to get on meth. You'll have the 'sheep sparkly and winning show and shines overnight. :spin:
 
It will be cool to see the SHeep actually alive and painted... The real question is how long will the alive part last ? :popcorn:
 
P said:
It will be cool to see the SHeep actually alive and painted... The real question is how long will the alive part last ? :popcorn:

42.5 seconds.

It will give up a ghastly death when Kelly does the ritual out of the shop burnout, and then kabbbllllooooeiiiiyyyyyyyyy


I can't help but think of the Red Rocket burnout at Kellys by Miles. It was so long it was funny, then got no funny, then got funny again, then got not funnt WTF is Miles doing, then it was funny again.
 
InDaShop said:
I can't help but think of the Red Rocket burnout at Kellys by Miles. It was so long it was funny, then got no funny, then got funny again, then got not funnt WTF is Miles doing, then it was funny again.
I love that part of the vid. you are staring at it going, "okay, that's enough, he can let off....then you start laughing again, then it wanes, then you see his face looking at the temp gauge and its funny again. So, you replicated anything yet?

tonight, shifters. no, they wont be pained :flipoff1:
 
shifters didn't happen.
I ran out of ****ing wire while welding...gay.
until the wire fiasco, I worked underneath some more. I am tying the lower link crossmembers together underneath the tranny crossmember. this will make tubes that go from from to back and aid in skidding, and also make it so **** is less likely to get caught on the tranny crossmember. I am coming straight off the link mounts, so the pressure will be 100% direct, not spread with a side load. Should have taken pics of that. anyway, I have tabs poked out that weld to each crossmember with 1/2" holes in them to fit these 2" tubes. the tubes here have 1/2" holes in the washers I made and welded in the ends.
thickwashers.jpg

bushingwelded.jpg

these will bolt into the tabs I weld to the crossmembers. then the spreader tubes will weld to the little gems you see above. this way they are unboltable for easy crossmember removal.
the washers you see welded into the little tubes are strap with a 1/2" hole poked in the middle and then 1" poked around it, and then set in the tube. I made my own 1/4" thick washers :D
 
more on teh dirtay dirtay. whacked the completely custom as **** old coil perches off the frame. man, those things were stout. who needs 1/4" wall 5" pipe with 3 kickers to hold a fuggin coil on. apparently I did in '03. then again, this is the guy that put 6" channel as the back of his frame :spin:
rockinoldperches.jpg

here is full stuff from the rear and side (it has never been close to this in real life because of the coil perches)
fullstuff.jpg

fullstuffright.jpg

here is the kicker tube crossmember that I was making with the bushings in my above post. I lost about 2" of breakover from what it could have been without the support, but gained about an inch from what it was with the factory clocking on the 205 and crossmember. I painted it too :flipgotcha:
skidgaurd.jpg

skidgaurd2.jpg

you guys are seriously gonna have me pressured into painting this whole pos before this thread is through. travesty :eek:
here is full droop, all the rear driveline will allow
rearview.jpg
 
Top