• Help Support Hardline Crawlers :

Inner AirLocks

Welderd

Well-Known Member
Joined
Jan 16, 2008
Messages
998
You guys probably know how to install stuff but I gotta pimp my new sponsor and show of a cheaper alternative that's out there now

Inner Airlock Install
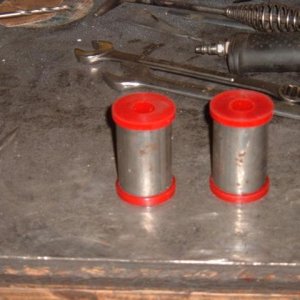
100_0800.jpg


Tube info:
This picture shows a heavy-duty tube (nearest) and a standard tube (farthest)

100_0768.jpg


Heavy-duty on the left and standard on the right
(standard tube has powder on it already)
EDIT: I'm not sure anymore which is which!
100_0769.jpg


Both tubes are the same size and there isn't much visible difference between the two. However you can definitely feel the difference in rubber thickness. Both tubes can be purchased at most atv or motorsports stores as they are a typically motocross inner tube. I found that my local store had the standard tubes in stock for $4.25 each and had to order the heavy-duty ones for $15 each and took 2 days. We will be installing 2 heavy-duty tubes in the front tires and 2 standard tubes in the rear. We also picked up a few spare standard tubes for a demo model and just in case.

The Airlocks come with special valve stems to install in your rims

100_0766.jpg


The cuts in the backside of the valve are to allow air to get from the underside of the tube to inside of the tire. Remember these inner tubes are not inflating your tires they only hold the bead on the rim.

Special note: Replace your valve stems! We used rubber valve stems and scored them with a cut-off wheel -- AFTER installing a complete tire and Airlock only to find the valve stem was cut and leaking.

100_0770.jpg


Rubber o-rings are also supplied with the Airlocks

100_0767.jpg


We've found it best to install one o-ring on the inside of the rim and one on the outside of the rim and then use the 2 nuts supplied with the tube to hold the tube valve stem in place and seal the hole.

Note: We tried to leave one nut on the inside of the rim and the other on the outside like you would on a motorcycle tire, but with an aluminum rim this left the valve stem too short to work with the air chuck.
 
Now its time to start the install!

Determine a suitable location for your second valve stem to go. Try to protect it as far back into the rim as possible but remember you have to clear brake and steering components on both front and rear axles. It is recommended to install them 180 degrees from the original valve stem.

We found a spot between the spokes of our aluminum rims that we think will be protected fairly well and we can still easily get an air chuck on it.

100_0764.jpg


100_0763.jpg


Mark and measure twice!
Center punch and drill your hole.
We used a 5/16" drill bit.
Make sure to de-bur your hole.
Also now is a good time to check your rims for nicks, cuts or rust etc. Remember an inner tube will be riding on this rim and the smoother the surface the less likely you are to have a failure out on the trail. Clean the rims up the best you can.

Install you special valve stems into the original location.
Start mounting your tire – slip one bead over the rim.
Now coat the inside of the casing with the supplied powder.
Next install the Inner Airlock casing into the tire and on the rim

100_0782.jpg


The first half should just be able to slip around the rim by hand with a little coaxing.

Now it's time for the tube
Lube it up with the supplied powder.
Install one o-ring on the valve stem.
We put a dab of silicone on the o-ring to help seal the tube to the rim.

100_0774.jpg


Install the valve stem first – Trust me it's easier to do first, I learned the hard way!
100_0776.jpg


There plenty of room to get to it with only ½ the tire on the rim.
100_0777.jpg


Install another o-ring on the outside, dab of silicone and install one of the nuts. Don't over tighten this nut, your only holding on a tube. Watch the valve stem and try not to let it twist because you'll be twisting up your tube. Now push the rest of the tube in the air lock
 
Now install the second half of the Inner Airlock casing

100_0773.jpg


The flap that you see needs to be positioned at the rims original valve stem location and the center of the to strips of material centered on the special valve stem. Now fold the flap under the inner tube (between rim and tube)

Here you can see we're not quite lined up and we have to shift the Airlock casing to line up.
100_0791.jpg


Now install the second half of the casing.
The second half of the casing bead should also be able to installed by hand with a little more effort than the first. In the picture you see a tire iron being used but it's just for the picture and not much force is being applied to the casing. The casing is strong but you don't want to be ripping on it with a tire iron. It will go on by hand when in the right position. The first one you do might seem hard but once you figure out the positioning and procedure it's a breeze.

100_0785.jpg


Try to fold over the inner lip as shown in the photo to let it slide over the rim easier. Also positioning the opposite side near the middle of the rim where it's smaller allows you more "slack" on the last bit your installing.

Now go around the rim and check that the tube is inside of the casing.
100_0788.jpg


check with your hand that all you feel is rim and casing and no tube. If the tube is exposed tuck it back into the casing. If you can push the tire enough you can see most of the casing so visually check that no tube is exposed.

100_0789.jpg
 
At this point we chose to slightly inflate the tube and recheck everything. Just 1-3psi (didn't even register on our gauge) This will help the tube untwist and form to the rim and casing. We rechecked everything and removed the tube valve core to deflate it.

Now install the final bead of the tire.

100_0795.jpg


Man I wish I had a tire machine!

Now check that there is not material between the bead of the tire and the rim

Like this

100_0792.jpg


That's the backside of the flap – it's between the tire and the rim, simply push the tire down and fold it back inside the tire.

Inflate the inner airlock to 15-18 psi to aid in seating the bead of the tires. If you think you tube is all twisted up inside it is best to do this in 5-7 psi increments and deflate the tube between each step to let it untwist and make sure everything is ok. We did 10 psi, deflate and then 18.

100_0796.jpg


Next inflate your tire till both beads seat; if necessary you can aid this a little with help from the Inner Airlocks. Now inflate the inner airlocks to 25psi and then your tires to whatever pressure you want to run.

Check for leaks and repeat 3-4 more times and your ready to wheel with full beadlocks on inner and outer beads!

100_0798.jpg
 
And here's our display model

100_0799.jpg


Leah painted up the rim to make so it didn't look as bad as it did

You can really see how this thing works and the casing keeps the tube protected, in place and directs the pressure to the beads where it is needed.

This one is aired up to 25 psi and it's ROCK hard!
 
One thing we didn't mention in that is to powder up the tube

I'm thinkin about testing water in the tires too so that would make the powder worthless
 
retail pricing on these

17's - $166 each
16 and 16.5's $149 each
15 - $146 each

that includes the tube and everything you need

so for a set
17's - 664
16 and 16.5's - 596
15 - 584

Catch me at an event and I can do a promotional cash price
shipping will be around $20 or less
 
FYI - that's our retail pricing

contact me to see what kind of promotional deals I can get you
I could definitely get a great group buy setup
 
they'd be fine

why would they build up any extra heat?
I could see if you kept the air real low in the tire but that wouldn't be good anyway

I'm gonna run water in some of mine and I'm kinda interest to have someone try balancing beads or bb's in the tires on the street.
 
we pimped the **** out of em this weekend and got a great response from everyone

102_0810.jpg


but no orders :dunno: - Broke ass SOB's
 
will this work?

My wife started to play with the movie maker and I think it came out great!!

th_Co2cannonfullmovie_0001.jpg
 
and yes there's 2 turret mounts on the toyota now and it's running off the yota air compressor at ~85-95psi

shooting 100+ feet and REALLY high
 
Top