• Help Support Hardline Crawlers :

Never ending Samurai build...

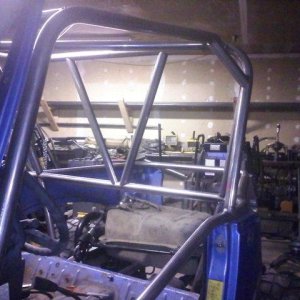
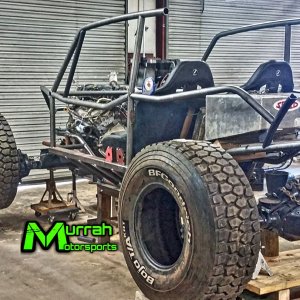
Yall I saw this mochine in action at Harlan last weekend and YES its built light and right :dblthumb:

AND Ryan can drive it as well,,,,heres the pics I got in LIONS DEN....


Lil Zuki mochine went like hell all weekend :dblthumb:
 
Thanks Scott...it was great to finally meet you and hang out a little over the weekend. Just wish you weren't at the front of the pack on the Friday ride so I coulda seen your rig in action a little more.
 
HA!,,,you didn,t miss much hee hee,,,,,naw it was cool finally wheelin with yall as well "this ride was a great idea" and what better place for it than Harlan :dblthumb:
 
Anyone have problems with these push button ignition switches hanging up after being around moisture...rain...washing your rig...or whatever? After this last trip to Harlan and then washing the rig down every time I go to start it up the button sticks...I have to back the rubber boot off and grab the actual button with pliers and pull it out...or disconnect the battery.

This is the switch I used: http://www.delcity.net/store/Heavy!Duty-Push-Button-Switch/p_8065

73475_primary.jpg
 
TBItoy said:
Yes, I've had several of those that didn't work correctly straight out of the box also. I prefer a momentary toggle switch now
After the third push button failed I went to a toggle also. No problems since.
 
TBItoy said:
Yes, I've had several of those that didn't work correctly straight out of the box also. I prefer a momentary toggle switch now

yankster said:
After the third push button failed I went to a toggle also. No problems since.

Yeah I would consider doing that, but I already have the bigger hole in the dash so I'm gonna try to stick with something similar and hope for better. It looks like there are some that are made with composite bodies rather than metal which I would assume would also be better for the conditions it will see in my rig. Thanks for the suggestions though!

rednecklights said:
I found a pretty gangster push button I ordered it and not gonna use it , pm me your address and I'll send it your way

Thanks...I'll definitely give it a shot! PM coming your way...
 
Well finally got some time in the shop today. Got around to installing the new rear brake setup using the 03+ 4runner parts.

IMAG4697_zpsoxmhgdhs.jpg


Then moved on to cutting up an old Pacesetter header i had to salvage the flange for the project ill be working on next week...good things coming...

IMAG4671_zpswfghaeur.jpg
 
MMMMAN...... I'm glad you found a good use for that ole pacesetter header :woot:

This turbo install yer doin has got my attention :dblthumb:
 
Made some more progress today. Clocked the center housing to get the oil drain to the bottom. Then started working on the "collector pipe". I decided to go with 1.75" .120 DOM and threw it in my lathe to reduce the end down to slip into the inlet flange. I will weld this on the inside and grind it smooth...if necessary (depends how bad i booger it up). In any case...all this allowed me to mock the turbo into its position and get the measurements for the oil feed and drain lines which should be here Thursday. Shameless plug for Techna-Fit for any and all braided stainless lines you might ever need!


IMAG4711_zpsy821vl3h.jpg


IMAG4715_zpshl7dyt5q.jpg


The blue fitting at the top of the pic is the oil drain which will go to a fitting in the oil pan. I still need to weld the bung in for that.
IMAG4716_zpsoisj25h8.jpg


IMAG4717_zpsjqsrxpse.jpg


Ill probably pick up some of those kevlar heat shields/socks for the plug wires since theyre so close tot the turbo housing. Ill also be wrapping as much as i can with the DEI wrap.
IMAG4718_zpshekcmsbi.jpg


IMAG4719_zpshv1teukg.jpg


IMAG4721_zps6joeodwh.jpg


Looks like im gonna have to reroute the hard lines under the brake booster to clear the downpipe.
IMAG4712_zpsnzjjhlsu.jpg
 

Latest posts

Top