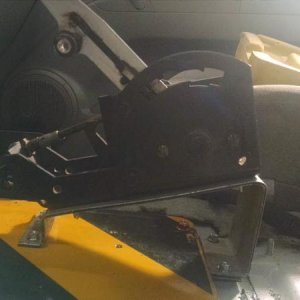
so, with heartbreaking news, I have to sell my winch bumper. I will build another one but this one is too close for the cooling fans and the trans cooler and fan just won't fit right. I going to make a fan shroud for the 2 front fans but its only as large as the fans are. basically enough to hold the fans.
well not much happened this weekend, well at least to the truck. I made some radiator brackets and the start of the heater hose brackets. I need to add some foam strips to them and need to figure a way to hold the radiator down.
ok, so now I'm torn again. I picked up a LS1 intake for cheap and figured I see what the differences were. well, here's the truck intake....
and the LS1 intake...
and the best part is... no need to fab the crossover hoop...
now its decision time... I go with the LS1 intake I need to pick up possible fuel rails, injectors and the fuel filter (not cheap BTW)... oooh and the coolest part... engine covers
so today I worked on the bed for a little. made a filler piece and it looks like I need to align the pathy side better, its off about an 1/8" grr. I then placed the 2 front bed mounts and tacked them on the frame. then went the the back and tacked in the tailgate support and it certainly stiffened up the bedside.
so today I work more on the bed, did some trimming for the spare tank filler neck hose and tacked in a wheel well from my old bed. did some more fitting for the taillight and the tailgate. I think there is a plactic piece that the Pathys have the goes next to the taillight but don't remember. I have about a 1/8" gap top and bottom between the sheet metal but the taillight gap is about a 1/4". More thinking here. I also went to the junkyard looking to stuff and found a 85 Pontaic GTA, hood louvres! sweet and in great shape too. (there's another GTA hood there in great shape too, I'm might pick that one up too)
yep, love the pathy taillight over the truck taillight
now I have to decide how I'm going to place them. these are true working louvres, so engine temps will be cooler for wheeling.
I'm dign this build. As for those vents? The placement of the two littel ones in the third pic :awesomework: The two biggger ones still need a home.( CHEERS).:beer:
so today, went back the j/y and picked up the GTA hood so I can cut out the louver openings. 25 bucks beats the 100-200 on e-bay just for the louvers. lol then stopped by the local chevy dealer to pick up parts I ordered and drool over a SS Camaro, I'd rather have a COPO Camaro though. lol then cut off the driver side taillight assembly and tacked on the pathy 1/4 panel, looks like a unibody lol
I'm going to need some trimming on the pass. side cover because of the high mount AC, but I was completely surprised that the fit under the crossover tube.
so today I think a lot got accomplished. more little stuff, but a lot of little stuff. 1st, reverified the thermostat housing to the lower radiator.
the upper and lower hose pipes will be cut and have 90* pipes installed. the veiw looking down, you can see how the upper hose will be with a 90* in the hose going to the water pump, the side view you can see the hose will have about a 30* bend to the lower hose pipe.
I made a cutout for the heater hoses to go by the AC compressor.
I also removed the strip on the pass side to weld up the front inner bed side
my friend evened the gap on the driver side bed side for a clean fit, then installed it. I prepped the tailgate bracket so I can possibly get that done tomorrow and still need to fit the front of the bed side but its on.
so today I worked more on the bed. got the dr. side taillight assembly welded in. tailgate is now going to be right around 50", inside opening is 48-1/4" and outside opening is 50-1/4". tailgate is currently 54-1/4" so 4" must go bye bye. I tacked the inside front of the bed, the wheel well opening is also tacked in. I had to trim some piece on the tailgate support so the lights fit in perfect. I will add the metal back in but it will be straight instead of bending in towards the taillight assembly. I also cutout the louver openings on the GTA hood, then put tape lines where I am thinking of cutting out for the rear bumper.