• Help Support Hardline Crawlers :

yota brakes

allrigt i got brakes but not till the bottom of the pedal i removed the box thing and ran a strait line and ive also put the box back in to see if that makes a difference and i got the same results so my question is whats the cheapest master upgrade ive heard somthing about chevy masters in toyotas but i couldt find any thing about it anywere so whats you guys opinions? o yeah and i allready put a new staock master on it
:mad::mad::mad:

I think Chop shop is right to say not to give up on the Toy stuff, but if you do, I like my hydroboost. There about 30 bucks at a junkyard. They came out of an Astro van. I think a 1994. Harold Shamblin @ Custom 4x4 and Transmission has a lot of experience with these, and Freds Mobile A/C, in Ravensdale can make all of the hydrolic lines for you, and even to the complete job if you want.
 
ive replaced the master and rear brakes, rear brakes are adjusted tight, can not find any fluid leaks, absolutely no pedal,thanks for input, i will find the problem eventually
 
If you don't have brakes till you are on the floor I'd venture to say your master is too small to push the proper amount of fluid to the rear right now. Adjust the shoes up snug and back them off 2 clicks and see if the pedal improves.
 
Buy an adapter at local 4x shop and put chevy 1 ton master , itll fix it all and eventually u can run rear discs


Going to a 1 1/4" master from the stock 13/16" on the stock little booster with the stock small piston calipers and small bore wheel cylinders will go the exact opposite direction... The brakes are on the floor now, do that and they'll be right on top and the pedal will be too stiff to push. :;
 
i was thinkin a master out of a 94 or newer 4 runer


Look in about 92+ pickups and runners, if you find an aluminum master it will be a 1" bore. That is what you want. :D I'd say to grab the booster too but I don't thing it'll clear the clutch master on a first gen... :booo:
 
either cut off the arm or

do it the right way.

I have removed over 30 of these things over the years. Its easy.

It diverts the extra pressure to the front right tire.

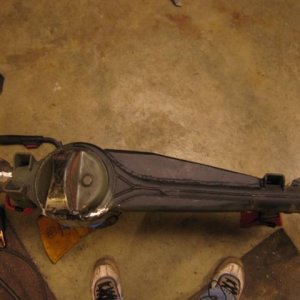
The valve has three lines on it. One is pressure, another is output to the rear hose/tee, the last is a return line going to the front right corner.

If you remove the valve you need to unhook the two lines going back up front (pressure and return). Now go up front and find the right front brake hose, follow it up to the framerail and it will go to a tee under the fenderwell on the framerail. There is only two fitting on the frame right there, a elbow and a tee, the tee is the one you want.

Once you have found the tee, leave the line going down to the hose, leave the line going up to the master, UNHOOK the line going to the rear of the truck. Go to the parts store and get a plug to plug the hole in the tee or replace it with an elbow from a parts truck.

Now take the loose line up front and blow thru it with your mouth or compressor until it spews out fluid and air from one of the loose rear lines. Whatever line is blowing in the rear is marked and bent out of the way. Dont kink it as it can be used as a spare rear line if you ever need one on the trail.

Now hook your rear brake hose to the remaining line that was NOT blown out.

Now the valve is completely eliminated and you have an extra rear hardline already installed from front to rear if needed.

Toyota rear brakes still suck and will not overpower the front.

Thanks Chop!

Also note, that when the rod is removed the valve will not flow fluid. It has nothing to do with clogged lines or anything else. It just has a fail-safe and will not flow fluid.
 
thanks for the bump.. i think this explanes my r.f allways trying to lock up .

any one try tieing the rear presure line into the rear line useing a residual presure valve? i think i have one laying around, and figure it shuld make the rears work sweet.
 
Last edited:

Latest posts

Top