• Help Support Hardline Crawlers :

Better late then never Ftoy 2008 rebuild

Had to work late on a paying job today, so didn't get much done tonight.

Measured up and ordered up a new tierod and draglink, ripped off the old hyrdo assist.

Fabricated up a diff mount for my new hydro assist, I'm upgrading to a 2" bore ram to get a little more grunt.

I still need to drill and plate the holes for the cylinder, but it looks like it all should line up nicely.
 

Attachments

  • hydroassitbracket.jpg
    hydroassitbracket.jpg
    55.6 KB · Views: 230
  • hydroassitbracket2.jpg
    hydroassitbracket2.jpg
    56.3 KB · Views: 232
  • hydroassitbracket3.jpg
    hydroassitbracket3.jpg
    60.4 KB · Views: 235
  • hydroassistondiff.jpg
    hydroassistondiff.jpg
    54.2 KB · Views: 232
  • hydroassistondiff2.jpg
    hydroassistondiff2.jpg
    55.6 KB · Views: 230
Not to much to show, had to work on the tow rig on Sunday.

I made new u-bolt plates, picked up new u-bolts. Got the old panels stripped off, took out the seats so I could figure out the new floor situation and the new t-case mounts. I also started prepping to shorten the wheelbase 5-6" in the back and making parts to get things ready for rear Diamond housing.

Started on perches similar to the fronts, and started on my traction bar. Still need to make the diff mounting plates. This is a revised version of my old one. I have my gas tank mounted really low, so I need to keep my traction bar as low as possible on the diff.

I still want decent vertical separation so I made the bushing mount 8" apart but on a horizontal plane instead of vertical. My old setup worked great for a year and half and then decided to snap off right where I was going to gusset once I got just one test run in... I think this one should last a little while.
 

Attachments

  • tractionbar2.jpg
    tractionbar2.jpg
    58.8 KB · Views: 203
  • tractionbar3.jpg
    tractionbar3.jpg
    58.3 KB · Views: 206
  • tractionbar4.jpg
    tractionbar4.jpg
    59 KB · Views: 203
  • tractionbar5.jpg
    tractionbar5.jpg
    56.3 KB · Views: 200
Hopefully we won't be pushing it through the courses.

Rear diff should be installed in the rig tomorrow. Got the alarm set for 8:00am and all I'm doing tomorrow is my own stuff. My customers can wait. :awesomework:
 
Made some rear spring brackets. They aren't done yet, still need to cut off the corners etc and make them a bit prettier. Not to fancy, I used a set of Trail gear spring brackets I got from BCC, to try and save some time. They are buried under the rig so need to go overboard on fanciness.

Made the diff mounts for the traction bar, need to cut the brackets in half to get them on and then I'm going to add a bit more material to beef them up a bit more.

Spent a lot of time stripping off stuff. Ripped out the rear diff and springs. Pulled out wiring, and started working on motor/drivetrain placement.

Got a plan should be a good day tomorrow.
 

Attachments

  • springbracket.jpg
    springbracket.jpg
    59.3 KB · Views: 174
  • springbracket2.jpg
    springbracket2.jpg
    58.4 KB · Views: 186
  • tractionbarbrackets.jpg
    tractionbarbrackets.jpg
    58.9 KB · Views: 175
  • empty.jpg
    empty.jpg
    61 KB · Views: 179
Don't feel like I got much done today, had to work a bit this morning/afternoon. Cut out my old rear floor section and all the cross members. Had a fun time removing the old leaf mounts, its a real pain in the ass removing something you welded on so it'd never come off

Ended up having to remove some of the old fish plating I did for the old mounts so I could get the new mounts to sit flat. Found a soft spot in the frame which I had to fix up. I'm probably still going to add a few gussets to the mounts. They seem solid enough but I just want to make sure.

Made a big mess of my shop. Tomorrow is going to have to start with a clean up.
 

Attachments

  • springmount1.jpg
    springmount1.jpg
    58.1 KB · Views: 163
  • springmount2.jpg
    springmount2.jpg
    58.2 KB · Views: 164
  • crap pile.jpg
    crap pile.jpg
    54.3 KB · Views: 159
Kick ass dude!!! I'm looking forward to seeing you and Money rocking the circuit this year!!!!! Good luck keep it Up!!!!
 
Rear of the rig is actually sitting back down on its own weight. Still a bit of bracing, gussets and welding to do.

Got the old rad ripped out and made plans for the motor, winch and the new rad setup.
 

Attachments

  • diffmockedup1.jpg
    diffmockedup1.jpg
    55.4 KB · Views: 229
  • diffmockedup2.jpg
    diffmockedup2.jpg
    54.8 KB · Views: 232
  • rearshacklemount3.jpg
    rearshacklemount3.jpg
    53.9 KB · Views: 216
  • rearshacklemount2.jpg
    rearshacklemount2.jpg
    54.6 KB · Views: 221
  • tractionbarmock.jpg
    tractionbarmock.jpg
    53.1 KB · Views: 218
I was making good progress the last few days. I got the old floor all cut out, re and re'd my tcases, built a fresh crawlbox, and cut off the old motor mounts repositioned. Ran into a snag when I went to put my new dual case adapter on I bought it from Marlin before Christmas, and had just opened the box when it got here and saw that it had all the usual parts in the box, and threw it on the shelf. I ordered a new clocked adapter but found a standard one in the box. Some miscommunication I guess. They are exchanging it but, can't wait all those days to get the new one. So I called up Big Country Customs and they hooked me up luckily they had one coming in so I should have a Clocked adapter to use tomorrow.

Thanks to "NoBrainR" in the pirate4x4 toy forum I got some pictures and dimensions I needed so I could mock up my tranny/bellypan and get my motor tacked into position.

Slowly getting there. :beer:
 
Got my t cases in so I could start building the new flatbelly. I am making the new belly pan bracing permanent, and making sure the tcases and stuff can all be accessed from the top. I had to pull the old belly pan on the trail last year and it was a pain in the ass. Got my new radiator from summit racing, BCC hooked me up with some new custom length hi steer links. So I messed around with the hydro assist setup and turning degree's. Got a bit of work to do to get max steering.

I also cut off all my old front end stuff to make room for the new winch and rad setup. Moved the motor back the full 8" allowed and dropped it the max 1" allowed by the ftoy rules.

I modified a FROR tcase mount and did something similar to the one in their f toy. I made extra sure that I had enough room to pull the case off the transmission. Last time I had just enough room and it was a real pain.
 

Attachments

  • image001.jpg
    image001.jpg
    70.3 KB · Views: 173
  • image002.jpg
    image002.jpg
    66.1 KB · Views: 177
  • image005.jpg
    image005.jpg
    68 KB · Views: 187
  • image006.jpg
    image006.jpg
    61 KB · Views: 182
  • image010.jpg
    image010.jpg
    63.9 KB · Views: 172
I hole sawed the crossmember so I could slip a piece of 3.5"tube in and weld it up. Now I can run my exhaust through the crossmember instead of over it. Floor is 1"x2" x.125 wall and will be getting more gussets and bracing. I'm still extending it farther forward and back aswell.

Planing on skinning the bellypan with aluminum and UMHW.
 

Attachments

  • image012.jpg
    image012.jpg
    62.4 KB · Views: 171
  • image014.jpg
    image014.jpg
    63.7 KB · Views: 186
  • image015.jpg
    image015.jpg
    67.7 KB · Views: 184
Got some more done. lots of head scratching, maxing out steering, fitting the high steer, hydro assist and the winch line to compress the front suspension (needs to be a straight down pull with leafs )
 

Attachments

  • weekendwork001.jpg
    weekendwork001.jpg
    59.4 KB · Views: 137
  • weekendwork002.jpg
    weekendwork002.jpg
    58.9 KB · Views: 137
  • weekendwork003.jpg
    weekendwork003.jpg
    59.3 KB · Views: 137
  • weekendwork004.jpg
    weekendwork004.jpg
    60.6 KB · Views: 145
  • weekendwork005.jpg
    weekendwork005.jpg
    60.3 KB · Views: 137
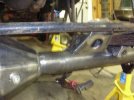
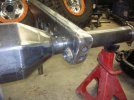
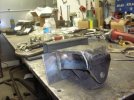
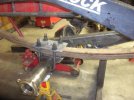
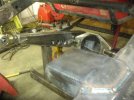
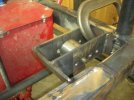
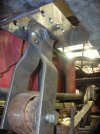
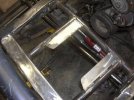
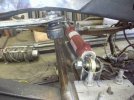
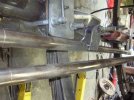
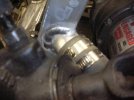
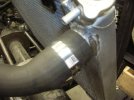
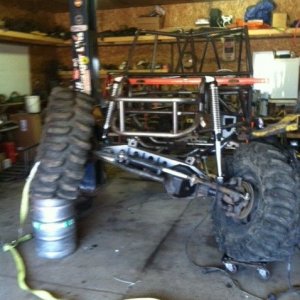
So one of the things that held me up. I bought a summit racing generic small aluminum rad, I needed to change the radiator tubes, because they were in the opposite corners of where I needed them, plus I need to clear the winch and steering box. I cut the tube and drilled/dremel'd the rad for the new tubes.

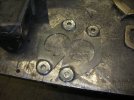
I'm not setup for tig welding at my shop, so I went to a friends shop who tig welds all the time. He had just sold his old tig setup and bought a new Miller inverter style welder, no biggee he's been tig welding aluminum for years. He put on a brand new bottle of Argon on, and we get to it. Well the damn thing wouldn't weld, and when it did it was dirty as hell. We mess around and grind out, and re clean the tubes and radiator. Try again, still nasty and not taking. He doesn't know why its not working, so we call up a friend who's welding instructor at BCIT. He calls me when he's from work and I head on over. He had run out of Argon and brought home a new bottle. So we get setup, reclean and grind out the crap welds. Damn thing welds a bit better but still dirty and porous. So he's pissed off. We try a bunch of other scraps of aluminum and they are better but still not right. He thinks its the gas. Sure enough my other friend and him both buy gas from the same supplier. He wants to make sure thats what it is, and I need to get it welded so we head off to BCIT, Its after 10:00pm now and all the students have gone home so we got the shop to ourselves. Regrind out the old welds, clean it all up and sure enough welds right up. I get back home around 12:30 am. Pretty much took my whole afternoon and night. At least they are welded now.
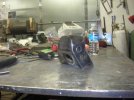
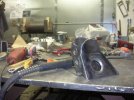
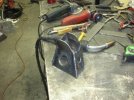
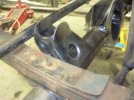
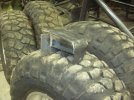
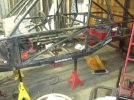
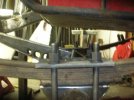
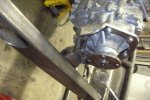
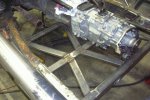
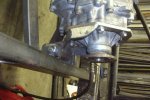
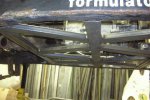
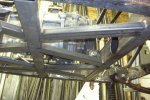
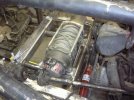
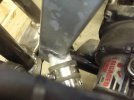
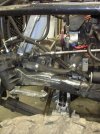
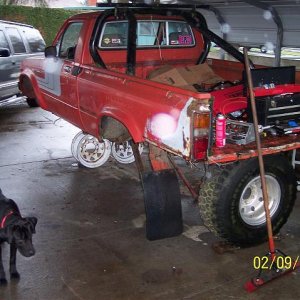
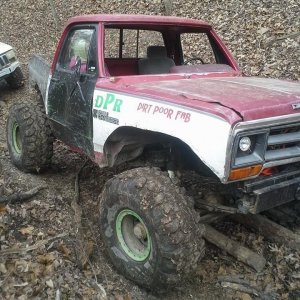
Its a tight fit.
 

Attachments

  • radweld.jpg
    radweld.jpg
    57.8 KB · Views: 113
  • radweld2.jpg
    radweld2.jpg
    49.7 KB · Views: 111
  • radweld3.jpg
    radweld3.jpg
    62 KB · Views: 109
  • radwinchstuff.jpg
    radwinchstuff.jpg
    60.8 KB · Views: 116
  • radwinchstuff2.jpg
    radwinchstuff2.jpg
    67.4 KB · Views: 114
I've started taking some stuff back off so I can finish it up right. But heres a sneak preview of the new front end. ToyotaDon from www.Crawlinbc.com narrowed up the grill for me, still need to smooth it out and repaint it but it looks pretty good as is.

Start of a small tube "bumper" to fill in the gap and to give some tube for the winch rope to ride on.

I'm currently working on getting an EFI setup installed and making some new shockmounts since I have a bit of time before Cedarcity, Goal is to get at least a few wheeling days in before then.
 

Attachments

  • frontend.jpg
    frontend.jpg
    69.5 KB · Views: 114
  • frontend2.jpg
    frontend2.jpg
    71.4 KB · Views: 119
Top