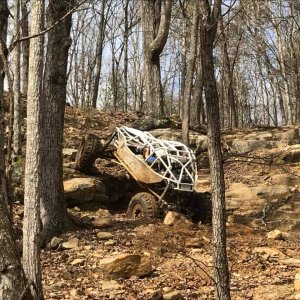
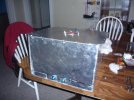
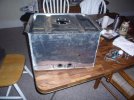
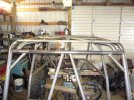
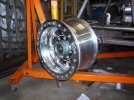
• Help Support Hardline Crawlers :

So i bought a 51 Whilly

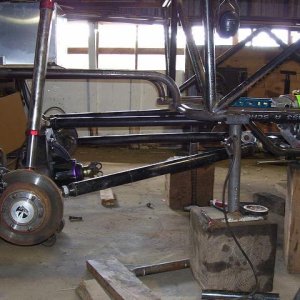
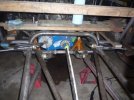
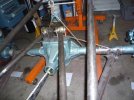
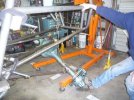
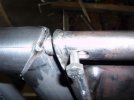
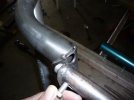
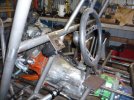
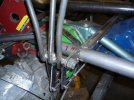
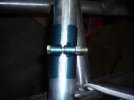
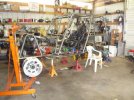
Sam ifn ya want im gonna have James over to help me bend another piece for the front end, and will be just fitting spreaders and such. feel free to drop by.

Saturday the 10th.

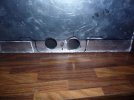
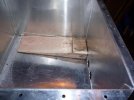
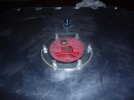
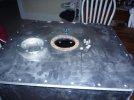
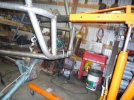
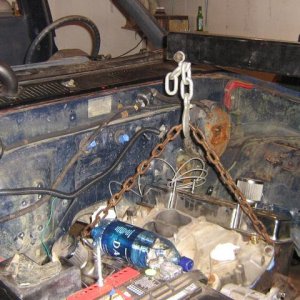
my computer is broken at home so i cant upload pictures of recent progress.

Anyone selling a laptop?

I dont think ive got anything going on this saterday, i will defiantantly stop by and lend and hand and check out the progress on it:awesomework:
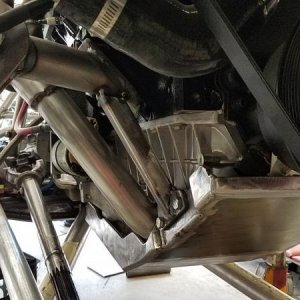
 :cool:
 
well its been a while but i have been making steady progress. even though its slow it moving forward.

first off some shots of my fuel cell can.
 

Attachments

  • fuel cell can1.jpg
    fuel cell can1.jpg
    35.2 KB · Views: 334
  • fuel cell can2.jpg
    fuel cell can2.jpg
    29.9 KB · Views: 332
  • fuel cell can3.jpg
    fuel cell can3.jpg
    29.9 KB · Views: 346
  • fuel cell can4.jpg
    fuel cell can4.jpg
    43.2 KB · Views: 343
the guy made the bottom flat instaed of shaped for the dropped pickups. i was gonna cut it and reshape but i decided to take the redneck way out. i cut a couple of wood wedges to support the weight of the fuel on the larger flat areas of the cell.:redneck:
 

Attachments

  • fuel cell can5.jpg
    fuel cell can5.jpg
    38.7 KB · Views: 335
  • fuel cell can6.jpg
    fuel cell can6.jpg
    32.7 KB · Views: 328
  • fuel cell fitup filler1.jpg
    fuel cell fitup filler1.jpg
    27.3 KB · Views: 337
  • fuel cell fitup filler.jpg
    fuel cell fitup filler.jpg
    38.4 KB · Views: 334
  • fuel cell fitup pickups.jpg
    fuel cell fitup pickups.jpg
    43 KB · Views: 332
last fuel cell picture, i still need to weld some tabs for the mount oncew i get it set in place.
 

Attachments

  • fuel cell fitup.jpg
    fuel cell fitup.jpg
    47.1 KB · Views: 341
rear link brackets and flex shots

i tacked the rear brackets in place and flexed it out some to check for binding...:awesomework:
 

Attachments

  • rear frame mounts.jpg
    rear frame mounts.jpg
    46.4 KB · Views: 328
  • Rear link mounts.jpg
    Rear link mounts.jpg
    46.8 KB · Views: 333
  • rear flex ps.jpg
    rear flex ps.jpg
    53.8 KB · Views: 334
  • rear flex ds.jpg
    rear flex ds.jpg
    52.3 KB · Views: 332
so on the rear pinon i get about a 1/2 inch swing from side to side and about 1 inch of driveshaft slip from full stuff to full droop. the pinon points pretty much directly at the output yoke on the transfer case during all movement.:cool:

my parts are starting to show up at S and N:cool::cheer:
 
That looks sweet. Did you put those rims and tires on the back for clearance? Where does the high side tire end up?
 
On a different note, I just got my new dash camcorder in. A little creative mounting and we should have something for our adventures down at KOH. Can't wait! :D
 
naw i been waiting for MY rims and tires to show up. the beadlocks are done but the rock rings had some flaws so trailready would not send them out the door...

the tires are a big unknown. my tires are probably on a trailer headed for johnson valley and after the race i might be able to get them.

my coil overs are here kinda waiting on the rims for the trip up to pick them up.

been working on the front of the engine also. mounted the new hyd steering pump in the stock location.

really need to pin down the front end and get the thing rollable. but im not touching it till after the KOH. i gots to get the jeep ready for that.
 
Your upper control arm mounts on the rear axle...are they only attached to the cast center section?


yes and no, there is a section of steel welded to the nodular iron of the center section with nickel rod and was preheated to 600 deg and cooled slowly. then the brackets are tacked to the mild steel.

this way i can make mistakes and redo without going thru all the effort to preheat the nodular iron. that whole process was covered here a while back.
 
so what kinda pinon movement is acceptable?

will i have issues with the side to side movement of 1/2" total?

im not thinking the 1" travel in and out of the driveshaft will be an issue.
 
Damn i really need to get up to yer place and give ya a hand:mad:

Been to dang busy lately, maybe when yer back from KOH we can hammer some stuff out:awesomework:
 
well sine the KOH has come and gone time to get back to it.

latest progress:

made 4 holders for my remote resevoirs out of some exhaust piping.
made three shifters for the transfer cases.
ordered a bunch of small rod ends for the linkage.
mounted the front seats.
finished the latch mechanisms for my tailgate.

pictures soon

been looking for a good deal on an ARB for the front, i need a RD35.

so far Randy's has the best price at $785

I really want to get all the stuff for inside the front end done.

looking for some standard rotation 5:38 gears also.
 
Today i plan on getting a new battery for my camera, i got a new computer at home so i can now post progress pictures.

Thanks James for helping me on sunday. We bent three spreaders and i fit them about 99%.

Got a sweet deal on some harnesses for a dollar each.:awesomework: Thanks Terry.

Finished off my triple stick shifter. i need to make the detent stronger for the range box. Im thinking that thing shifts too easy, might flop outa gear at the wrong time.

One of my radflo coilovers does not bottom out like the other three. It stops about an inch from the bottom and i cannot make it go any farther.


Hopefully pictures later this evening.
S&N are aware and are working with radflo to figure out the issue.
 
Nice meeting ya on Saturday. Best of luck with the build. Glad the harnesses will work out for you.

Terry
 
progress with pix

catching up. first the tailgate i spent way too much time on, works good.
 

Attachments

  • P1000253.jpg
    P1000253.jpg
    33.1 KB · Views: 318
  • P1000254.jpg
    P1000254.jpg
    30 KB · Views: 333
top spreaders
orbit valve bracket
 

Attachments

  • P1000252.jpg
    P1000252.jpg
    56.4 KB · Views: 319
  • P1000255.jpg
    P1000255.jpg
    57.9 KB · Views: 417
Triple stick shifter.
Made some cans to hold the shock reservours (sp?)
Will have a tab from the cage, made from some muffler pipe and some tubing.

A set of 3 1/2" BS 17X8 TR beadlocks:D:masturbanana[1]:
 

Attachments

  • P1000256.jpg
    P1000256.jpg
    49.7 KB · Views: 317
  • P1000257.jpg
    P1000257.jpg
    26.8 KB · Views: 319
  • P1000258.jpg
    P1000258.jpg
    50.5 KB · Views: 312
When mounting a vice do not let it fall off the bench right onto, "the very middle" of your 220V, heavy duty, extention cord:looser:

Stuck the seats in for a picture, they are covered to keep the dirt off.
 

Attachments

  • P1000259.jpg
    P1000259.jpg
    33.9 KB · Views: 311
  • P1000260.jpg
    P1000260.jpg
    58.8 KB · Views: 312
Top