-
Help Support Hardline Crawlers :
You are using an out of date browser. It may not display this or other websites correctly.
You should upgrade or use an alternative browser.
You should upgrade or use an alternative browser.
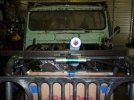
So i bought a 51 Whilly
- Thread starter Hip
- Start date
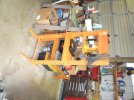
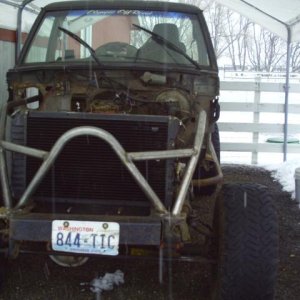
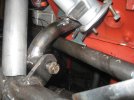
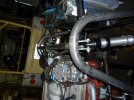
Started working on the front axel mounts this weekend and the damn camera broke. has that same lens error it had at KOH.
it has a one year warranty im sending it back.
i made all the tabs to mount the shocks lower mounts.
I hired another care provider so i can now work on it on sundays also.:awesomework:
Decided i need to raise the front of the motor an inch:eeek:
it has a one year warranty im sending it back.
i made all the tabs to mount the shocks lower mounts.
I hired another care provider so i can now work on it on sundays also.:awesomework:
Decided i need to raise the front of the motor an inch:eeek:
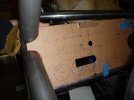
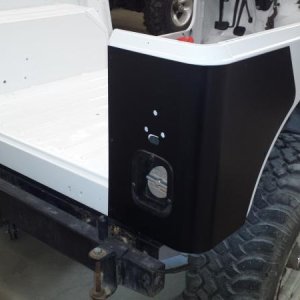
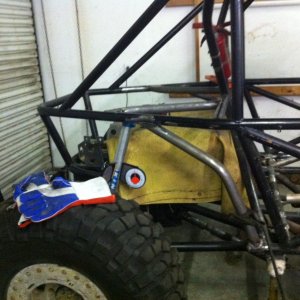
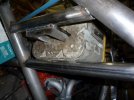
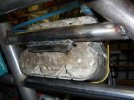
catching up. first the tailgate i spent way too much time on, works good.
looks good. did you put a spring inside the tube to keep the latch in the closed position ?
yes, i actually added a thicker wall DOM inside the loop made on the original sheetmetal tube.
i bored out the ends of the DOM tube so things would slide easier. i made the first one using the sheetmetal tube and it didnt work smooth at all so i overkilled it.
the latch is made of aluminium so it does not wear out the chassis tube.
spring was from a bag of springs at home depot........
i still want some cables so it will sit flat when lowered.:awesomework:
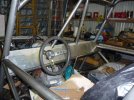
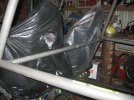
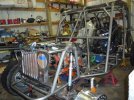
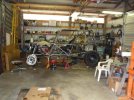
made a bunch more forward progress. remounted the seats and incorporated the rear seat bar into the upper link mounts for the rear.
moved the A pillar frame around the engine forward a few more inches so i have better feet room and incorporating it into the front upper link mount.
Added a bar behind the seats for attachment of harness's.
Dialed in the dimensions for the front end and rear end to be perfectly square to each other.
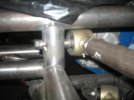
this weekend ill figure out the double shear mounts for the upper links.
i really need my tires to show up as im real close to having the weight on it so i can start messing with the springs.:awesomework:
havent heard a word about my camera i sent in for repairs....
moved the A pillar frame around the engine forward a few more inches so i have better feet room and incorporating it into the front upper link mount.
Added a bar behind the seats for attachment of harness's.
Dialed in the dimensions for the front end and rear end to be perfectly square to each other.
this weekend ill figure out the double shear mounts for the upper links.
i really need my tires to show up as im real close to having the weight on it so i can start messing with the springs.:awesomework:
havent heard a word about my camera i sent in for repairs....
Attachments
Last edited:
dove'd85
Well-Known Member
right on hip,
whats the word on the tires? and did you get your coil over issue resolved?
whats the word on the tires? and did you get your coil over issue resolved?
right on hip,
whats the word on the tires? and did you get your coil over issue resolved?
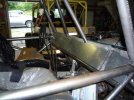
havent heard anything about tires yet, the coilovers issue is resolved. it appeared they put in a few too many ounces of oil. jason took the fitting off and we compressed the one all the way and put the fitting back on. compresses fully now.
S&N loaned me some coils that we think will be about the right rates. as soon as i have the coilovers mounted i will be able to weigh each corner and actually get the spring rate i need with out having to buy/trade more than one set.


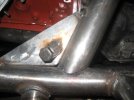
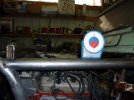
looking like something already.
i want to engrave a logo and all the original whilly info on a valance plate which will also hold the top of the grill and the radiator all in place. kinda like an oem plate only mine. ohh i got my camera back all fixed.
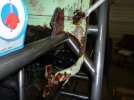
ohh and all the ugly tacks are mine but everything will be welded after all the pieces are together. im hoping to test drive my buddys car roteserie (sp?) when he finishes making it.:awesomework:
i want to engrave a logo and all the original whilly info on a valance plate which will also hold the top of the grill and the radiator all in place. kinda like an oem plate only mine. ohh i got my camera back all fixed.
ohh and all the ugly tacks are mine but everything will be welded after all the pieces are together. im hoping to test drive my buddys car roteserie (sp?) when he finishes making it.:awesomework:
Attachments
Last edited:
crapyota
Well-Known Member
:awesomework: looking good hip!
Pony-boy
Well-Known Member
Great looking so far Hip.
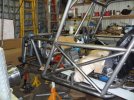
Spent a few hours making some more of the front end.
Set tne windshield frame in place. im gonna make an entire new one with a much bigger windshield but all the latches and attachments should resemble the willys style.
Set tne windshield frame in place. im gonna make an entire new one with a much bigger windshield but all the latches and attachments should resemble the willys style.
Attachments


Bought a new tool, and three new disposable grinders.
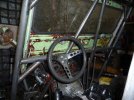
Template with some gauges drawn in.
My plan is to have the dash where the orbit valve and pressure gauges are to be, sealed from the passenger comp. so if i ever have a leak i dont spray my legs with hot oil. The rest of the dash will be for electric crap and the marine CD player.
Template with some gauges drawn in.
My plan is to have the dash where the orbit valve and pressure gauges are to be, sealed from the passenger comp. so if i ever have a leak i dont spray my legs with hot oil. The rest of the dash will be for electric crap and the marine CD player.