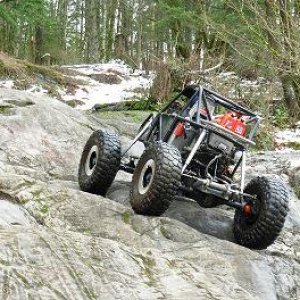
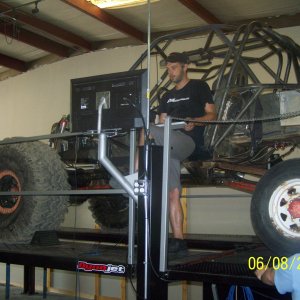
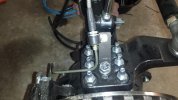
• Help Support Hardline Crawlers :

Yum... Tacos

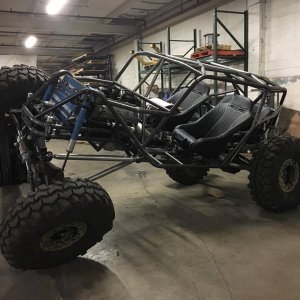
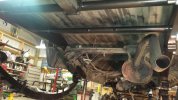
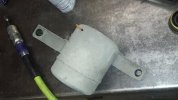
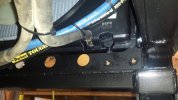
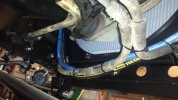
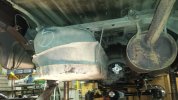
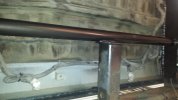
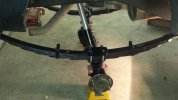
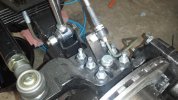
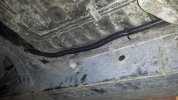
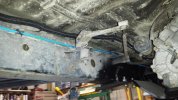
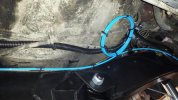
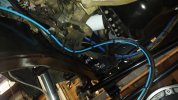
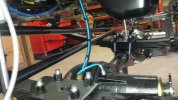
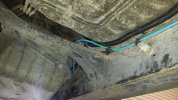
So I got the crossmember for the shocks and brake line routing/tab done and everything painted.

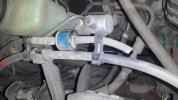
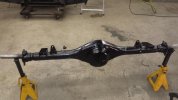
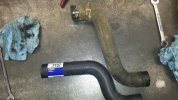
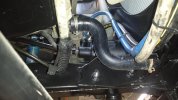
I had planned on having the rear almost done today but it ends up they sent us a v6 instead of the taco v6.
 

Attachments

  • tmp_4977-20161029_1837591224736732.jpg
    tmp_4977-20161029_1837591224736732.jpg
    40.6 KB · Views: 223
  • tmp_4977-20161029_183818238945372.jpg
    tmp_4977-20161029_183818238945372.jpg
    61.4 KB · Views: 215
So the vacuum canister was located on drivers side front inner fender well. A portion of the mounting was removed for the steering box. So I looked over how the system was and its there for a vacuum supply for the front diff. Since thats all gone now it can be removed. To seal the vacuum system I just turned the one way check valve around...
 

Attachments

  • tmp_3325-20161101_204639-765730835.jpg
    tmp_3325-20161101_204639-765730835.jpg
    47.9 KB · Views: 161
  • tmp_3325-20161101_204648-1933788727.jpg
    tmp_3325-20161101_204648-1933788727.jpg
    45.5 KB · Views: 160
Got the new firewall seal (TG) and its the right one. You can see the new one is much larger and fits the new firewall plate.
 

Attachments

  • tmp_3325-20161101_183234-765744183.jpg
    tmp_3325-20161101_183234-765744183.jpg
    47.9 KB · Views: 173
  • tmp_3325-20161101_183240673732100.jpg
    tmp_3325-20161101_183240673732100.jpg
    62.8 KB · Views: 160
Firewall plate and steering shaft all in now. The joint at the base of the steering column has no splines but a set screw. I flattened a spot on the shaft to lock the joint and then welded the joint to the column. The rest of the shaft I drilled shallow holes for the double set screws to bite into and then locked the screw with a nut. Should hold up nicely...
 

Attachments

  • tmp_3325-20161101_2038231546650922.jpg
    tmp_3325-20161101_2038231546650922.jpg
    62.1 KB · Views: 158
  • tmp_3325-20161101_203836-827985481.jpg
    tmp_3325-20161101_203836-827985481.jpg
    47.7 KB · Views: 154
We got the new fan shroud. I found it was actually an inch long but very workable. I just had to notch the very bottom and would have been less had it been a manual tranny. I actually found it was wrong after cutting one of the ears off so I figured I would just make it work--and it will :awesomework:
 

Attachments

  • tmp_3325-20161101_2051081743323356.jpg
    tmp_3325-20161101_2051081743323356.jpg
    47.5 KB · Views: 163
  • tmp_3325-20161101_205127-442399217.jpg
    tmp_3325-20161101_205127-442399217.jpg
    53.1 KB · Views: 165
With everything else in place it was time to do the fluid lines from the pump to the steering box. That was simple and straight forward.
 

Attachments

  • tmp_3325-20161101_2038552127739690.jpg
    tmp_3325-20161101_2038552127739690.jpg
    49.7 KB · Views: 158
  • tmp_3325-20161101_203914-560514545.jpg
    tmp_3325-20161101_203914-560514545.jpg
    43.1 KB · Views: 157
  • tmp_3325-20161101_203906-1360846854.jpg
    tmp_3325-20161101_203906-1360846854.jpg
    44.3 KB · Views: 154
Got the fuel tank and rear wiring harness/tail lamps all back in.
 

Attachments

  • tmp_12408-20161102_193043-765730835.jpg
    tmp_12408-20161102_193043-765730835.jpg
    52.9 KB · Views: 153
  • tmp_12408-20161102_193050-1933788727.jpg
    tmp_12408-20161102_193050-1933788727.jpg
    39.4 KB · Views: 147
Rear housing painted. Just waiting for the correct 3rd to get it assembled
 

Attachments

  • tmp_12408-20161102_193103673732100.jpg
    tmp_12408-20161102_193103673732100.jpg
    43.8 KB · Views: 150
Firewall plate and steering shaft all in now. The joint at the base of the steering column has no splines but a set screw. I flattened a spot on the shaft to lock the joint and then welded the joint to the column. The rest of the shaft I drilled shallow holes for the double set screws to bite into and then locked the screw with a nut. Should hold up nicely...

Very clean! :D
 
I was hoping to have the 3rd member in before but I needed to get the rear in and the truck lowered so I can get the arb stuff setup.
 

Attachments

  • tmp_25562-20161103_203937-765730835.jpg
    tmp_25562-20161103_203937-765730835.jpg
    43.2 KB · Views: 175
  • tmp_25562-20161103_203951-1933788727.jpg
    tmp_25562-20161103_203951-1933788727.jpg
    58.5 KB · Views: 178
  • tmp_25562-20161103_204012-765744183.jpg
    tmp_25562-20161103_204012-765744183.jpg
    48.7 KB · Views: 183
I got the tabs made for the brake lines at the knuckle. I simply used the knuckle removal hole--worked like a champ.
 

Attachments

  • tmp_5178-20161105_200354-839039390.jpg
    tmp_5178-20161105_200354-839039390.jpg
    42 KB · Views: 145
  • tmp_5178-20161105_2003451095453135.jpg
    tmp_5178-20161105_2003451095453135.jpg
    51 KB · Views: 140
  • tmp_5178-20161105_2004041329980708.jpg
    tmp_5178-20161105_2004041329980708.jpg
    62.7 KB · Views: 150
So the stock lower radiator hose would no longer work due to the different neck location. I gave Jason some homework to find the right hose and he nailed it. Once I trimmed the hose it fits perfectly.
 

Attachments

  • tmp_5178-20161105_091420-2063490330.jpg
    tmp_5178-20161105_091420-2063490330.jpg
    61.7 KB · Views: 140
  • tmp_5178-20161105_0925361903346702.jpg
    tmp_5178-20161105_0925361903346702.jpg
    54.9 KB · Views: 141
So jason wanted the arb compressor mounted in the tool box in the bed of the truck. In order to mount it where it needed I had to make a stud plate since there was no access to the back side to get the bolts thru the box. But got the compressor mounted.
 

Attachments

  • tmp_5178-20161106_081140696270015.jpg
    tmp_5178-20161106_081140696270015.jpg
    50.9 KB · Views: 132
  • tmp_5178-20161105_0814321856003389.jpg
    tmp_5178-20161105_0814321856003389.jpg
    42.5 KB · Views: 129
  • tmp_5178-20161105_082623-87693738.jpg
    tmp_5178-20161105_082623-87693738.jpg
    43.3 KB · Views: 131
Time to get the arb system wired up. Since the ABS system is no longer I went and dove into the underhood electrical center and re-routed the voltage off the ABS fuse for the arb compressor--keep it super clean. Got the relay mounted and and a portion of the system wired to the firewall.

The little units show no relay needed per instructions but I always prefer to switch the voltage by a relay plus doing it this way gives the option to upgrade the compressor down the road if need be.
 

Attachments

  • tmp_5178-20161105_200449-1337154960.jpg
    tmp_5178-20161105_200449-1337154960.jpg
    47.6 KB · Views: 135
  • tmp_5178-20161106_0812021168407712.jpg
    tmp_5178-20161106_0812021168407712.jpg
    68.9 KB · Views: 138
  • tmp_5178-20161106_0811542117195756.jpg
    tmp_5178-20161106_0811542117195756.jpg
    66.2 KB · Views: 136
  • tmp_5178-20161105_200438-1797658009.jpg
    tmp_5178-20161105_200438-1797658009.jpg
    58.9 KB · Views: 130
Front to rear and compressor wired up.
 

Attachments

  • tmp_10881-20161105_2005081329980708.jpg
    tmp_10881-20161105_2005081329980708.jpg
    51.7 KB · Views: 118
  • tmp_10881-20161105_2005021095453135.jpg
    tmp_10881-20161105_2005021095453135.jpg
    68.3 KB · Views: 123
  • tmp_10881-20161106_084521-839039390.jpg
    tmp_10881-20161106_084521-839039390.jpg
    37.6 KB · Views: 133
Air line ran to the compressor.

I have been doing this a long time and I can say 90% of arb failures are due to poor line installation. Also NEVER run the line tight--always leave a loop near the front for "just in case" because the line is most vulnerable at the front diff and having some extra near there will make a trail repair or any repair much simpler and cheaper (than replacing the line).
 

Attachments

  • tmp_10881-20161106_10162886088148.jpg
    tmp_10881-20161106_10162886088148.jpg
    65.5 KB · Views: 115
  • tmp_10881-20161106_1016181737259183.jpg
    tmp_10881-20161106_1016181737259183.jpg
    61.1 KB · Views: 118
  • tmp_10881-20161106_101612286103276.jpg
    tmp_10881-20161106_101612286103276.jpg
    54.1 KB · Views: 129
  • tmp_10881-20161106_101558-714675407.jpg
    tmp_10881-20161106_101558-714675407.jpg
    57.3 KB · Views: 122
  • tmp_10881-20161106_101636359716964.jpg
    tmp_10881-20161106_101636359716964.jpg
    62.7 KB · Views: 118
Top