• Help Support Hardline Crawlers :

The wifes runner

crash2

-Oh no I picked a side-
Joined
Mar 26, 2001
Messages
39,839
Location
Da gold bar
So this is something I have been putting off for far too long and she said she would blow up my shop if hers wasn't after mine,lol--she cracks me up...

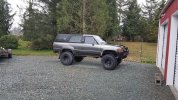
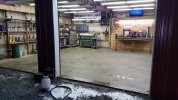
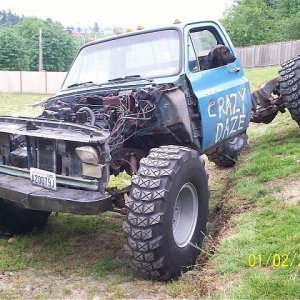
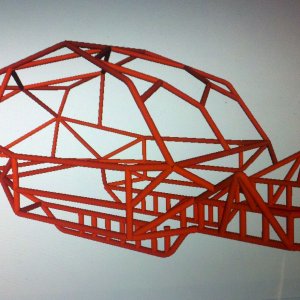
Some may remember it was stolen a few years ago and took some work to get it back to where it was--never made it since I never got the cage replaced.

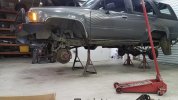
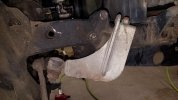
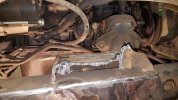
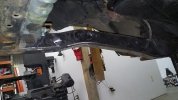
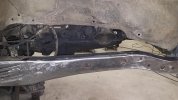
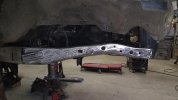
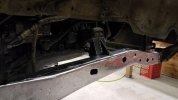
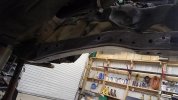
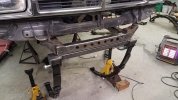
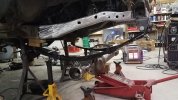
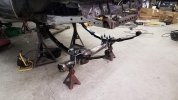
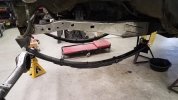
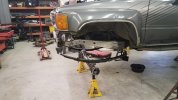
So in any case the plan is quite simple and pretty tame compared to the last few rigs I have done. Going to do a simple SAS, 4" springs front rear(longer rear springs). Also plan on doing an internal cage.

Plan on max 36" tire and will be throwing some 5.29's with a lockright in the front and keeping the tru-track in the rear(which has always worked).

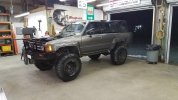
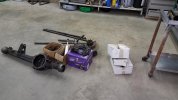
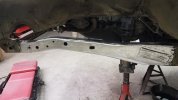
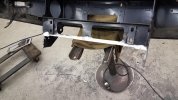
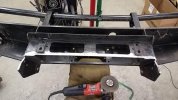
I am going to use trail gear stuff and with the arb bull bumper I will have to do my own front spring buckets for those who know how them things are designed.

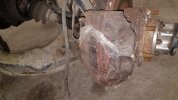
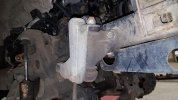
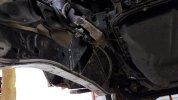
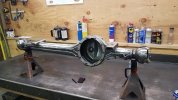
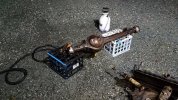
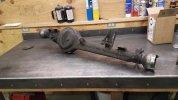
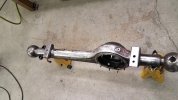
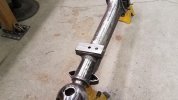
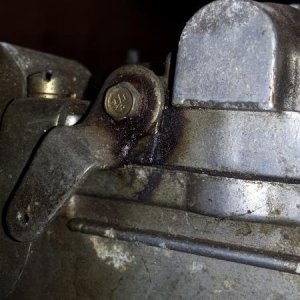
Front will be a toy housing and gotta do some research on running the ifs hubs as I have never gone that route.
 

Attachments

  • 20171111_151516.jpg
    20171111_151516.jpg
    111.7 KB · Views: 208
My outlook is a clean shop produces clean work so I scrubbed the floor, cleaned and organized the stuff from my own rig and got her pulled in..
 

Attachments

  • 20171112_175107.jpg
    20171112_175107.jpg
    74.5 KB · Views: 217
  • 20171112_175912.jpg
    20171112_175912.jpg
    61.2 KB · Views: 203
Dug the stash of parts out of the compressor shed..

So now I gotta make a list and get stuff ordered and in the mean time its going to be cutting and removing that wore out ifs stuff. Funny part is the front has a bunch of NWOR stuff thats been there for years
biggrin.gif
 

Attachments

  • 20171112_182454.jpg
    20171112_182454.jpg
    73.3 KB · Views: 207
  • 20171112_185742.jpg
    20171112_185742.jpg
    52.5 KB · Views: 206
So its been slow starting with trying to get things done around the place from building my rig.

Got the wheels pulled and onto jack stands...
 

Attachments

  • 20171113_192305.jpg
    20171113_192305.jpg
    57.1 KB · Views: 200
Ya think its been sitting a while,lol...
 

Attachments

  • 20171113_193045.jpg
    20171113_193045.jpg
    63.3 KB · Views: 203
  • 20171113_193053.jpg
    20171113_193053.jpg
    61.1 KB · Views: 206
Here is something the newer generation may have never seen--this is true old skool toyota,,,,
 

Attachments

  • 20171114_191843.jpg
    20171114_191843.jpg
    61.8 KB · Views: 206
  • 20171114_191848.jpg
    20171114_191848.jpg
    54.7 KB · Views: 202
I went ahead and pulled the header(NWOR) to not only give more room, but the header gasket was shot and I wanna toss the pos 3 bolt flange and weld on a ball flange......
 

Attachments

  • 20171129_184238.jpg
    20171129_184238.jpg
    60.7 KB · Views: 208
And the typical cutting off of the IFS crap....
 

Attachments

  • 20171114_201832.jpg
    20171114_201832.jpg
    59.9 KB · Views: 205
  • 20171116_190704.jpg
    20171116_190704.jpg
    55.7 KB · Views: 211
So one thing I absolutely hate about doing SAS's is this--the motor mount just looks like ass next next to a perfectly clean frame rail....

So I am going to be ---well me lol....
 

Attachments

  • 20171118_191447.jpg
    20171118_191447.jpg
    67.3 KB · Views: 209
  • 20171118_191457.jpg
    20171118_191457.jpg
    53.3 KB · Views: 210
So I started by setting my cube of confusion on the intake so I know where current level of the motor is.

Then removed everything off the frame rail (do one side at a time so the motor stays where it is)---Now I have a nice clean slate.....
 

Attachments

  • 20171119_193109.jpg
    20171119_193109.jpg
    51.4 KB · Views: 201
  • 20171119_193101.jpg
    20171119_193101.jpg
    58.4 KB · Views: 216
  • 20171119_193056.jpg
    20171119_193056.jpg
    47.5 KB · Views: 198
So I got the riser made for the mount. The hard part was trying to guess the squish of the mount to keep the motor level. But nothing fancy and should be as strong, if not stronger than the stock one.
 

Attachments

  • 20171129_183939.jpg
    20171129_183939.jpg
    44.9 KB · Views: 205
  • 20171129_183947.jpg
    20171129_183947.jpg
    46.3 KB · Views: 203
So now that the passenger side is done I got the driver side all stripped....
 

Attachments

  • 20171202_140903.jpg
    20171202_140903.jpg
    58.5 KB · Views: 202
  • 20171202_140851.jpg
    20171202_140851.jpg
    48.4 KB · Views: 201
And the driver side mount done. I was really hoping to nail the motor to its original spot---missed it by .2 degrees-----grrrrr.
 

Attachments

  • 20171203_185311.jpg
    20171203_185311.jpg
    38.9 KB · Views: 203
  • 20171203_185320.jpg
    20171203_185320.jpg
    41.3 KB · Views: 200
  • 20171203_185428.jpg
    20171203_185428.jpg
    49.3 KB · Views: 204
Time to play catch up. Only been able to poke along with everything else going on. When ya got lots of property and the kids are gone---ya busy,lol..

So drug he front housing out and got the useless crap cut off, seals and races removed and cleaned and stripped..
 

Attachments

  • 20171209_185035.jpg
    20171209_185035.jpg
    63.9 KB · Views: 132
  • 20171207_194402.jpg
    20171207_194402.jpg
    111.8 KB · Views: 126
  • 20171204_190039.jpg
    20171204_190039.jpg
    57.5 KB · Views: 138
I welded the spacer to the low side perch and went ahead and drilled the perches for the second hole--just in case....
 

Attachments

  • 20171222_190022.jpg
    20171222_190022.jpg
    60.6 KB · Views: 135
  • 20171222_190032.jpg
    20171222_190032.jpg
    56.2 KB · Views: 130
So I always like to throw the housing under the rig with the springs bolted down then the front cross-member to see how it all sits. Once I was happy with the setup I tacked the cross-member in place and pulled the housing.
 

Attachments

  • 20171223_192225.jpg
    20171223_192225.jpg
    67.7 KB · Views: 128
  • 20171223_180403.jpg
    20171223_180403.jpg
    73.1 KB · Views: 120
  • 20171222_191603.jpg
    20171222_191603.jpg
    60.4 KB · Views: 126
Before I pulled the front diff back out I also measured for the shackle mounts. I popped holes thru the frame on both sides (I used the TG templates since they make it so simple) and welded the inserts in and hung the springs....
 

Attachments

  • 20171225_181125.jpg
    20171225_181125.jpg
    50.8 KB · Views: 117
  • 20171227_140849.jpg
    20171227_140849.jpg
    52.7 KB · Views: 118
  • 20171227_141824.jpg
    20171227_141824.jpg
    58.5 KB · Views: 116
And the runner is now sitting on its own weight...
 

Attachments

  • 20171227_142412.jpg
    20171227_142412.jpg
    57.2 KB · Views: 116
So one thing I like to do is use 3/16" flatbar as a spacer for the the cross-member where it lays across the front frame and then fully welded the cross member in place..
 

Attachments

  • 20171227_183905.jpg
    20171227_183905.jpg
    38.1 KB · Views: 127
  • 20171227_183749.jpg
    20171227_183749.jpg
    50 KB · Views: 119
So for anybody that is familiar the ARB bull bumpers on an IFS rig you would know how they mount to the bottom of the frame. Well with the SAS that causes a BIG issue,lol. Ya **** is now in the way and one key item on this build--the wife loves her bull bumper..

So I simply started with a few ideas but I had to start with cutting the bumper where **** was in the way but I wanted to remove as little as possible..
 

Attachments

  • 20171227_174113.jpg
    20171227_174113.jpg
    58.2 KB · Views: 125
  • 20171227_172925.jpg
    20171227_172925.jpg
    73.1 KB · Views: 118
  • 20171227_174002.jpg
    20171227_174002.jpg
    62.7 KB · Views: 117
Top