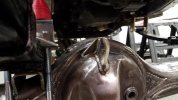
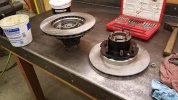
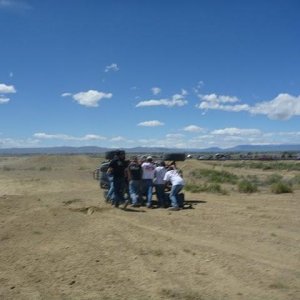
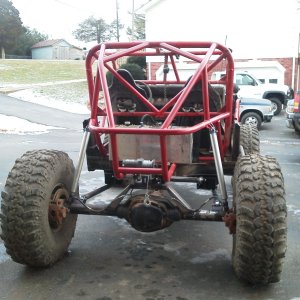
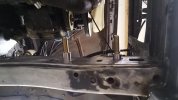
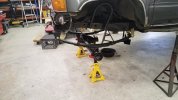
• Help Support Hardline Crawlers :

The wifes runner

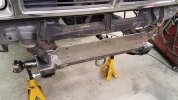
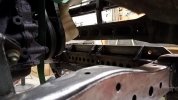
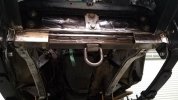
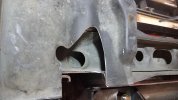
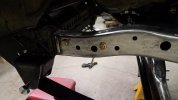
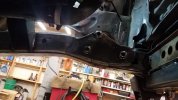
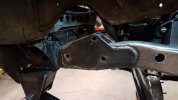
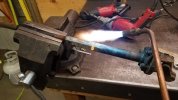
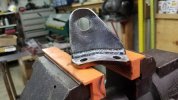
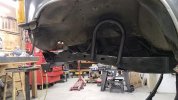
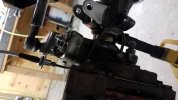
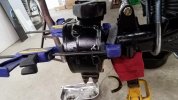
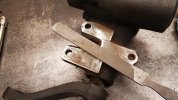
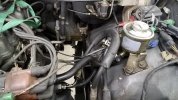
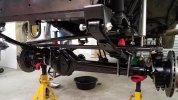
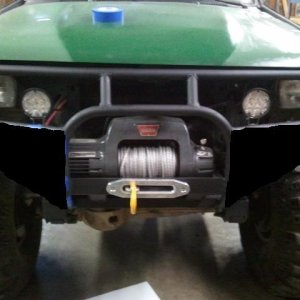
And here is what I came up with for the mount on the frame side. The rear gussets were a tight one to try and weld up.

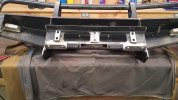
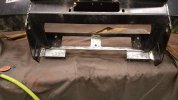
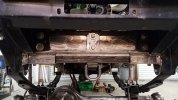
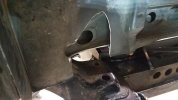
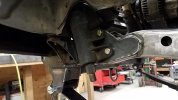
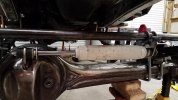
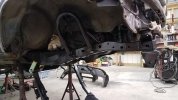
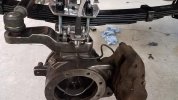
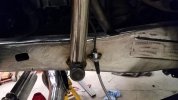
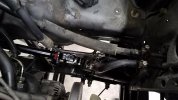
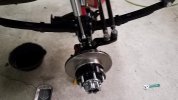
And of course--it just screamed for a D-ring,lol...
 

Attachments

  • 20171229_092229.jpg
    20171229_092229.jpg
    67.1 KB · Views: 197
  • 20171229_092256.jpg
    20171229_092256.jpg
    50 KB · Views: 195
  • 20171229_092244.jpg
    20171229_092244.jpg
    47.4 KB · Views: 196
I got the bumped all modified. I added a riser in the middle so there is 6 bolts on the vertical face and lower mounts with 4 bolts on the bottom of the cross-member.
 

Attachments

  • 20171229_095833.jpg
    20171229_095833.jpg
    58.6 KB · Views: 192
  • 20171229_100706.jpg
    20171229_100706.jpg
    51.9 KB · Views: 202
I got the bumper all bolted up and was a little worried it might have some wobble to it. Its actually feels pretty stout and should hopefully hold up to the little amount of abuse it might see. But I was happy to get that part done.
 

Attachments

  • 20171229_102648.jpg
    20171229_102648.jpg
    53.1 KB · Views: 199
  • 20171229_102643.jpg
    20171229_102643.jpg
    61.2 KB · Views: 198
  • 20171229_102636.jpg
    20171229_102636.jpg
    77.2 KB · Views: 207
Next I roughed the knuckles, tie rod and drag link into place to find the steering box placement.
 

Attachments

  • 20171229_164559.jpg
    20171229_164559.jpg
    55.3 KB · Views: 115
And of course I kept notching the core support till I got the box as forward as I wanted. Like always I only like to remove as little as possible. I makes for a snug fit but looks better IMO...
 

Attachments

  • 20180107_164718.jpg
    20180107_164718.jpg
    48.3 KB · Views: 111
  • 20180107_164700.jpg
    20180107_164700.jpg
    44.7 KB · Views: 118
So whats the hardest part about drilling thru a frame? The odd position and needed constant pressure. Sure you get a fancy mag drill but for as little as I would use it--not really needed. So This is my trick and as long as you hold onto the drill your good to go with pretty fast cutting. On my last hole it grabbed and snapped the bit--whoops,lol...
 

Attachments

  • 20180107_090747.jpg
    20180107_090747.jpg
    60.9 KB · Views: 112
  • 20180107_090754.jpg
    20180107_090754.jpg
    61.8 KB · Views: 111
So the outside holes I drill to 1/2" and the inside to 3/4". This lets the sleeves butt up to the inside of the frame and has always worked well for me.
 

Attachments

  • 20180107_121210.jpg
    20180107_121210.jpg
    38.9 KB · Views: 111
  • 20180107_121224.jpg
    20180107_121224.jpg
    44.5 KB · Views: 118
Got the steering box burned into place the box mounted..
 

Attachments

  • 20180107_173948.jpg
    20180107_173948.jpg
    53.1 KB · Views: 109
  • 20180107_164904.jpg
    20180107_164904.jpg
    58.5 KB · Views: 112
  • 20180107_164850.jpg
    20180107_164850.jpg
    46.4 KB · Views: 117
Next was to modify the steering shaft. I simply melt the plastic out of the collapsible shaft and pull it apart and clean it up and also toss he rag joint. Some guys like to weld them back up, I lube it with grease and let it slide.
 

Attachments

  • 20180107_170349.jpg
    20180107_170349.jpg
    54.8 KB · Views: 112
  • 20180107_173958.jpg
    20180107_173958.jpg
    66.6 KB · Views: 121
So since this thing will probably see more road use than anything hard regarding trail use I also made mounts for a steering stabilizer and made sure it all fit.
 

Attachments

  • 20180115_201545.jpg
    20180115_201545.jpg
    60.9 KB · Views: 144
  • 20180115_194719.jpg
    20180115_194719.jpg
    51.7 KB · Views: 149
  • 20180114_190123.jpg
    20180114_190123.jpg
    54.3 KB · Views: 147
So I got the shock towers setup and everything burned into place and pulled everything off the runner. I threw he third in the front and got the housing painted, all the small parts and the frame.
 

Attachments

  • 20180121_220633.jpg
    20180121_220633.jpg
    64.4 KB · Views: 151
  • 20180121_220626.jpg
    20180121_220626.jpg
    67.8 KB · Views: 154
  • 20180121_220621.jpg
    20180121_220621.jpg
    58.2 KB · Views: 146
  • 20180121_190205.jpg
    20180121_190205.jpg
    62.3 KB · Views: 153
  • 20180121_190156.jpg
    20180121_190156.jpg
    73.7 KB · Views: 146
I also forgot that I built the brake lines/mounts prior to paint. Since I was not running backing plates I wanted the short section secured because I have seen them fracture before. So I make mounts off the steering arms near the location of the mount off the backing plate. I also made a tab on the frame and the drivers side line was a simple slight re-bend and I made a new one for the driver side. I also removed the second line at the tee and plug welded the port closed.
 

Attachments

  • 20180120_102942.jpg
    20180120_102942.jpg
    57.3 KB · Views: 94
  • 20180120_102948.jpg
    20180120_102948.jpg
    45.1 KB · Views: 90
  • 20180120_105935.jpg
    20180120_105935.jpg
    44.9 KB · Views: 100
  • 20180120_105939.jpg
    20180120_105939.jpg
    48 KB · Views: 93
  • 20180120_105947.jpg
    20180120_105947.jpg
    50.9 KB · Views: 98
So time for some assembly fun. Started by getting the new FJ60 rotors onto the hubs and new races put into the hubs....
 

Attachments

  • 20180127_114826.jpg
    20180127_114826.jpg
    70 KB · Views: 84
Boy you have no idea how long it has been since I have had one of these apart. So I am going to run stock birfs in it for now since with the ype of use it will be seeing, the tire size and the auto--they should fair well. Tore both down and cleaned and packed with grease.
 

Attachments

  • 20180127_124617.jpg
    20180127_124617.jpg
    71.4 KB · Views: 81
Got the springs and housing under the rig and bolted down.
 

Attachments

  • 20180127_122332.jpg
    20180127_122332.jpg
    60.7 KB · Views: 87
So after I got the arms/knuckle setup (preload/torqued) this is a little trick I have found that works well for getting the scraper seals on. I will say I like the TG ones better than stock being as they are thicker. Get one both started and then clamp it down--works like a champ.
 

Attachments

  • 20180128_085140.jpg
    20180128_085140.jpg
    55.9 KB · Views: 85
So this is one thing I always do... File the mating surface of the steering box. Removes all the rust and and raised edges..
 

Attachments

  • 20171229_174221.jpg
    20171229_174221.jpg
    73.3 KB · Views: 90
Got the steering box installed, the steering shaft lubed up and installed and all of the lines. Love the fact that everything fits like OEM..
 

Attachments

  • 20180128_193547.jpg
    20180128_193547.jpg
    70.5 KB · Views: 85
  • 20180128_193541.jpg
    20180128_193541.jpg
    69.3 KB · Views: 88
  • 20180128_193534.jpg
    20180128_193534.jpg
    54.8 KB · Views: 87
  • 20180128_193529.jpg
    20180128_193529.jpg
    69 KB · Views: 95
So I got the wheel hubs on, shocks, bump stops and steering and then aligned it with my method. Looking like a front axle again....
 

Attachments

  • 20180128_192221.jpg
    20180128_192221.jpg
    42.9 KB · Views: 92
  • 20180128_192230.jpg
    20180128_192230.jpg
    66.4 KB · Views: 97
Top