-
Help Support Hardline Crawlers :
You are using an out of date browser. It may not display this or other websites correctly.
You should upgrade or use an alternative browser.
You should upgrade or use an alternative browser.
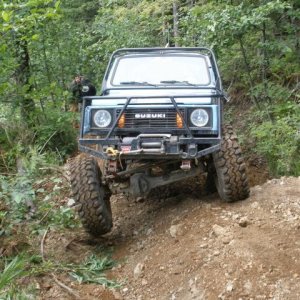
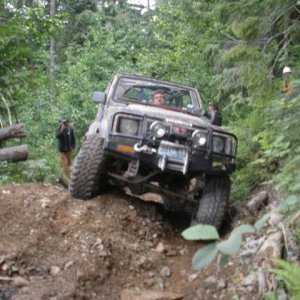
The wifes runner
- Thread starter crash2
- Start date
crash2
-Oh no I picked a side-

crash2
-Oh no I picked a side-
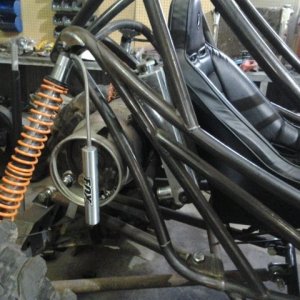
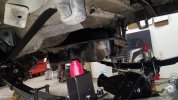
And the shocks are upside down so I can mount them to the axle as far out as possible without the body hitting the spring plate.
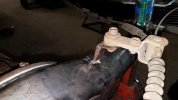
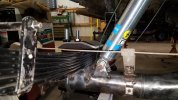
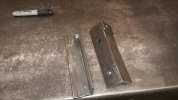
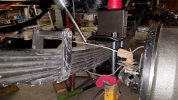
So next I wanted to finish up the brake lines. I started by cutting off the stock hardline to softline mount off the tank mount. I simply took the mount I removed and cut it down and remounted it to the tank mount. Since I tossed the lspv all I had to do was rebend the hardline around and down to the new mount--easy peasy...
So next I wanted to finish up the brake lines. I started by cutting off the stock hardline to softline mount off the tank mount. I simply took the mount I removed and cut it down and remounted it to the tank mount. Since I tossed the lspv all I had to do was rebend the hardline around and down to the new mount--easy peasy...
Attachments
crash2
-Oh no I picked a side-
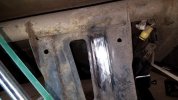
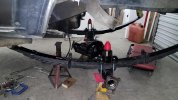
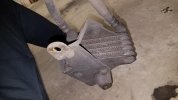
For those who wish to continue using there e-brake you need to tweek the mounts a little. Even if you don't rotate the housing typically the springs are thicker which causes the cables to rub the springs. So just bend both these mounts upward and you should have plenty of room.
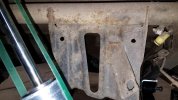
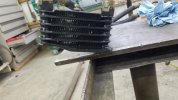
So next is bump stop mounts on the spring plates...
So next is bump stop mounts on the spring plates...
Attachments
crash2
-Oh no I picked a side-
crash2
-Oh no I picked a side-
crash2
-Oh no I picked a side-
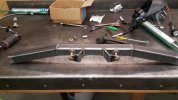
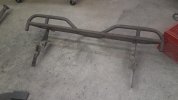
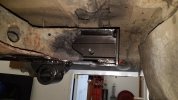
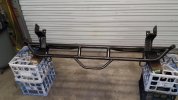
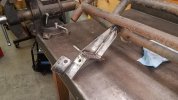
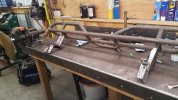
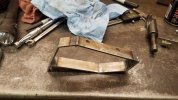
So Since the bumper mounts would be shorter at he frame I made these inserts that go inside the frame to help give the frame some support. Once done I capped the end of he frame (at that point the inserts were stuck inside the frame). This gives the bumper 3 mounting locations per side(outside frame,bottom frame and rear of frame).
Attachments
crash2
-Oh no I picked a side-
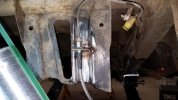
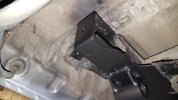
As you can see the mount is much shorter and I added some vertical material to the bumper mount. When I test fitted it I was happy with how much stronger it felt to how it was prior..
I painted the back side and will finish painting it once its on he rig.
I painted the back side and will finish painting it once its on he rig.
Attachments
crash2
-Oh no I picked a side-
crash2
-Oh no I picked a side-

crash2
-Oh no I picked a side-
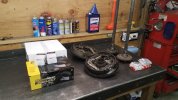
Time to dig out more boxes of parts. Its getting all new parts..
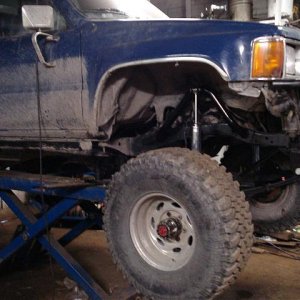
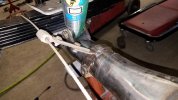
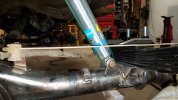
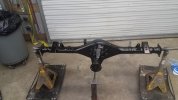
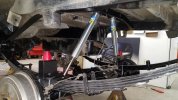
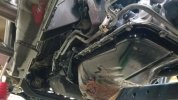
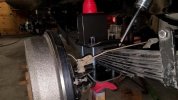
So once the axles are assembled with brakes and adjusted I got the shocks and brake lines all installed...
So once the axles are assembled with brakes and adjusted I got the shocks and brake lines all installed...
Attachments

crash2
-Oh no I picked a side-
crash2
-Oh no I picked a side-
crash2
-Oh no I picked a side-
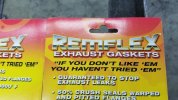
I forgot who had mentioned this brand of exhaust gaskets but they are supposed to be the best.
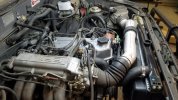
I originally planned on swapping the 3 bolt flange on the header for a ball socket. I changed my mind since I am really hoping after the rig is done I can work on convincing the wife the runner will do much better (power/economy) with a 4.3 vortec....
I originally planned on swapping the 3 bolt flange on the header for a ball socket. I changed my mind since I am really hoping after the rig is done I can work on convincing the wife the runner will do much better (power/economy) with a 4.3 vortec....
Attachments
crash2
-Oh no I picked a side-
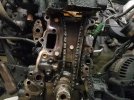
So I got the motor assembled along with the new radiator. Got the header back in and all the small stuff also. Once the top was done I got all the trans cooler lines installed also. So most the front is done.....
Attachments

DHR Darren
Well-Known Member
WHEW!!
I got tired just reading that, very nice work & excellent job chronicling the build!
I got tired just reading that, very nice work & excellent job chronicling the build!
crash2
-Oh no I picked a side-
Thanks--you should go thru the build of my new rig :redneck:
crash2
-Oh no I picked a side-

crash2
-Oh no I picked a side-
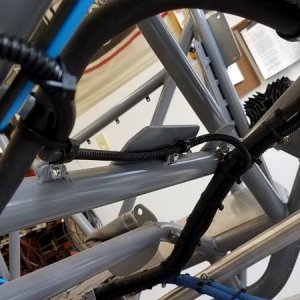
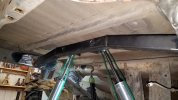
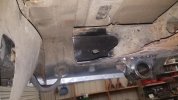
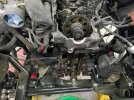
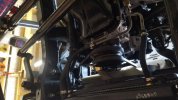
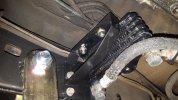
So since the cooler originally goes right where the shackle mount now sits I had to look at other options. I looked at bringing it away from the frame and mounting it in the same spot--but there was not enough room before it hit the trans cooler lines.
Well I came up with this mount and brought it back a bit. Its kinda close to the drive shaft but not 100% certain until I get a new shaft made and flex it out..
Well I came up with this mount and brought it back a bit. Its kinda close to the drive shaft but not 100% certain until I get a new shaft made and flex it out..
Attachments
crash2
-Oh no I picked a side-
Similar threads
- Replies
- 120
- Views
- 16K