-
Help Support Hardline Crawlers :
You are using an out of date browser. It may not display this or other websites correctly.
You should upgrade or use an alternative browser.
You should upgrade or use an alternative browser.
The wifes runner
- Thread starter crash2
- Start date
crash2
-Oh no I picked a side-
crash2
-Oh no I picked a side-
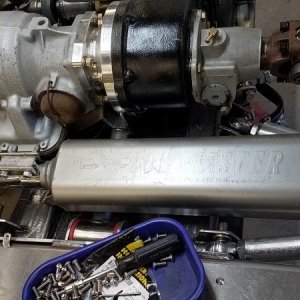
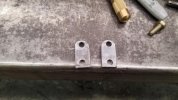
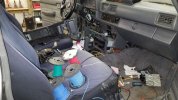
So for probably 7 years I had this stuff stored away--factory rear heater. The install was pretty simple and the hardest part was popping the hole thru the floor for the heater core fittings. The center console bolted in place as did the factory hard lines--everything fit lit a champ.
I did however did not have one of the tee's for the heater lines to tie in. I found 1/2" brass water fittings were damn near the right size and made one tee.
I was also missing the factory harness from the dash to the heater and will take care of that later..
I did however did not have one of the tee's for the heater lines to tie in. I found 1/2" brass water fittings were damn near the right size and made one tee.
I was also missing the factory harness from the dash to the heater and will take care of that later..
Attachments
CHOP SHOP
Well-Known Member
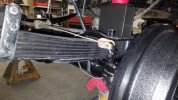
Undercarriage and workbench are cleaner than the interior!
crash2
-Oh no I picked a side-
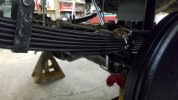
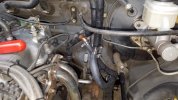
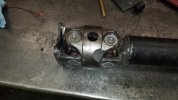
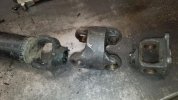
So the next part was a good challenge and I wanna say the last one I did was back in the day when NWOR was one of the only places to easily source parts.
So The caps on the joints had KC1720AD which I spent over an hour without being able to cross reference to anything via the web using the number on the cap.
Well I went with application and came up with this part number
Precision #513 and it is a perfect fit.
I had a hard time getting the caps out due to the body hitting not letting the cap work all the way out so I used the welder and a slide hammer. Ya the one joint was a little toast..
So one thing I can say is made certain the needle bearings where pin for the ball rides don't pop out of place--that was the one curve ball I ran into and broke a few of them. Since the ball was in perfect shape I just cut up one of the many CV's I had laying around and used the needle bearings.
Finally got that all done and installed.
Attachments

crash2
-Oh no I picked a side-
Undercarriage and workbench are cleaner than the interior!
Ya it sat for a year at our old place and trailed it here and it just sat. Inside will be cleaned here soon..
crash2
-Oh no I picked a side-
crash2
-Oh no I picked a side-
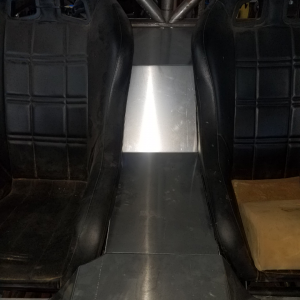
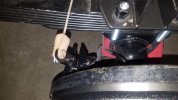
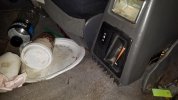
Tore some of the interior stuff apart and got the rear heater wired in. The downside of the heated center console is there is only room for 2 factory switches where there was originally 3. So I extended the wiring for the window lockout switch and there was a blank spot above the radio.
I also added one more security feature--they are not stealing this easily again...
I also added one more security feature--they are not stealing this easily again...
Attachments
crash2
-Oh no I picked a side-
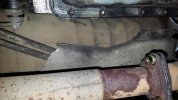
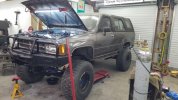
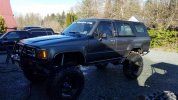
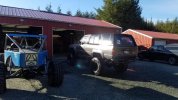
Pulled it out of the shop to get some of the dust washed off and all the mess off the front axle from the motor work.
Wife was pretty happy to see it and I just buzzed it around the yard.
Its getting close to taking it down the road--few more odds/ends...
Wife was pretty happy to see it and I just buzzed it around the yard.
Its getting close to taking it down the road--few more odds/ends...
Attachments

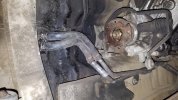
So I lopped off the shackle mounts and tacked the new ones in and now siting at 23 degrees...
What springs did you use? I'm at 25* with some new all pro springs and I'm wondering if I should decrease it to 20*?
So the next part was a good challenge and I wanna say the last one I did was back in the day when NWOR was one of the only places to easily source parts.
So The caps on the joints had KC1720AD which I spent over an hour without being able to cross reference to anything via the web using the number on the cap.
Well I went with application and came up with this part number
Precision #513 and it is a perfect fit.
I had a hard time getting the caps out due to the body hitting not letting the cap work all the way out so I used the welder and a slide hammer. Ya the one joint was a little toast..
So one thing I can say is made certain the needle bearings where pin for the ball rides don't pop out of place--that was the one curve ball I ran into and broke a few of them. Since the ball was in perfect shape I just cut up one of the many CV's I had laying around and used the needle bearings.
Finally got that all done and installed.
maybe it does not matter , but it appears you put it back together different than how you took it apart
pic of b4 u took apart

pic of after u put back together


crash2
-Oh no I picked a side-
What springs did you use? I'm at 25* with some new all pro springs and I'm wondering if I should decrease it to 20*?
TG 4"....
I went 23 degrees but 25 should be ok unless they have a TON of arch..
crash2
-Oh no I picked a side-
maybe it does not matter , but it appears you put it back together different than how you took it apart
pic of b4 u took apart
pic of after u put back together
I am pretty sure thats upside down in the second photo because its together correctly. There is only one hole in the H and only goes on one way... plus I staked each piece..
TG 4"....
I went 23 degrees but 25 should be ok unless they have a TON of arch..
They don't, thanks.
Similar threads
- Replies
- 120
- Views
- 16K