• Help Support Hardline Crawlers :

Reworking the tired Toyota Pickup

IMG_7246.jpg after installing the motor and trans and hooking up/bleeding the clutch, i still couldnt feel any clutch disengagement. (pedal depressed while trying to turn tcase output with breaker bar) So I took the trans back out, hooked up the slave, bled it again and clamped a piece of flatbar across the bellhousing so I could check the throw...
IMG_7250.jpgit was .2". I didnt think that was going to cut it, so I picked up a clutch master from an 80's FJ,
IMG_7251.jpg with a 3/4 bore. had to drill the firewall a little bit, and drill some threads out of it, but it fits real nice in there. Now the throw is right about .4", so that will have to do.
 
IMG_7262.jpg finished up the gussets on the towers and gave them some rattle can
IMG_7265.jpgput everything back on to test fit the bed, trim it out for tire clearance and stare at it for a bitIMG_7267.jpgthis is going to be fun, eventually.
 
picked up some 1/4 alum from a guy on offerup
IMG_7270.jpgguess ill try to make a fuel cell
IMG_7275.jpgthis is the fastest way to cut straight lines in aluminum. its only scary if you're scared.
IMG_7281.jpgbent a couple, cut a couple. I'm going to use the factory toyota pickup/return top and the factory fuel level sender. got a 15"x3" holley hydramat for a fuel pickup in there, hope they work like they are advertised. seems pretty straightforward
IMG_7284.jpg welding alum with a mig machine is really dumb feeling
IMG_7285.jpgbut it sticks it together
 
IMG_7294.jpg used the rest of the aluminum to make a skidder for the aluminum fuel tank.. hope 1/2" of alum is enough to keep the rocks out
IMG_7302.jpgtest fit the thing after a watertest, no leaks, yet, fit seems good-ish. turns out there is a lot of crap on a fuel tank. filler neck, inlet, outlet, rollover vent, filler vent and gauge

at least the tank isnt draggin weeds two feet below the frame anymore
 
Thanks Toy779!! I guess at least one dude still checks the site....

last two days I spent the majority of my waking hours in the shop. Feels like I'm finally getting things done.
IMG_7312.jpg got new bumper mounts made, had to thread the needle on both sides of the radiator to get them suckers to fit
IMG_7319.jpg test fit #1
IMG_7322.jpggot brake lines plumbed, safety third when fitting the braided line in the back on the ol hi-lift
IMG_7315.jpgfinished up the power assist, the super cheap version- thanks Marlins forum for the cheap crap
 
IMG_7320.jpgproof of brake line
IMG_7321.jpg I swear one day I'll be able to weld, don't judge me
IMG_7328.jpg got my 4xinnovations cage all welded in, had bend a couple new pieces so it would fit super snug, I dont want to bang into that thing anymore than I have to
IMG_7324.jpg aaand got the new winch installed. (not wired yet though..) went with a Warn China 8k. I hope it lasts like the m8000 that its replacing, but I dont have my hopes up. the damn thing is practically twice the size of the m8000 though, and its all in "tactical plastic" I miss the old one already.
 
IMG_7338.jpg also made a little bash guard for the hydro assist ram
IMG_7332.jpg butchered some seatrails, need to get these things mounted in the truck tomorrow

IMG_7333.jpg and the last big job besides wiring the thing up is to close these holes in the bed up. I'm really not looking forward to this job. Sheetmetal, welding, and I.. aren't friends. Starting to see the light at the end of the tunnel at least. Cant wait for some catastrophe to happen so l can burn the thing down.

Maybe I'll even have it ready for 4th of july wheeling in Natches. Who knows.
 
had to do some "real work" this week so progress slowed down a bit
IMG_7339.jpg got a box-o-exhaust bits for 119$ from ebay 2.25" stuff...mandrel bent mild steel or so they say
IMG_7340.jpg pulled some junkyard flanges for the manifold side, burned a couple out for the downstream end, ordered a 14$ "muffler" thats just a little tiny resonator, and made me a sad little crooked excuse for a Y-pipe

IMG_7343.jpg but it fits, its out of the way, and the price was right, and it was only a little bit painful to do
IMG_7347.jpg also got a super cheap crap thrush 2.25 muffler that probably sounds like diarrhea, but thats what you do when you run out of money
 
got the lowrider function engaged on the rear to buttfab exhaust. wishing it sat that low at rideheight
1.jpg
 
Welp, I pushed the clutch in while fitting my drivers seat, and it the pedal stayed on the floor, and there is now a puddle of fluid under the truck dripping from the bellhousing. I guess this is why I should've ran the KS bellhousing. Im really starting to dislike this internal clutch slave cylinder business.

Guess I wont be going wheeling on the 4th of July, so instead of working on the truck on fathers day I took my boy to some trails on bikes.

IMG_2448.jpg IMG_2449.jpg (check out the SWEET 12v last-minute battery hackjob on the classic Honda.)
IMG_2439.jpg

whats she looks like when im checking clearance at the steering and exhaust. Kinda funny looking.
IMG_2441.jpg

I am happy that I dont have to trim the sides of the bed at all to make the tire stuff. I was worried about that.

I'll post some wiring when I get started on it.
 
Thanks 4x4pig! I really picked em because I didnt want to hassle with figuring out the right spring rates, using rates to set ride height, and having to run bumpstops and swaybars. There is enough crap crammed in the the suspension already. It was a fairly lazy decision, but I havent heard many folks complaining about ORI's, I guess I'll see for myself soon enough.

Figured out my clutch problem.
IMG_2455.jpg


Its kinda hard to see, but it was apparently arcing from the stainless cable to the hole in the bellhousing. I didnt think about the cable being the only ground strap from the engine to the chassis. I dont know if it was from welding or from shorting wires out trying to figure out the pins on my body harness. Probably welding. Oh well...
 
I went coilovers, air bumps and sway bars and setup and packaging has been a pain. Still not done. Only reason I backed Out on struts is because I do a lot of overlanding and I was worried about blowing a strut seal on a trip. Not sure if it was a valid concern tho.
 
Because the motor and trans is out to replace the clutch lines, and July 4 wheeling is off, I guess I can do the wiring the "right" way. I'll thank myself later for de-pinning and removing all of the unnecessary wires from the loom. It necessitated removing the intake manifold to get to the knock sensors and the starter section of the wiring harness.
IMG_7359.jpg

IMG_7357.jpg In case you're thinking of doing a 1UZ swap, and dont know anything about them; the starter is UNDERNEATH the intake manifold. Since its out, and since its a rebuilt NAPA starter from who knows when, Im putting a Denso starter in there. I really didnt want to spend the money for this....but I can see me losing my sh*t on the trail if my starter were to go out.
IMG_7356.jpghere is the harness freshly pulled. I tagged the sensors I will need and can gut the rest.
IMG_7360.jpg Crappy picture of mostly gutted harness.
IMG_7361.jpgPile of wires that were removed. Mostly TRAC ECU, auto trans crap, the extra tps, etc...

back to work
 
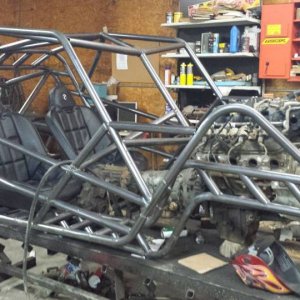
Okay. A couple days work went into:
IMG_7365.jpg

got the wiring harness all trimmed up, soldered, heat shrunk and taped up where it belongs. used the body plugs off of the 22ret harness and ran all the necessities through those. Ended up using the COR as the fuel pump relay, just jumped the 22re AFM wires so the relay gets power whenever the key is on. Not ideal, but it runs the fuel pump.

The rubber hydraulic hoses for the clutch, it turns out, are a NO-GO. There is too much volume and/or they flex too much under pressure.. only after i drilled the bellhousing holes out bigger to accommodate the bigger lines, i found this out. So I went to Industrial Hydraulics and had them make me a new braided line. I electrical taped the crap out of them so they wont arc in the same spot. Then welded the holes shut, and redrilled them smaller, again.

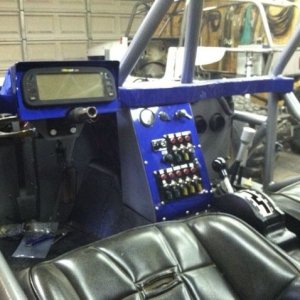
also removed the 2nd TPS from the throttle body, along with the cruise control motor. replaced the TPS with a brass barb fitting to run the IACV. Looks cleaner now.
IMG_7368.jpg

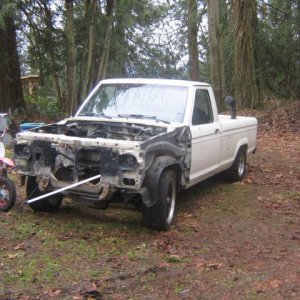
aaand, hopefully this will be the last stupid problem for a while. I had to move my axle back about an inch because apparently I dont know how to use a tape measure. My steering box is too close, and the pitman arm hits the tie rod. But, now my upper link mount hits the oil pan at full bump. Hence:
IMG_7370.jpg

Pulled the pan today, the pickup is in the center, so there is plenty of room to clearance it for the link mount. Please be the last hiccup. I want to hear this thing run. I'll update once it gets a runnin'.
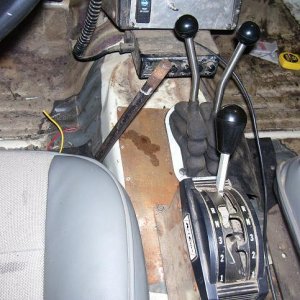
 
SHE LIVES!
No o2 sensors in the manifolds, so its a bit raspy, but it revs freely and sound just fine to me. I'll post one tomorrow with the o2's plugged... its wayyy smoother sounding.

so obviously i got the pan patched back up and in.
.IMG_2480.jpg
IMG_2482.jpg
and had forgotten to weld up my inner fender, its been cracked for a while now.
IMG_2483.jpg

Got those out of the way, and fired it off today.. didnt take too much futzing around...my IGN system didnt have 12v for some reason...mustve missed a pin on the body harness side or something dumb, I just jumped power into the circuit at the driverside coil and BOOM. what a relief.

Steering seems good, it keeps gettin better as it bleeds air out of itself. Besides the wiring snafu, the only real hiccups are one of my welds on the radiator has a pinhole, so thats gotta come back out and get welded again..no biggie there, and my dash temp gauge doesnt work, but it didnt work before...so it could be the cluster.

now to just put it all back together, wire the winch in, shorten a driveline, make seat brackets, and then go jump it.
 
got her mostly back together now, its drivable, but needs shock tuning real badly. I just pieced together a dual fill kit off of amazon that should be here on Monday.

its making a clicking sound in reverse, sounds like crap. I think it might be the reverse idler rubbing up against whatever gear its next to. Ideas anyone?


the thing has so much power compared to the 22re-t! Feels like its going to do a cartwheel when I hammer down on pavement in 2nd gear. (but its largely because the shocks are WAYYY too soft currently...)

here's putting around the yard with my boy on the first go round, nothing special
 
Top