TreeClimber
Well-Known Member
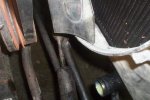
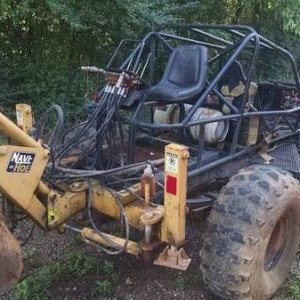
As some of you may know, I'm building a Chevy EFI 350 into a TJ.
For those who don't know, the inlet and outlets are reversed on a Chevy from a Jeep
I bought an YJ radiator from online at Radiators.com ($220. Part #2825)
http://www.radiators.com/radiator_how_to_jeep_engine_conversion.html
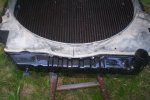
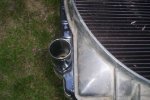
or something like that. I can't exactly remember, maybe I'll edit this when I do... but it was for a YJ. Now I know that mine's a TJ, but my old YJ radiator (still have that jeep too) was removed when I put a V8 in it, and I gave it to Amanda for her TJ when hers died. So I figured if a YJ radiator fits a TJ, then a TJ radiator should fit a YJ.... anyhow, this is a Chevy V8 conversion radiator and it was only like $200 or so. Much cheaper than I've found elsewhere, and it's thick so hopefully cool well.
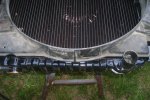
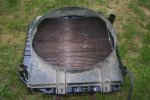
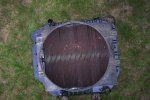
So anyway, this is the pics of my original YJ factory I6 shroud installed onto this conversion radiator.
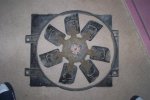
The openings on the YJ shroud are approximately 19.5 by 19.75 round (it's just not quite perfectly round. More oval shaped, but just barely.
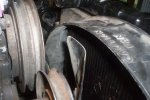
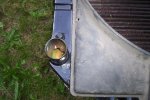
The Chevy fan is almost 20 inches around. It just barely won't fit into the shroud.
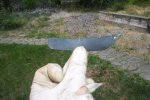
So I trimmed off about 1/2 inches on the blades and test fit everything.
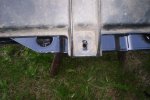
Looks like a good fit, I'll still need to lower the shroud ever so slightly. I've got about an inch clearance on the top, and maybe a 1/16th on the bottom after trimming the blades.
I should have enough material on the shroud itself, where it bolts to the radiator, to oval out the mounting holes and just lower it about 1/4 inch. That should give me about the perfect amount of room on the bottom, and still have enough room on the upper as the motor torques upward and right under load.
Lots of pics.
For those who don't know, the inlet and outlets are reversed on a Chevy from a Jeep
I bought an YJ radiator from online at Radiators.com ($220. Part #2825)
http://www.radiators.com/radiator_how_to_jeep_engine_conversion.html
or something like that. I can't exactly remember, maybe I'll edit this when I do... but it was for a YJ. Now I know that mine's a TJ, but my old YJ radiator (still have that jeep too) was removed when I put a V8 in it, and I gave it to Amanda for her TJ when hers died. So I figured if a YJ radiator fits a TJ, then a TJ radiator should fit a YJ.... anyhow, this is a Chevy V8 conversion radiator and it was only like $200 or so. Much cheaper than I've found elsewhere, and it's thick so hopefully cool well.
So anyway, this is the pics of my original YJ factory I6 shroud installed onto this conversion radiator.
The openings on the YJ shroud are approximately 19.5 by 19.75 round (it's just not quite perfectly round. More oval shaped, but just barely.
The Chevy fan is almost 20 inches around. It just barely won't fit into the shroud.
So I trimmed off about 1/2 inches on the blades and test fit everything.
Looks like a good fit, I'll still need to lower the shroud ever so slightly. I've got about an inch clearance on the top, and maybe a 1/16th on the bottom after trimming the blades.
I should have enough material on the shroud itself, where it bolts to the radiator, to oval out the mounting holes and just lower it about 1/4 inch. That should give me about the perfect amount of room on the bottom, and still have enough room on the upper as the motor torques upward and right under load.
Lots of pics.
Attachments
Last edited: