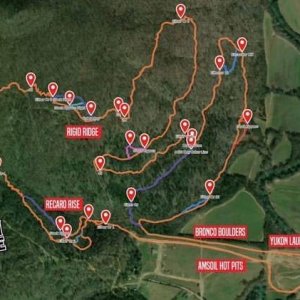
Hey guys. Im new here but been lurking for a while. I live a good 8 hours west of you guys but man I wish I had a group of you closer. This board makes for some great morning **** reading. I have a buddy that just moved to town that is native to nashville. He mentioned this site to me. Hopefully I'll get to meet a few of you on the trail. My names Justin.
So since I finished my rig almost 3 years ago I have always wanted to shave my 14 bolt. This axle is the only rear axle I have ever run in the 7 years I have been wheeling. It came out from under my ZJ and is now on its 3rd truss design.
I have always ran 42 inch TSLs on H1 8 bolt bead locks. The drawback is the true height of these tires are only 37 inches and combined with a 14 bolt that isn't shaved, I hang up on every dang rock in a park.
Now, I can say that I have never been denied a climb because of it but it has made me angry more times than I can count and kept me from taking a line that I wanted. So I decided to do a shave and run 42in red labels. In total I gained a true 5 inches of ground clearance.
Old design:

A couple of weeks ago I started the tear down. I ordered a shave kit from TMR customs in Canada. It was half the price of ballistic and I already had a 3/8 plate diff cover to work with so it was the smartest decision. I ordered a low profile 1/2in plate truss as well.
I started by trimming the ribs with my plasma cutter off the bottom. The kit claims to fit 76-87 14bolts that have a smooth housing. I have a 95 so it required a little extra to make the shave fit properly.


Then I marked my housing. I have 2 lines because one was incorrect. This proved to be the hardest part of the shave. Trying to mark and measure plus cut at a 6deg angle with a thin cutting wheel as perfect as possible. Lol fun stuff.
Then I went to cuttin. I used a thin 7 inch cutting disc. It worked far better than a sawzall or metal blade.

I cut the housing first, then bolted the cover up and cut the cover with it on the housing. Seemed to work really well.

I cut deeper than what the kit called for and machined my ring gear to match. I wanted a true 3 inches.

After all the cutting was done, I used my grinder to fine trim the edges so angles were correct. It went real smooth it didn't take much time at all. It was time to install the cover plate. I preheated my housing to 400deg. I ran out of acetylene of course so in emergency I used a map gas torch and it worked well. Just took a while to preheat. I preheated the plate and housing together. Then burned her in outside first.

I had to make a patch plate because of the extra amount I shaved to get a full 3 inches. Then burned in the inside.

Then moved to the diff cover.


Clearance turned out just right. I also installed a new truss to clean up my old rushed through design. I really like it.

If I did it all over again I would have used a mask during all my cutting and grinding. I had a bloody nose for a week and the smell of raw metal. I would have used a strap bolted to the housing in place of the diff cover to keep the housing from flexing during welding and cooling. I know I'm leaving out a couple steps but only what involves cleaning all the dust out of the housing before reassembly.
Felt like sharing the process. It went really smooth. Figured it may steer someone in the shave direction if they were considering it.
So since I finished my rig almost 3 years ago I have always wanted to shave my 14 bolt. This axle is the only rear axle I have ever run in the 7 years I have been wheeling. It came out from under my ZJ and is now on its 3rd truss design.
I have always ran 42 inch TSLs on H1 8 bolt bead locks. The drawback is the true height of these tires are only 37 inches and combined with a 14 bolt that isn't shaved, I hang up on every dang rock in a park.
Now, I can say that I have never been denied a climb because of it but it has made me angry more times than I can count and kept me from taking a line that I wanted. So I decided to do a shave and run 42in red labels. In total I gained a true 5 inches of ground clearance.
Old design:
A couple of weeks ago I started the tear down. I ordered a shave kit from TMR customs in Canada. It was half the price of ballistic and I already had a 3/8 plate diff cover to work with so it was the smartest decision. I ordered a low profile 1/2in plate truss as well.
I started by trimming the ribs with my plasma cutter off the bottom. The kit claims to fit 76-87 14bolts that have a smooth housing. I have a 95 so it required a little extra to make the shave fit properly.
Then I marked my housing. I have 2 lines because one was incorrect. This proved to be the hardest part of the shave. Trying to mark and measure plus cut at a 6deg angle with a thin cutting wheel as perfect as possible. Lol fun stuff.
Then I went to cuttin. I used a thin 7 inch cutting disc. It worked far better than a sawzall or metal blade.
I cut the housing first, then bolted the cover up and cut the cover with it on the housing. Seemed to work really well.
I cut deeper than what the kit called for and machined my ring gear to match. I wanted a true 3 inches.
After all the cutting was done, I used my grinder to fine trim the edges so angles were correct. It went real smooth it didn't take much time at all. It was time to install the cover plate. I preheated my housing to 400deg. I ran out of acetylene of course so in emergency I used a map gas torch and it worked well. Just took a while to preheat. I preheated the plate and housing together. Then burned her in outside first.
I had to make a patch plate because of the extra amount I shaved to get a full 3 inches. Then burned in the inside.
Then moved to the diff cover.
Clearance turned out just right. I also installed a new truss to clean up my old rushed through design. I really like it.
If I did it all over again I would have used a mask during all my cutting and grinding. I had a bloody nose for a week and the smell of raw metal. I would have used a strap bolted to the housing in place of the diff cover to keep the housing from flexing during welding and cooling. I know I'm leaving out a couple steps but only what involves cleaning all the dust out of the housing before reassembly.
Felt like sharing the process. It went really smooth. Figured it may steer someone in the shave direction if they were considering it.