• Help Support Hardline Crawlers :

Goatbuilt JHF buggy build

Got a bunch more pieces tacked in after work today. Really starting to look like something. I'm planning on chopping up a spare samurai tub that I have for skins so I figured I see how the windshield off my old zuk/buggy fit. Actually lines up pretty good. I should be able to make it work for the winter trips.
 

Attachments

  • 20180223_191719.jpg
    20180223_191719.jpg
    97.8 KB · Views: 460
  • 20180223_191722.jpg
    20180223_191722.jpg
    92.7 KB · Views: 461
  • 20180223_191731.jpg
    20180223_191731.jpg
    100.1 KB · Views: 469
  • 20180223_180147.jpg
    20180223_180147.jpg
    90.8 KB · Views: 466
  • 20180223_175759.jpg
    20180223_175759.jpg
    87.3 KB · Views: 470
Been slowly plugging along getting the rest of the front end bars in place and putting in more of the cross bracing. I received two driver side bars for one of the front shock mounts so that is on hold for the moment. Getting extra tacks put on all the joints so that I can pull the jig and finish up the door bars. Then its on to final welding. I hoping to get that done by the end of the week end.
 

Attachments

  • 20180227_182020.jpg
    20180227_182020.jpg
    94.6 KB · Views: 413
  • 20180227_182006.jpg
    20180227_182006.jpg
    97.8 KB · Views: 414
  • 20180227_181957.jpg
    20180227_181957.jpg
    96.5 KB · Views: 414
Got the rest of the cage structure tacked up tonight. Just have the sub frame to tackle tomorrow and then its on to final weld out. Visibility looks like it is going to be really good. Just a little lean to the passenger side and I can see the outside of the frame rail through the foot well. Should be able to see all 4 tires pretty well.
 

Attachments

  • 20180301_184523.jpg
    20180301_184523.jpg
    87.2 KB · Views: 362
  • 20180301_183921.jpg
    20180301_183921.jpg
    82.5 KB · Views: 367
  • 20180301_183857.jpg
    20180301_183857.jpg
    88.6 KB · Views: 368
  • 20180301_183057.jpg
    20180301_183057.jpg
    96.1 KB · Views: 366
  • 20180301_183050.jpg
    20180301_183050.jpg
    89.6 KB · Views: 372
  • 20180301_183037.jpg
    20180301_183037.jpg
    93 KB · Views: 366
Last edited:
Got the subframe welded on and dropped the powertrain in tonight to make sure everything was gong to clear. It all looks good. Weld-a-thon this weekend.
 

Attachments

  • 20180302_184211.jpg
    20180302_184211.jpg
    89.4 KB · Views: 345
  • 20180302_184134.jpg
    20180302_184134.jpg
    88.9 KB · Views: 343
  • 20180302_180045.jpg
    20180302_180045.jpg
    105.2 KB · Views: 348
  • 20180302_180025.jpg
    20180302_180025.jpg
    93.7 KB · Views: 353
  • 20180302_180018.jpg
    20180302_180018.jpg
    104 KB · Views: 360
  • 20180302_174128.jpg
    20180302_174128.jpg
    88.3 KB · Views: 343
  • 20180302_174123.jpg
    20180302_174123.jpg
    86.8 KB · Views: 354
Got the chassis welded out this weekend. Having a crane is great for rolling the chassis around while welding.:redneck: When I got done I dropped the powertrain back in so I could start figuring mounts out. Also threw the axles up on the table so I could get an idea of how it was all going to fit. Now the fun part begins, making it all fit.
 

Attachments

  • 20180304_144516.jpg
    20180304_144516.jpg
    83.1 KB · Views: 312
  • 20180304_144444.jpg
    20180304_144444.jpg
    89.2 KB · Views: 318
  • 20180304_144426.jpg
    20180304_144426.jpg
    88.8 KB · Views: 317
  • 20180304_123235.jpg
    20180304_123235.jpg
    88.7 KB · Views: 317
I've been slowly working on getting the suspension where I want it an figuring out clearances and link mounts. I've set it up so that with a 20" belly on a 42 inch tire I'll have 6 inches of up travel.

I bought a ruffstuff simple truss for the rear and it was really tall, about 1.5" above the axle at the top, so I cut it down and then I cut apart one of their horizontal link mounts to drop it around 2". With the truss and link mount uncut the mount was above the top of the rear frame rails about 3" now I am 1/2" or so below the top of the rear rails.

Got the front axle up into place and it looks like I'll have room to fully triangulate the front uppers. That makes me happy since I'm keeping the lowers pretty straight for steering clearances.

There are also a couple cool pictures of an engine we pulled this week in our shop at work.
 

Attachments

  • 20180305_153125.jpg
    20180305_153125.jpg
    59.2 KB · Views: 267
  • 20180305_153114.jpg
    20180305_153114.jpg
    66.5 KB · Views: 269
  • 20180306_094306.jpg
    20180306_094306.jpg
    76.7 KB · Views: 269
  • 20180307_180945.jpg
    20180307_180945.jpg
    63.7 KB · Views: 270
  • 20180306_182839.jpg
    20180306_182839.jpg
    52.6 KB · Views: 267
  • 20180305_172456.jpg
    20180305_172456.jpg
    94.8 KB · Views: 270
I've now reached the point where I do a bunch of work and don't have a whole lot to show for it so updates will probably slow some. Last week I started on the rear suspension. I set up the links the way Goat built wanted them first and really didn't like the length of the uppers, I also ran into some upper clearance issues with full stuff being as high as I wanted it to be. In their setup the uppers were 4 inches longer than the lowers. So I cut those brackets off the frame and moved them back so that the uppers were an inch higher in the chassis and 6 inches shorter. On paper this results in a much more neutral level of AS through travel having only 30% of change through the entire cycle.

After getting that sorted I started mounting the front links last night. I set them up essentially the same with a slight change in the uppers to start with a little extra AS to help combat brake dive.
 

Attachments

  • 20180320_184149.jpg
    20180320_184149.jpg
    81.2 KB · Views: 219
  • 20180320_184142.jpg
    20180320_184142.jpg
    82.4 KB · Views: 236
  • 20180314_090753.jpg
    20180314_090753.jpg
    74.6 KB · Views: 219
  • 20180314_090749.jpg
    20180314_090749.jpg
    90.4 KB · Views: 223
  • 20180314_090740.jpg
    20180314_090740.jpg
    82.9 KB · Views: 217
  • 20180312_115313.jpg
    20180312_115313.jpg
    93.8 KB · Views: 222
  • 20180312_115250.jpg
    20180312_115250.jpg
    104.7 KB · Views: 211
  • 20180310_160335.jpg
    20180310_160335.jpg
    84.7 KB · Views: 219
So in the rear the uppers are now 2" shorter than lowers? What is the difference in the front? What are your anti squat/anti dive numbers if you don't mind? I'm working on my first f/r 4 link and I'm curious what works good in our area.
 
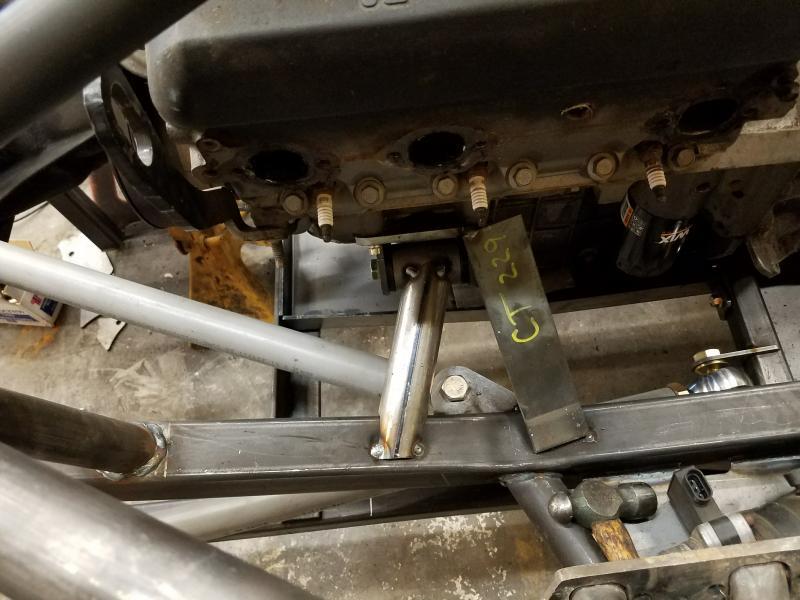
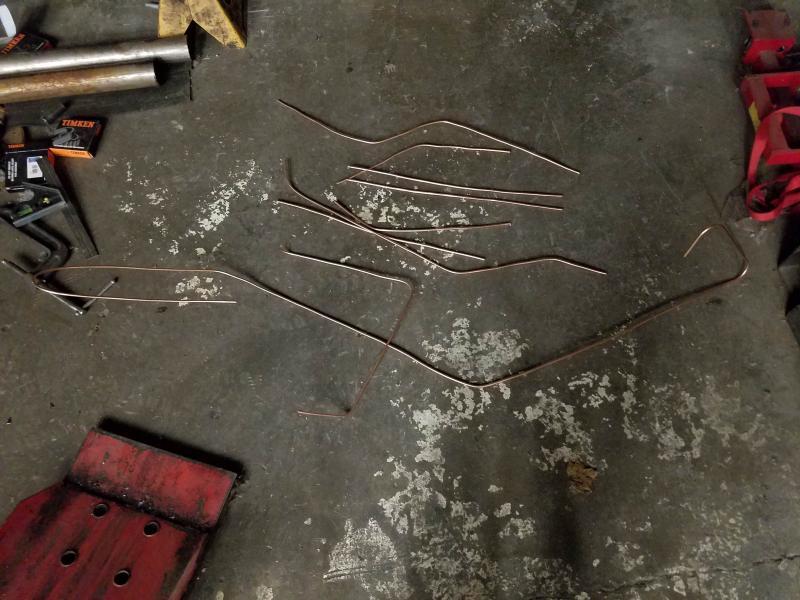
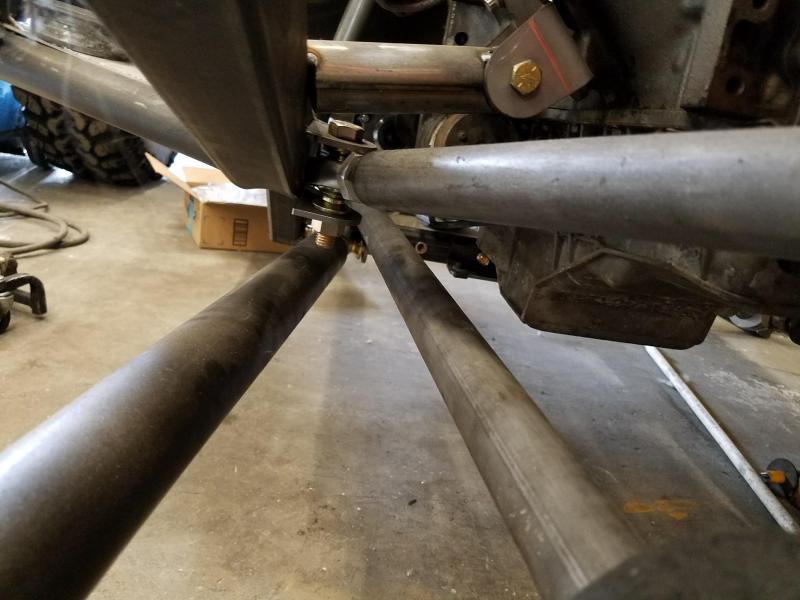
Lengths and locations have a lot to do with making it all fit where it can, no two rigs will be the same. The thing to do is to get the lowers up in the chassis where they fit and then tack in some uppers where you think you have room for them. Then run the numbers and see if they are in an exceptable ball park. I think it is more important to have a minimum amount of change through the suspension cycle rather than a specific AS number. These happen to be 50% rear and 60% front static. I also like to keep the roll center a little higher in the rear than the front, I think this helps make the rig more predictable in corners. A lot of this is pretty subjective and can very by driver though. If this is your first link job I would build some adjust-ability into the uppers at the frame at the very least and probably make sure I had room to move the brackets around, front to back, if needed. I had to screw around with my first one quite a bit to make it do what I wanted it to.

More confused now? :eeek::haha:
 
Got the engine and trans mounts set up and took the rig up to ride height so that I can set the link lengths and shock mounts up.
 

Attachments

  • 20180327_184812.jpg
    20180327_184812.jpg
    86 KB · Views: 371
  • 20180327_184801.jpg
    20180327_184801.jpg
    73.9 KB · Views: 372
  • 20180323_181316.jpg
    20180323_181316.jpg
    78.7 KB · Views: 370
  • 20180326_181517.jpg
    20180326_181517.jpg
    63.4 KB · Views: 369
I've just been trucking along getting all the suspension figured out. The rear was easy but trying to get everything to fit in the front has been a bit of a challenge. I wanted to keep the top of the shock low so that I could retain good visibility over the hood and minimize the angle of lean back as well. I fought with that a bit and finally figured out a way to get it down behind the axle and still have room to clear the link mount. I still need to flex the suspension and confirm that it clears when the shock is leaned over but I think I've got it figured out now.

At one point I was waiting on a couple of brackets I ordered so I spent some time getting seat mounts figured out and interior panels tacked in. I took a shot from the drivers seat to show visibility, it's really good.
 

Attachments

  • 20180407_141543.jpg
    20180407_141543.jpg
    91.1 KB · Views: 310
  • 20180407_133258.jpg
    20180407_133258.jpg
    65.6 KB · Views: 298
  • 20180412_184435.jpg
    20180412_184435.jpg
    88.7 KB · Views: 298
  • 20180412_183910.jpg
    20180412_183910.jpg
    88.3 KB · Views: 310
  • 20180412_183902.jpg
    20180412_183902.jpg
    91.7 KB · Views: 297
  • 20180410_182358.jpg
    20180410_182358.jpg
    70.3 KB · Views: 296
  • 20180410_182337.jpg
    20180410_182337.jpg
    62.8 KB · Views: 295
  • 20180406_185830.jpg
    20180406_185830.jpg
    98.1 KB · Views: 296
  • 20180404_183220.jpg
    20180404_183220.jpg
    76 KB · Views: 304
  • 20180404_183201.jpg
    20180404_183201.jpg
    104 KB · Views: 295
Done yet :redneck:

No. :fawkdancesmiley:

Spent a week in Jamaica.

Last week Kevin from Fullstack came over and we swapped out my lower eyelets on the front shocks to get me the clearance on the lower control arm mounts I needed. I've been working on little **** and ordering parts.

While searching for other parts I stumbled across a bracket from stinky fab that fixes the one thing about the rear axle that bugged me. The factory rear brake brackets locate the caliper fairly low on the axle. Stinky makes a bracket that eliminates the parking brake parts and rolls the caliper way up, should save a couple pounds too.

I also picked up a set of shock install spacers, they make installing the fox shocks way easier since they hold the spacers for you.
 

Attachments

  • 20180429_124632.jpg
    20180429_124632.jpg
    59.6 KB · Views: 203
  • 20180429_124624.jpg
    20180429_124624.jpg
    56.3 KB · Views: 206
  • 20180429_124331.jpg
    20180429_124331.jpg
    75.8 KB · Views: 208
  • 20180429_124311.jpg
    20180429_124311.jpg
    80.4 KB · Views: 212
  • 20180429_124220.jpg
    20180429_124220.jpg
    47.8 KB · Views: 215
Just been ordering and installing parts.

I did some junkyard digging while I was picking up some stock tranny lines and fuel lines for modification and found an intake hat that will be a little better for modification. It's about 3/4 of an inch shorter than the factory one and points forward instead of off to the side.

Figured out the front shock mounting finally and got it to go to full flex without any bind anywhere.

Figuring out pedal mounting and shifter locations and rapidly running out of space...

Got most of my brake stuff figured out and installed. Laid the radiator in and checked it for clearance may need to raise it a little more in the front to get a fan on it. I still need to install the upper portion of the upper link mount.
 

Attachments

  • 20180528_174948.jpg
    20180528_174948.jpg
    72 KB · Views: 157
  • 20180528_174928.jpg
    20180528_174928.jpg
    103.8 KB · Views: 156
  • 20180526_163703.jpg
    20180526_163703.jpg
    73.4 KB · Views: 159
  • 20180526_163636.jpg
    20180526_163636.jpg
    68.1 KB · Views: 156
  • 20180526_140508.jpg
    20180526_140508.jpg
    65.5 KB · Views: 156
  • 20180523_180122.jpg
    20180523_180122.jpg
    66.3 KB · Views: 154
  • 20180520_145014.jpg
    20180520_145014.jpg
    94.1 KB · Views: 157
  • 20180526_140512.jpg
    20180526_140512.jpg
    52.1 KB · Views: 165
Top