• Help Support Hardline Crawlers :

I ton LJ "BUSTED BUDGET" build

After much delay, the Build resumes...slowly. Goal is still to be done about 1 week prior to Memorial Day Weekend in order to squeeze in a shakedown run before heading to Morris Mountain for the Wheelin' 4 Warriors Rock Ride 6.


We had to re-work the rear truss that was on the axle we I got it (above). The one that was on it was too tall and the angles were off. So it was cut off and a new one put on:


While the shop was busy, I have been working on a project at the house: Custom tailgate tag mount supplied by Undercover Fabworks

The idea was to use Lexan and an LED strip to backlight the cutout (which I custom ordered) to be used as a 3rd brake light in place of the original that was removed with the rear tire carrier in an earlier evolution of my Jeep. First I painted the mount:


Then I worked on the Lexan to determine the best way to capture the light from the LEDs that would be wrapped around it. I tried cutting a grid pattern into, scuffing it with a dremel, a wire brush, front side back side, etc... In the end I spent more time trying to figure out the best method than the rest of the project combined. Best method turned out to be wire cup on the end of the drill roughing up the back of the Lexan. Then I used clear sealant to attach the LEDs to the edge of the Lexan with the LEDs pointed in:


And with the LEDs lit:


Using the same clear sealant, I glued the Lexan to the back of the tag mount and clamped it all together for the night:


After letting it set, I decided to fill in the lettering with the same clear sealant. Apparently "clear" sealant only dries clear if it is applied thin. I filled in the lettering in hopes of keeping dirt and mud from getting between the Lexan and the tag mount. (I also sealed the edges of the Lexan on the back.)


Final product lit and soon to be mounted on the Jeep:


Hopefully this Saturday I'll have more pics and another update!
 
Not a very long update, but the crosssmember and batwing are in and although the pictures show pvc links, the rear links are done as well. new driveshaft and rear hoops for the coilovers will finish the rearend. New steering box should be in Monday. Then we can start the front and see how much stretch we can figure out.

 
As mentioned above, the links are done and the axle was pivoted through the range of motion; needless to say it has more flex without binding than I have room for. Limiting factors will be driveshaft drop (having to go to double cardan driveshaft to pick up a little more flex) and wheel to body clearance (I've already highlined the rear, front maybe highlined in the future).
Driver's rear and passenger rear:


Unfortunately parts (or lack thereof) have been holding up the rest of the build, but most of them just came in this week. We are still waiting on some different coilover brackets so we can get the c/o mounted with about 10 degrees of lean to them. Once they come in the rear will be finished up (I hope) very quickly.

While I have been waiting on the Jeep build, it dawned on me that my full-width Jeep would no longer fit on my little trailer (16' utility trailer with 1' sides and 82" between the fenders) and I don't want to have to rely on using just my big trailer (30' gooseneck) when hauling a single rig. So I went about removing the sides and creating drive over ramps by notching and bending the top rail down:


Bad news on the build; Found out tonight that I'm not going to be able to get enough lean in on the c/o with my current set-up so we are having to re-look some things. We thought we had all the geometry worked out but didn't adequately account for the tire width. The tires combined with the length of the shock made it unfeasible to keep the rear frame as originally planned, so I guess a backhalf is now in my future. In any case our timeline just got thrown out the window. I'll post more pics as we make some kind of noticeable progress.
 
1tonyj said:
Keep your head up rob....all part of a new build.....your jeep will b better for it bud
I know, worse part is I'll have to miss the Rock Ride. I think Jamie took it harder than I did, of course he has the time and sweat in it that I don't.
 
Thanks got the offers but riding shotgun all weekend would drive me nuts. Family will be going RV camping instead so its not a total waste.
 
Its about time for an update on the BUSTED BUDGET Build.
We finally figured out how to section and clearance the frame. We ended up using a piece of 8" C channel to bridge the gap.


Jamie finished up the welding on the coilover hoop and that was the final piece after clearancing the frame. We still have to tie the shock hoop into the C-pillar of the cage but that should finish the rear end until paint time.


The rear end is finally sitting under its own weight. The pictures below show how it sits currently. Plan was for the final ride height to provide 7" up travel and 9" down. Its about 5.5" up now.


Now we start the front: a stretch using TnT TJ front stretch kit that will move the steering box forward and rotate it upward allowing the front High pinion kingpin D60 to be moved several inches forward. It will be suspended on 14" coilovers and a front 3-link. Steering will be via a Redneck Ram (hydro-assist).
 
Patriot Customs said:
What spring combination did you end up with in the rear to be left with 5.5" of up travel?
I'm running 100/150 right now but that is with the upper and middle stops where they were when I got them from the previous owner (they were under teh back of a 3 seat buggy) and that is just where it ended up being. In order to get to the 7"/9" setup we were shooting for I would have to crank the upper spring down a few more inches or get some stiffer springs. I'll wait until we get the everything finished and then weigh it front and rear before I start shipping springs back and forth trying to get the right rate.
 
We got the frame part of the front end stretch done today. Basically the front frame horns have everything removed and ground smooth. Then the front of the frame is notched to allow the new crossmember to be mounted in the frame plates. Once everything is tacked in place, then the upper mounting bung has to be cut through the top portion of the frame, new crush sleeves installed with the steering box, and everything welded up.


A couple of thumbnails


Ready to finish weld
 
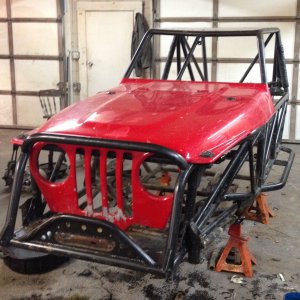
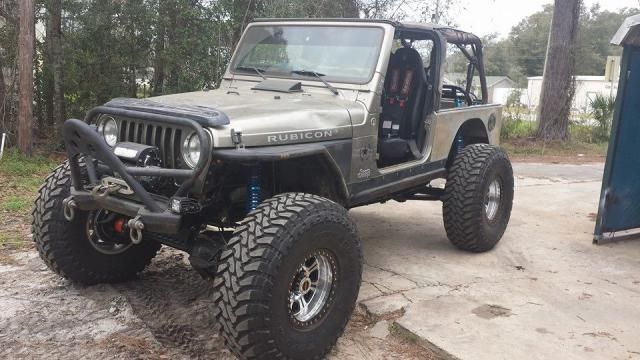
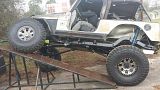
It's been a long time coming but I finally have a real update .. It LIVES again:


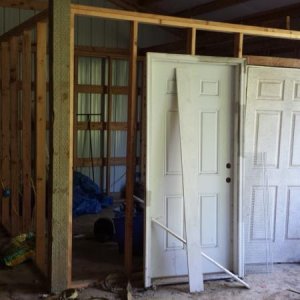
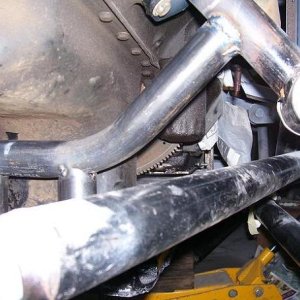
But I'm getting ahead of myself. The last real update I provided left off with the rear pretty much done and teh front stretch kit installed but I really didn't provide much commentary so I'll catch up on the back story then progress on the rest of the build. Once we had the rear links figured out, progress was very slow and not very picture worthy. Normally clearance for the rear coilovers would have entailed backhalving the frame and putting a fuel cell in behind the seat – afterall I had plenty of room with the LJ body style…. BUT… I wanted to be able to drive this on the road regularly with my family and this forced some concessions that complicated the build considerably – Many thanks to Jamie Carr at 
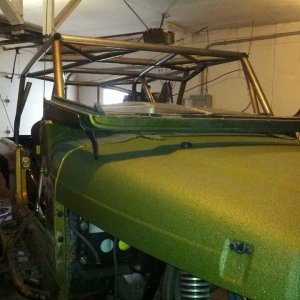
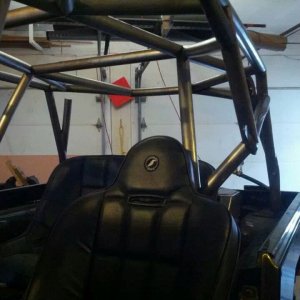
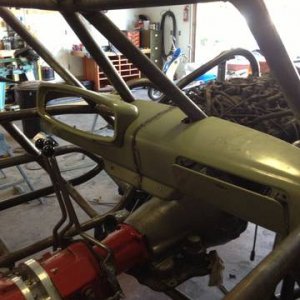
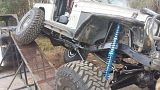
Son of a Jeep in Panama City for the work. So along this line I wanted to keep the gas tank under the Jeep – no filling it inside the cabin my girls in the backside and the top on – which forced me to keep the frame. This concession lead to us having to notch the frame to clear the coilovers. After getting that part figured, next came the upper mounting. For this I again went a little different route and incorporated a rear harness bar and eventual headrest mount. The final positioning of the reservoirs ended up side by side instead of the over under option pictured above.

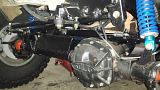
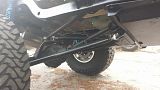
With the rear pretty much figured out we tackled the front. As mentioned above, I was able to slide the rear axle back some by moving the gas tank back. The LJ tank is mounted about 5 inches from the rear crossmember. To gain some room, we cut out the extra cross member and mounted the tank off the rear just like a TJ. After the D60 rear conversion, we were able to gain about 5" of stretch. For the front, I wanted to stretch it also. Research revealed two primary options:
1) Use an astrovan stearing box. It mounts directly to the frame but the gearing is reversed so that the pitman arm points forward instead of to the rear. This gives about 6" of forward stretch.
2) Go with the TnT Front Stretch Kit for the TJ/LJ which nets about 3.5" inches of stretch.
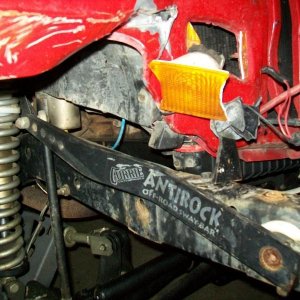
After looking it over, I never got comfortable with the idea of the pitman arm being under the front crossmember even though it and the draglink would be well behind the leading edge of the tire. SO I went with the TnT kit. Overall, it was a very straightforward install: cut out the original crossmember and weld in a new placed by new sideplates for both front frame horns. This allowed the steering box to be rotated up moving the draglink forward.

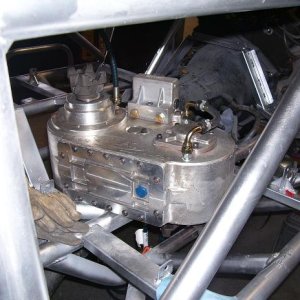
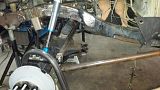
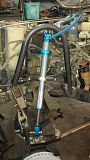
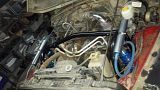
Then it was on to mocking up the front end. The obvious question is why didn't I go full hydro? Then I could have stretched it as much as I wanted – Well back to the dual-purpose intent. I wanted to keep the mechanical steering linkages in case I blew a hose on the highway (remember the whole family thing). To assist in steering I went with a Redneck Ram Hydro Assist from West Texas Offroad. So we had to keep that in mind as mocked up the front end:


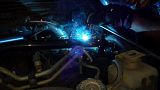
A few final things and we were almost ready. Obviously we had to finish weld everything, mount extra coolers for the transmission and steering, put the seats back in and the get the fenders back on.


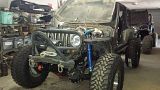
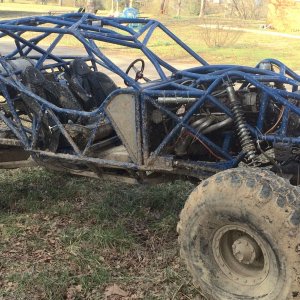
Then it was off to flex it and see if everything cleared. In the end .. it all did!


And one last pic for good measure: (No that is not me, but she has done A LOT of grunt work to include grinding and cutting on this Jeep)
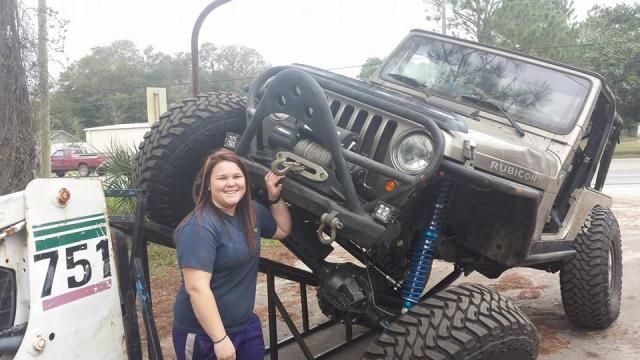
 
Re:

Glad to see it back to life Rob!!

Sent from my SPH-L710 using Tapatalk
 
Top