You are using an out of date browser. It may not display this or other websites correctly.
You should upgrade or use an alternative browser.
You should upgrade or use an alternative browser.
Pokeys rebuild
- Thread starter pokey
- Start date
Roccrawler
Well-Known Member
- Joined
- Mar 27, 2006
- Messages
- 6,325
sweet, let me know when your ready to break it (in) :;
zukkev
Cornfuzzled yet again...
Sweet Jim!!!:awesomework: You guys headin up Sat???:corn:
Sweet Jim!!!:awesomework: You guys headin up Sat???:corn:
Not looking like it.:booo: Lees jeep is having some issues and he dosent have time right now to address them:booo:
zukkev
Cornfuzzled yet again...
We all were lookin forward to roll, er.....wheel with ya again!!!:redneck: Maybe next time!!! We gotta head your way and hit some trail next spring/summer.....
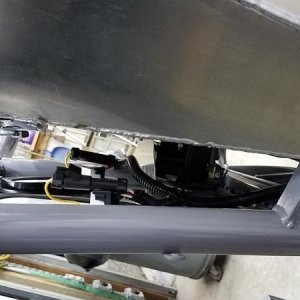
Been getting a little done. Picked up these nice led lights for turn signals. The only problem was finding a center for the pilot of the holesaw:eeek: So I used a larger holesaw and made a couple of large discs to cover the factory holes. Screwed them to the grill after centering the pilot hole in the center of the existing hole and then drilled out with the right size holesaw using the existing pilot hole for a guide. Worked pretty slick and the light fit nicely.
Attachments


Totalled
That Ford Guy
Damn... And I thought **** was close in my bronco... :eeek:
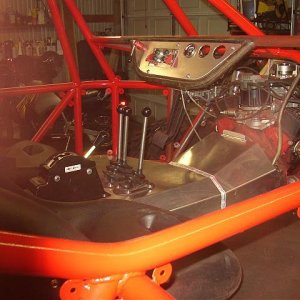
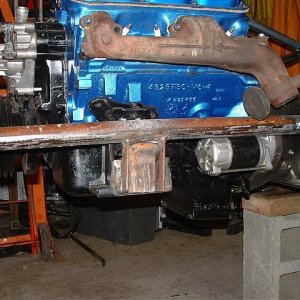
heres what I got done this weekend. I have been trying to get everything mounted where it will go so that I dont have to drill to many holes or do any more welding once the paint is done. I finaly got the welder mounted up. Found a nice dry spot where the glovebox used to be Also got the 160 amp alternator installed. Hacked out the rear wheel wells so the TJ flares would fit. These make a nice fit with the 35s. Got the grill back on and the lights mounted. Found out the H4s are a little deeper than standard bulbs so I had to relocate the wiring a little bit Got tired of having all of the plumbing for the OBA tank (using a air compressor type regulator) So I got a Kilby type preasure switch and made up a manifold for all of the fittings. The tank will be going under the passenger seat.
Attachments


zukkev
Cornfuzzled yet again...
Coming right along!!!:awesomework: Notice the spacing between the front turn signal bulb and the rubber on the backside where the wiring is? Shove that light in til the front is flush with the rubber ( you don't have 'em in deep enough!!!:redneck: ) There's a reason they call 'em 'flush-mounts!!!:haha:
There's a reason they call 'em 'flush-mounts!!!:haha:Coming right along!!!:awesomework: Notice the spacing between the front turn signal bulb and the rubber on the backside where the wiring is? Shove that light in til the front is flush with the rubber ( you don't have 'em in deep enough!!!:redneck: )
jeeze put away the microscope:haha: I didnt push em in all the way since their coming back out to paint:haha:
zukkev
Cornfuzzled yet again...
No Microscope--->> lazer eyeballs!!!!:haha: How's it comin along-updates???:corn:


Not Jobless
Mr Funbags
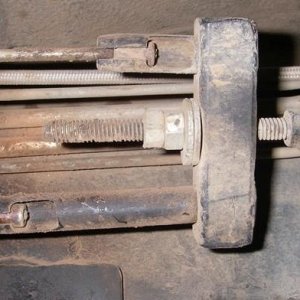
You running those in stock shafts?
You running those in stock shafts?
Yes:fawkdancesmiley:
zukkev
Cornfuzzled yet again...
TTT.....Progress Report????????????:stirpot:
zukkev
Cornfuzzled yet again...
Getting ready to paint. Just bought a new paint booth from costco tonight:cheer:
:redneck:
wheelinjp
Well-Known Member
Cool jim. are you working much? I need to stop by and hang with ya, its been a while again. Maybe monday. What color are you gonna go with? Is your steering still pink? I think it would look good silver. Are you using that same kind of paint tankota used? what was that stuff called? It should turn out nice. :cheer: