Stephen Broady's "An Actual Trail Rig" build

Hardline Crawlers - Rock Bouncer Builds, Tech & Off-Road Trail Talk

Help Support Hardline Crawlers:

Nick,
It's built with a 14 bolt pinion. So ID of the bearing is 1-5/8". It's pretty beefy. I ran a very similar size in my old buggy. It lasted years of trail wheeling before mud killed the bearing itself when I was racing ECORS. The ball bearings were gone and the only thing left was the housing with the drive shaft beating around inside it and we made it to the finish line with it like that. Probably half a lap or more at the Durham town? GAP? race.

I've used this set up or very similar in every buggy I've built and a couple buddies with the same platform as well.

It's proven and works. Is it super bling? No. If he was desert racing, high speeds for hours, I'd go a different direction. But who knows, it may hold up to that too. But I'd be more comfortable doing something oil bath for a sustained high speed application.

I assumed it was big (hard to get a size reference in pictures ya know). I was lookin at the housing itself, being webbed out on the backside (and I'm assuming some sort of cast iron). Sounds like you've failure tested the housing too!
I figured you knew what you were doing to put it on a rig of this caliber.

I used a 4 bolt flange housing one with a 1 piece bracket, worked great. It was a self aligning, just clamped to the OD of a driveshaft slip. That took care of the movement of the (not hard mounted) drivetrain.


All those custom bearing housings and whatnot that people use seem a bit excessive when a standard industrial part will work
 
Last edited:
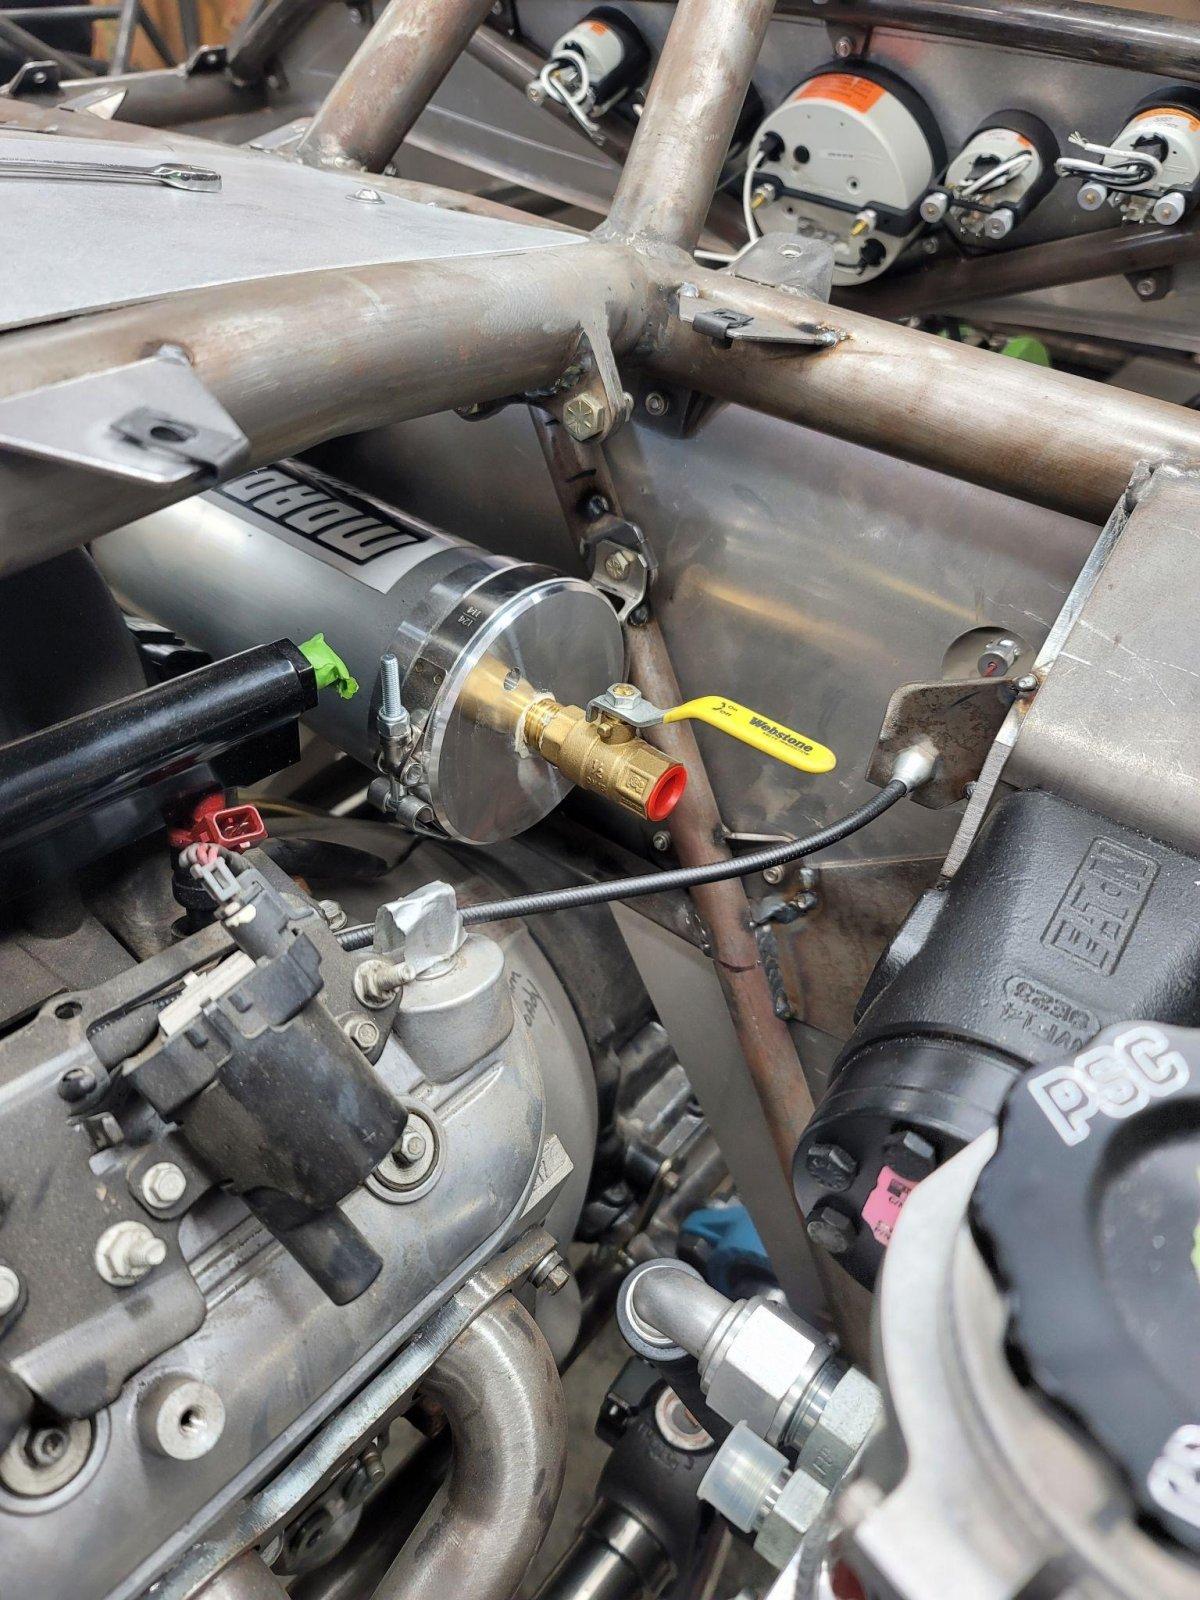
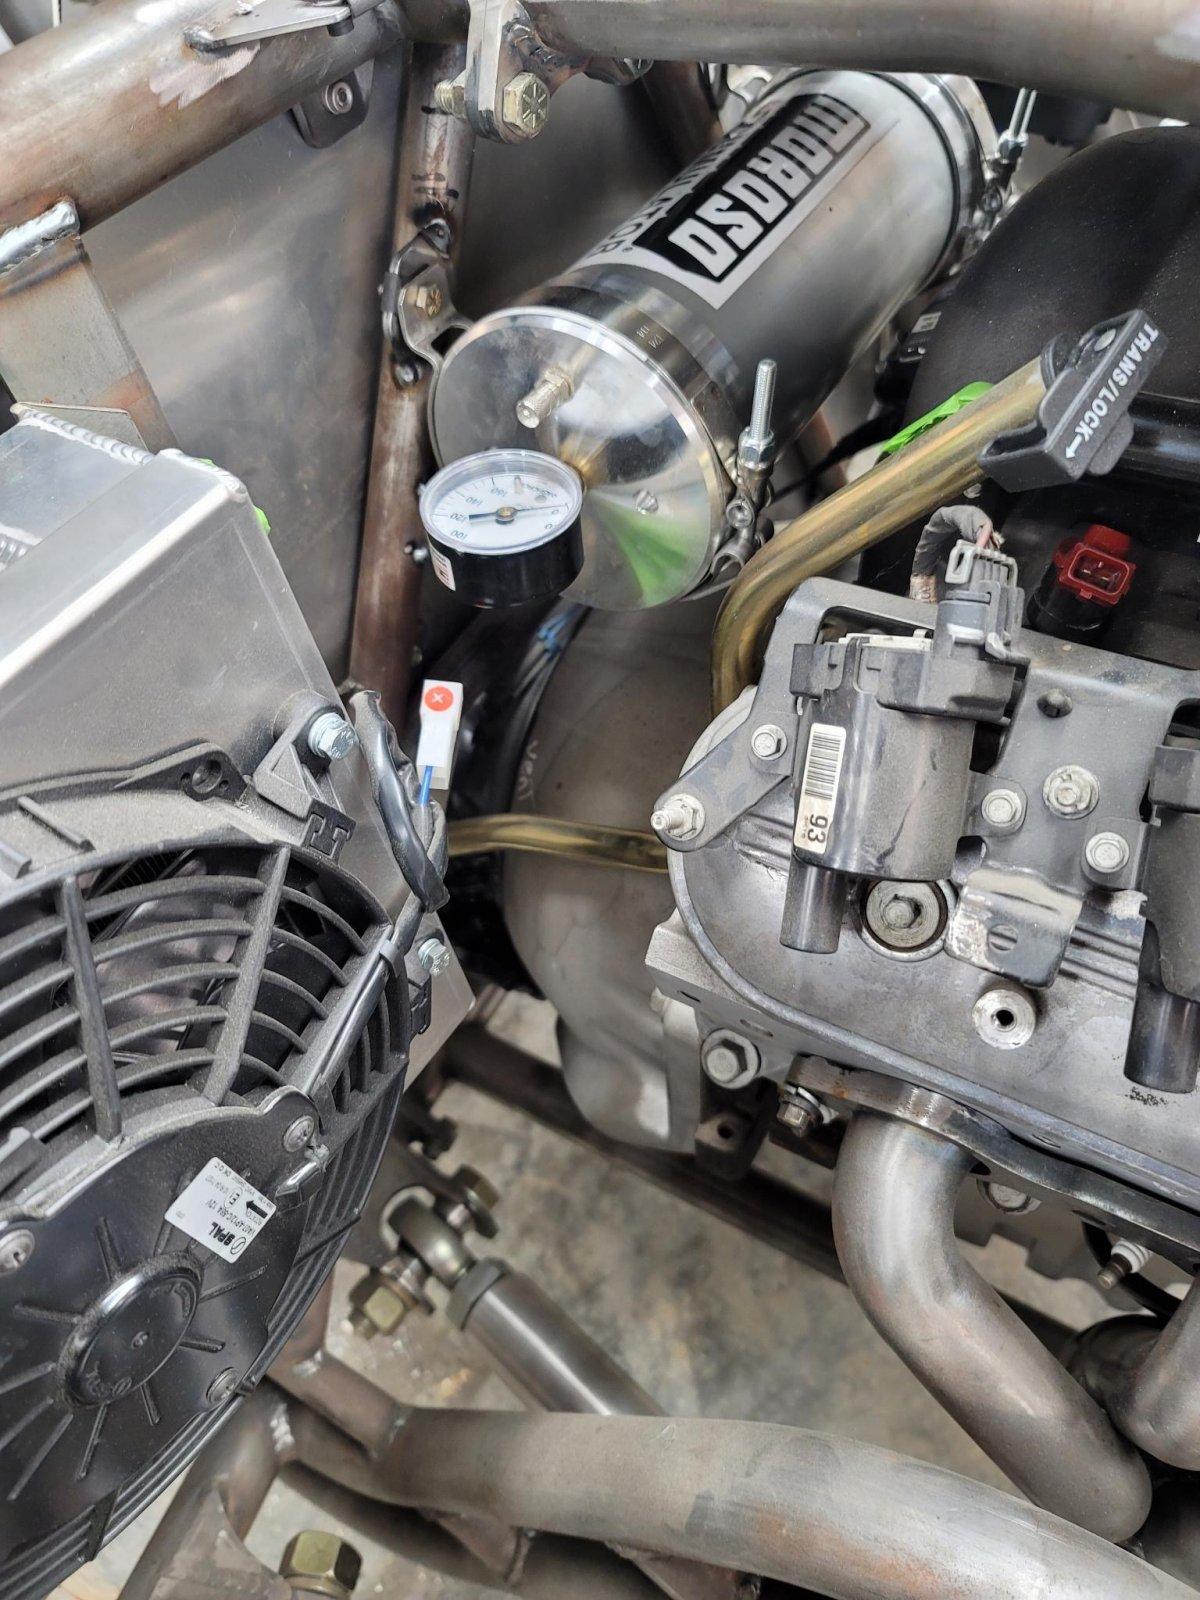
Moroso oil accumulator mounted

1FD632D2-D59C-46F5-93AC-783D65C262E1.jpeg
F5BE2255-9612-496A-BCD2-729870F3DD9A.jpeg
 
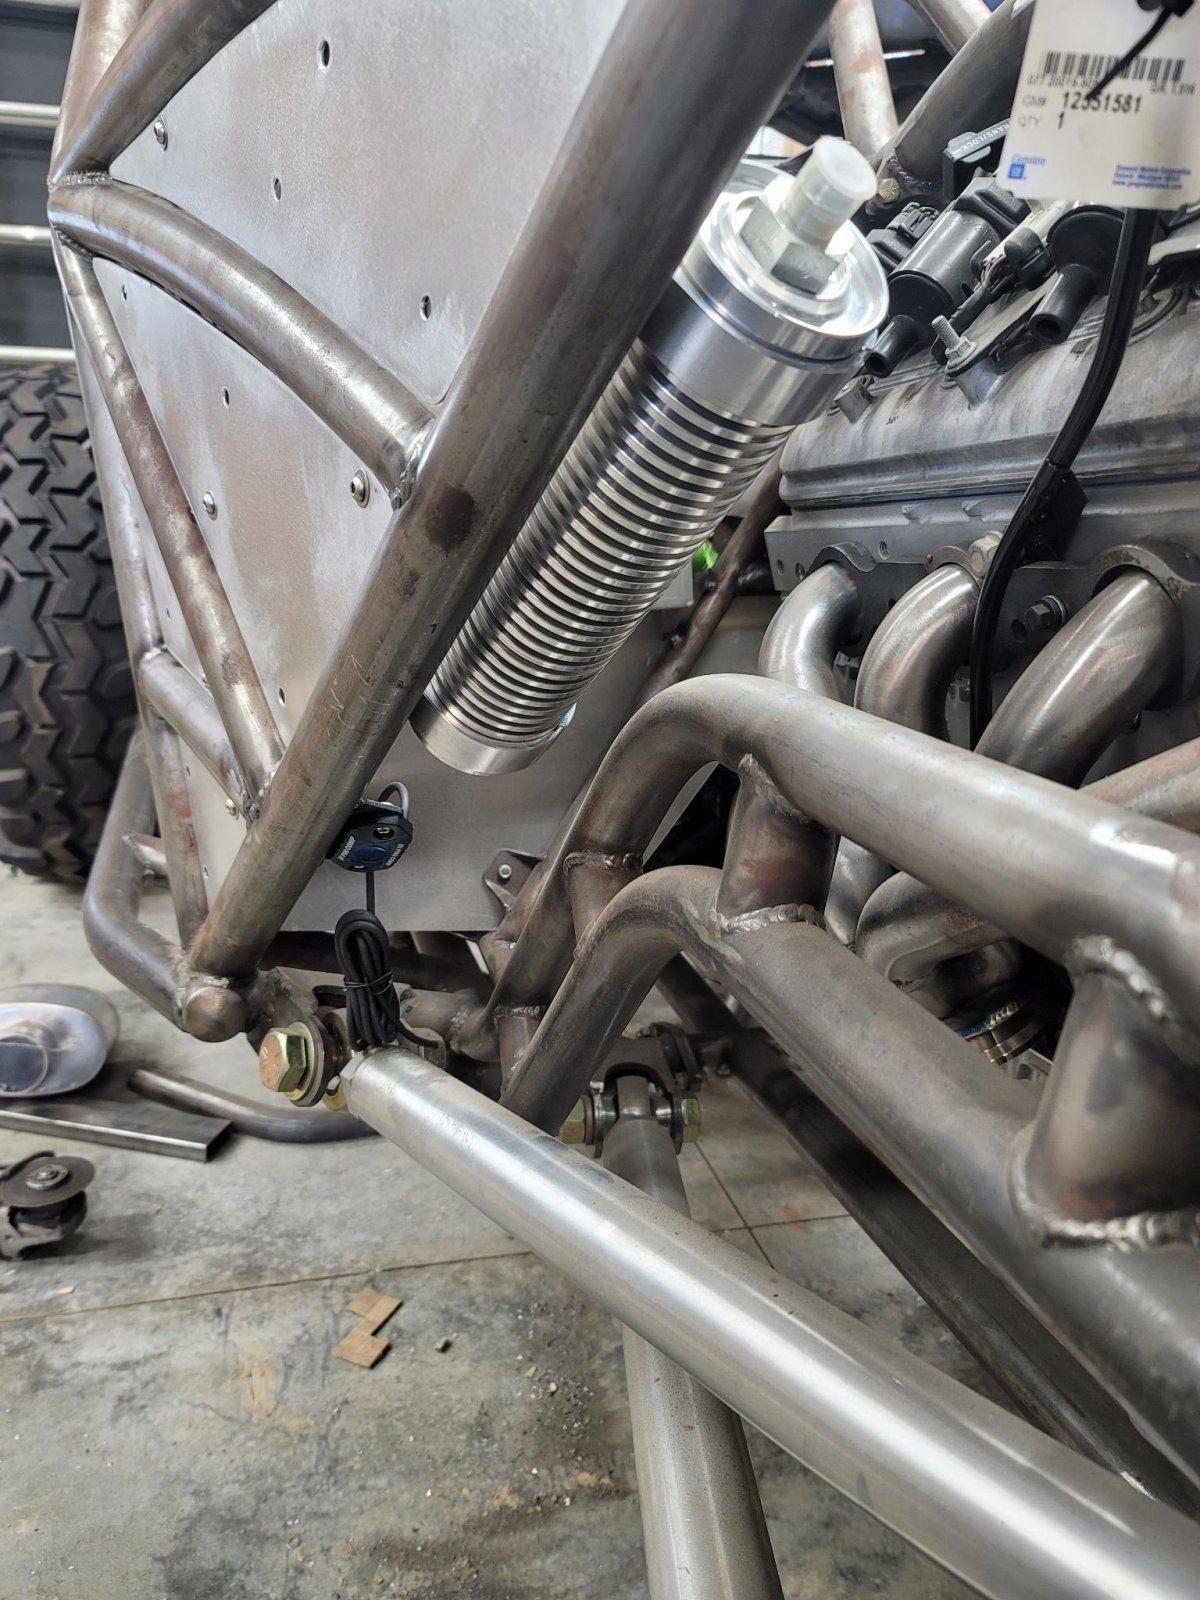
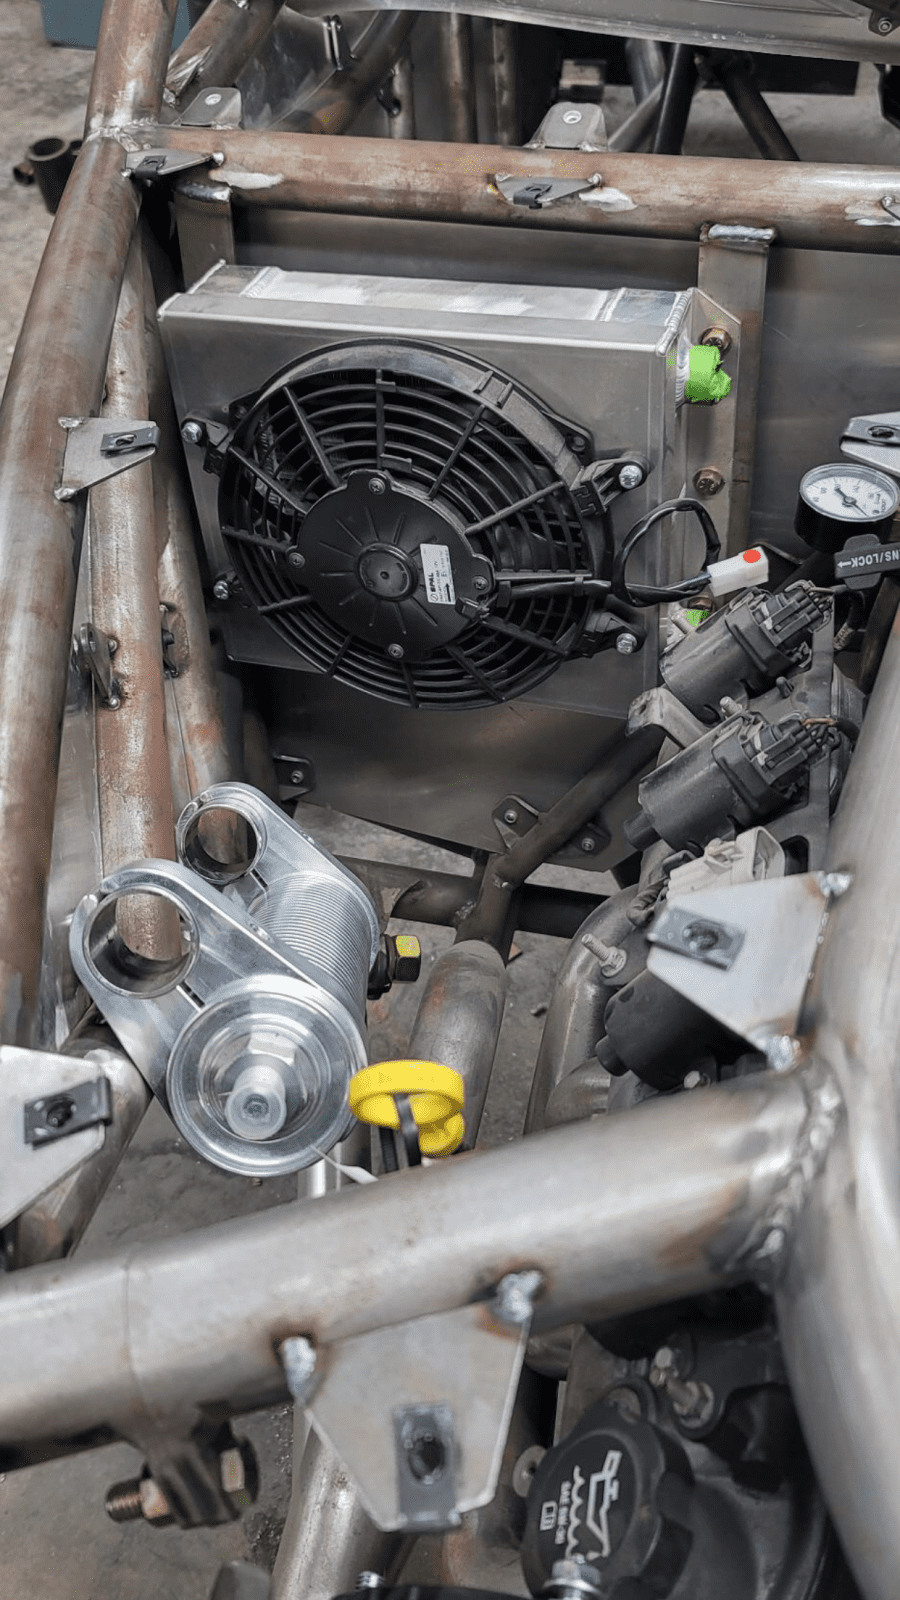
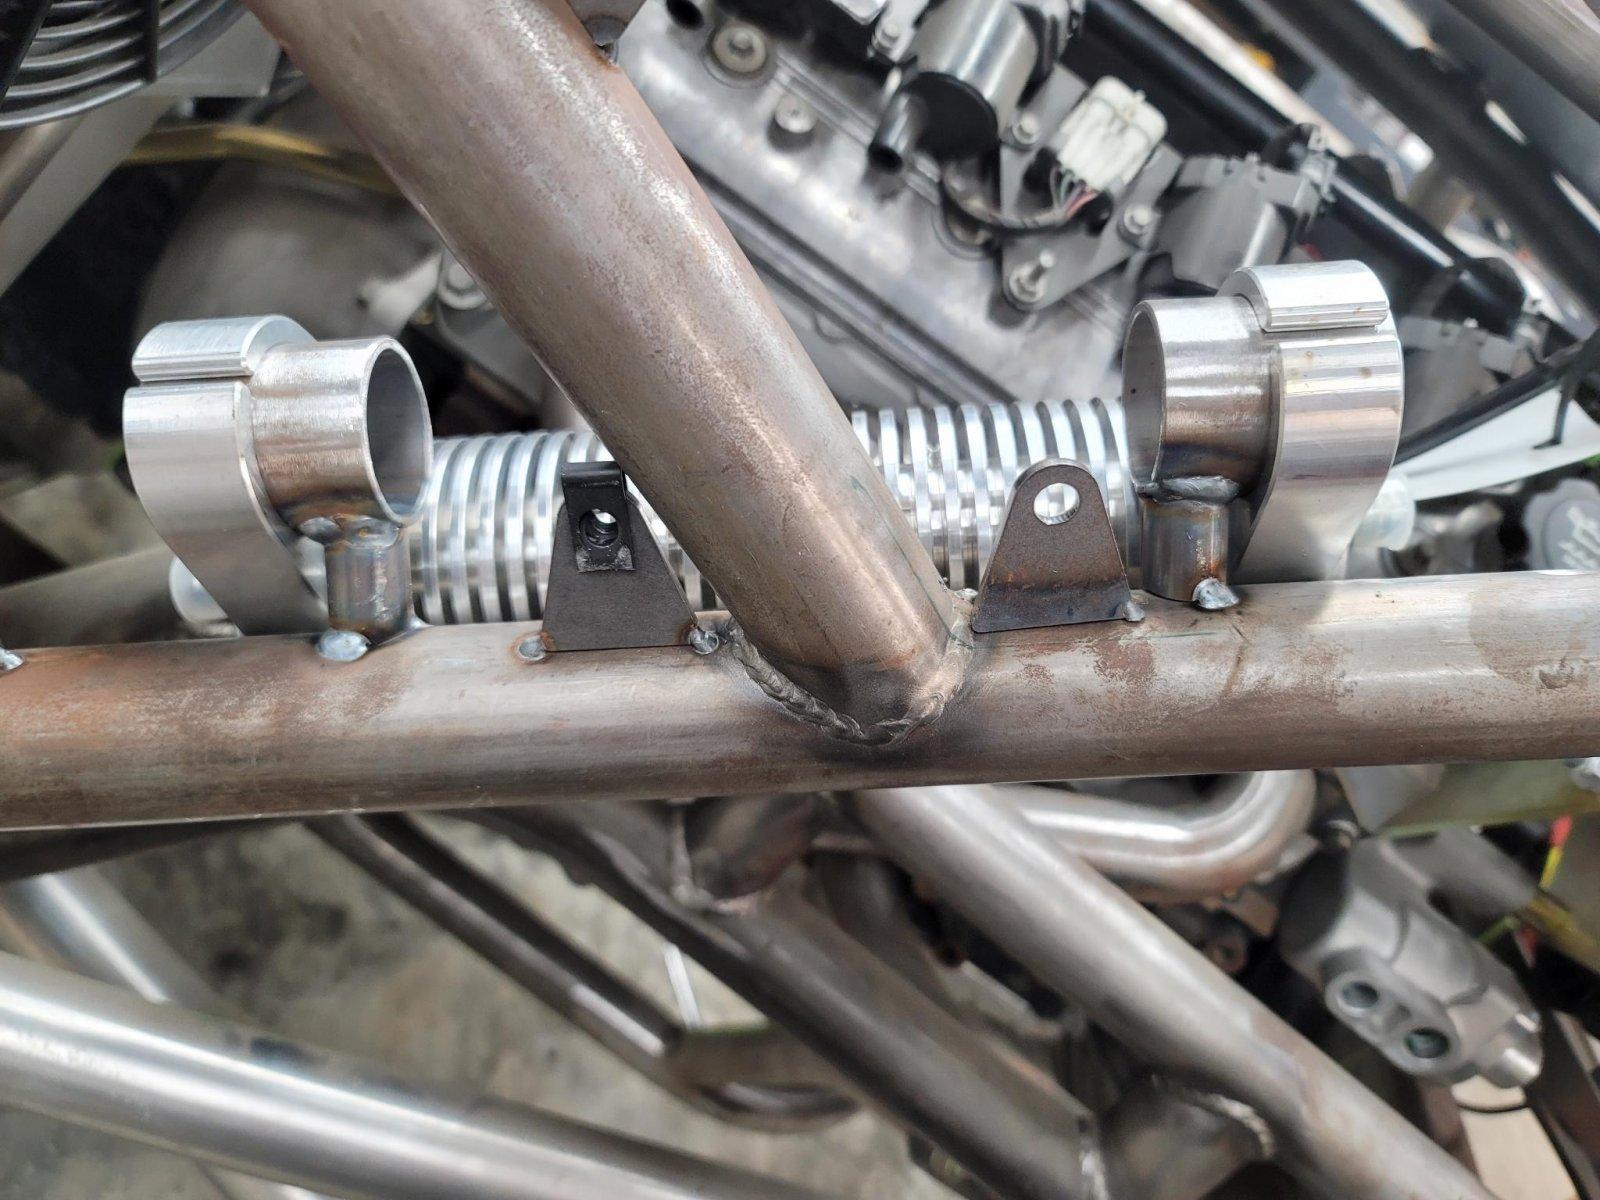
Howe in-line steering cooler mocked up.
Went with the larger 3”x12” diameter. P#1150

Chris built some cool stand-offs with tube so it would mount without protruding through the side panels. It will be rotated up some from these pics to mitigate possible damage.

938E041A-ECEA-42CA-A0FF-10675BF16176.jpeg
4EBA09A1-3122-4FB8-9785-48F6066375C2.png

0EC45CD3-6513-471C-A5B4-83276EF5991D.jpeg
 
Howe in-line steering cooler mocked up.
Went with the larger 3”x12” diameter. P#1150

Chris built some cool stand-offs with tube so it would mount without protruding through the side panels. It will be rotated up some from these pics to mitigate possible damage.

View attachment 148688View attachment 148689
View attachment 148690
I have the same howe Coolers for my rig, I have always seen them mounted side to side I'm curious if it matters. one of the last things I'm buttoning up on my rig is where to clamp the steering coolers front and rear.
 
As an Amazon Associate we earn from qualifying purchases. Product prices and availability are accurate as of the date/time indicated and are subject to change.
I have the same howe Coolers for my rig, I have always seen them mounted side to side I'm curious if it matters. one of the last things I'm buttoning up on my rig is where to clamp the steering coolers front and rear.

It's more about air flow than mounting orientation.

Front of the chassis has zero space.
 
Whats the plan on the valve for the accusump? I'm guessing swapping to electric or do you just plan to use it for a preoiler?
 
Whats the plan on the valve for the accusump? I'm guessing swapping to electric or do you just plan to use it for a preoiler?
Just a little extra security in case I lose pressure for whatever reason.
Won’t be adding the electronic valve. I don’t plan on messing with a valve every time I stop/ start it.
 
I think I’d have cut/milled the tube clamp side off and bolted it to some tabs.

Or use worm clamps and resi mount tabs?

Just a little extra security in case I lose pressure for whatever reason.
Won’t be adding the electronic valve. I don’t plan on messing with a valve every time I stop/ start it.

That how mine is, I never touch the manual valve and it works great.
 
Broady
I installed a electric valve in mine that is energized with the ignition switch. That did a few thing for me. First with the accumulator i was not smart enough to check my oil . The LS pans dont have a lot of room for extra oil,so mine leaked a lot . I blamed it on the accumulator dumping all the oil in the pan when not running. So with the electric valve , when i shut off the motor the oil is trapped. I can easily check my oil, without a calculator to add or subtract the oil from the accumulator. Second , every-time i turned the ignition on the engine was flooded with oil ,so my engine was always per oiled. Third they are less than $20 on ebay , and mine has lasted over 5 years.
 
Broady
I installed a electric valve in mine that is energized with the ignition switch. That did a few thing for me. First with the accumulator i was not smart enough to check my oil . The LS pans dont have a lot of room for extra oil,so mine leaked a lot . I blamed it on the accumulator dumping all the oil in the pan when not running. So with the electric valve , when i shut off the motor the oil is trapped. I can easily check my oil, without a calculator to add or subtract the oil from the accumulator. Second , every-time i turned the ignition on the engine was flooded with oil ,so my engine was always per oiled. Third they are less than $20 on ebay , and mine has lasted over 5 years.
Definitely some good points there. I'll keep that in mind.

If I went that route, I like the idea of being energized with the ignition switch for sure.
 
Or use worm clamps and resi mount tabs?

Hose Clamps?:eek:

Nah, get out of here with that peasantry.


You cant' see the mounts after the body panel is on, so I wouldn't change it at this point.

No worm gear clamps will be harmed in the making of this buggy.

The goal is to keep this thing clean. I don't want clamps and zip ties everywhere.

So I made the stand offs for the steering cooler to clamp to instead of cutting holes in panels and having them seen. It'll be covered by the panels.
 
I was just pointing out another way of doing things that works good. Zip ties and hose clamps are all over trophy trucks. They aren't bad.

I also understand the whole idea behind the solution that was chosen here. High end look and all.
 
I was just pointing out another way of doing things that works good. Zip ties and hose clamps are all over trophy trucks. They aren't bad.

I also understand the whole idea behind the solution that was chosen here. High end look and all.

I'm with ya man, yeah we just want this one to be as nice as possible initially. It pained me to order my fire extinguisher mounts that use band clamps this week ..just couldn't justify $150/ pop or so for bling + the cost of the extinguishers. So it will in fact have a few band clamps. :(
 
what kinda mounts did you get? I'm sure wizzo and the hive mind here could come up with an alternate mounting method.
 
Broady
I installed a electric valve in mine that is energized with the ignition switch. That did a few thing for me. First with the accumulator i was not smart enough to check my oil . The LS pans dont have a lot of room for extra oil,so mine leaked a lot . I blamed it on the accumulator dumping all the oil in the pan when not running. So with the electric valve , when i shut off the motor the oil is trapped. I can easily check my oil, without a calculator to add or subtract the oil from the accumulator. Second , every-time i turned the ignition on the engine was flooded with oil ,so my engine was always per oiled. Third they are less than $20 on ebay , and mine has lasted over 5 years.

This is what I was thinking about when I asked. I put the valves on them that run off the ign switch relay with a toggle hidden under the dash. Extra switch is there to shut it off for maintenance or hooking up to the computer without ever needing to start the motor.

I didnt want that much extra oil in the pan if it wasnt running, and as Roger mentioned..I'm to lazy to keep up with this much more oil or trying to put a new mark the dipstick.
 
Broady
I installed a electric valve in mine that is energized with the ignition switch. That did a few thing for me. First with the accumulator i was not smart enough to check my oil . The LS pans dont have a lot of room for extra oil,so mine leaked a lot . I blamed it on the accumulator dumping all the oil in the pan when not running. So with the electric valve , when i shut off the motor the oil is trapped. I can easily check my oil, without a calculator to add or subtract the oil from the accumulator. Second , every-time i turned the ignition on the engine was flooded with oil ,so my engine was always per oiled. Third they are less than $20 on ebay , and mine has lasted over 5 years.

I took a small punch to my dip stick and marked it at 6 quarts, added the extra for the accumulator and then marked it again. I've never been accused of being smart but it seems to work fine.
 
Specs:
WOD rock bouncer chassis
6.0L LS based motor
TH400 from PTC w/ ultra bell
Atlas 3.0 race case w/ Mark Williams 1410 yokes and strap kits
Crane 14 bolt from with magnum C's and Knuckles, Mark Williams spool
14 bolt rear w/ Mark Williams 300M shafts
Radflo 2.5 coil-overs all around
Radflo 2" air bumps
CBR radiator and transmission cooler

Stephen Broady brought this to me as some what of a roller. He had WOD set up as a roller but he decided to make some improvements. He swapped from ORI's in favor of the Radflo 2.5 coil-overs. He had a passenger drop HP60 and went to the 14 bolt front. He had it set up with a standard Atlas and upgraded to the race case. Swapped from a griffin radiator to a CBR with cradle or "sandwich" style mounting. All of these changes required a bit of modifications to what was already there.

I'll let Broady add info as well, this is his build thread. I'm just lucky enough to have good friends that trust me to work on their buggys!
Specs:
WOD rock bouncer chassis
6.0L LS based motor
TH400 from PTC w/ ultra bell
Atlas 3.0 race case w/ Mark Williams 1410 yokes and strap kits
Crane 14 bolt from with magnum C's and Knuckles, Mark Williams spool
14 bolt rear w/ Mark Williams 300M shafts
Radflo 2.5 coil-overs all around
Radflo 2" air bumps
CBR radiator and transmission cooler

Stephen Broady brought this to me as some what of a roller. He had WOD set up as a roller but he decided to make some improvements. He swapped from ORI's in favor of the Radflo 2.5 coil-overs. He had a passenger drop HP60 and went to the 14 bolt front. He had it set up with a standard Atlas and upgraded to the race case. Swapped from a griffin radiator to a CBR with cradle or "sandwich" style mounting. All of these changes required a bit of modifications to what was already there.

I'll let Broady add info as well, this is his build thread. I'm just lucky enough to have good friends that trust me to work on their buggys!
Curious why you dumped the ORI’s for coil overs? I have heard good things about the ORI shocks but have no experience with them.
 
Curious why you dumped the ORI’s for coil overs? I have heard good things about the ORI shocks but have no experience with them.
I've ran them both before and prefer the ride and performance of a tuned coilover.
ORIs have their place, I ran a set on a 4 cylinder rig for years and had no complaints. They do just fine in slower speed applications IMO.
I don't think I would ever buy a new set again unless I was just completely strapped for room on a rig. Not having to run bump stops and a sway bar does help with packaging.
 
Curious why you dumped the ORI’s for coil overs? I have heard good things about the ORI shocks but have no experience with them.

I've ran them both before and prefer the ride and performance of a tuned coilover.
ORIs have their place, I ran a set on a 4 cylinder rig for years and had no complaints. They do just fine in slower speed applications IMO.
I don't think I would ever buy a new set again unless I was just completely strapped for room on a rig. Not having to run bump stops and a sway bar does help with packaging.

It's cause he wants to go fast!
 
Back
Top