• Help Support Hardline Crawlers :

The Dirt Squirrel v. 2.0 -- Even Dirtier

Definitely dont want my new tires to contact the sheet metal. I made that mistake with my 43s and the result was some custom siping in the lugs. trying to avoid that this time around.
 
Sliced and diced the bedside last night. Took 29" out of it and trimmed the fender radius to accommodate for full flex/stuff. Its about 1/2" off the tire. Pretty stoked the way it turned out. Looks like a truck again. I am probably going to skin the tube work with some AL to keep mud/water/**** out of the bed area.

At full flex.


8" down near right height. You can see all that space that i can fill in with some aluminum. Should come out nice.
 
Move them back and build landing pads similar to this. The high rises on the axle.

4dc15c85807f6d9e8743423f96a26aa7.jpg
 
After discussing with a wise man I decided to go ahead and French in the bump cans. Came out pretty clean. Need to.build some pads on the truss, but they are in.


Next up in the winch mount. Looks like I should be able to squeeze the radiator up front as well.
 
Knocked out the winch mount this morning. Simple and strong. It fits behind the grille out of sight. I should be able to fit my radiator up front. I ordered a Griffin 26x15.5x3 LS swap radiator on summit yesterday. Should be in next week, then we will see.

Pics of the mount. I cut up my other mount to make this one permanent.


My only problem is your shop is way too small. Poorly lit and way too cluttered with a dirty floor. I could never work in those conditions. . . . Lol
 
LightBnDr said:
My only problem is your shop is way too small. Poorly lit and way too cluttered with a dirty floor. I could never work in those conditions. . . . Lol

lol. Yeah it sucks sometimes. Should have went bigger. ;)
 
Steering is in. Reused the ram i had on the last build and made it line up in the truss. Fitting on top of the ram clear everything, but its a pretty tight fit. Bonus is that i can reuse my tie rods by offsetting the ram towards the drivers side.


I have some more welding to do, then its coming off the table as a roller. I ordered up my Griffin LS swap radiator from Summit, so that should be in tomorrow. Hope to get that mocked up up front.
 
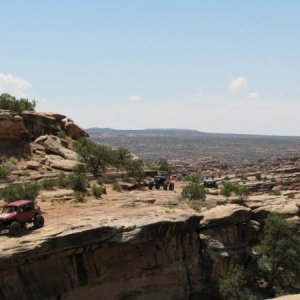
My Tk1 Racing sway bar came in. Initial impression was great overall quality. Fit an finish of the aluminum arms were nice with tight tolerances. Sent a few pics into to Tony to check out my arrangement then made a few changes based on his expertise.

First iteration. Everything is setup at 50% travel of the coilover (ride height). I set the arm level to the earth and my end links were 16" (Same as coilover travel).


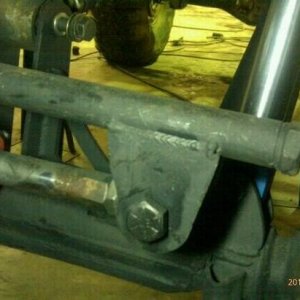
Kinda hard to tell, but the axle mount is offset 2" outward.


2nd iteration was after sending pics in to tony. the arm is angled up more at ride height.


After drilling holes in my frame, I installed a 33" piece of 1.75x.120 tube and installed the swaybar without the end bushings as they were a tight press fit into the tube and i havent fully welded it yet.


Same 2" angle at the axle end.


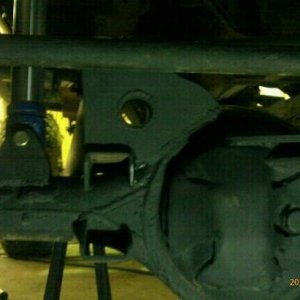
Checked clearances at full bump. The arm clears the tubing with some room to spare.


I then tried to repeat the setup on the passenger side. This is where i think i ran into an issue with the swaybar itself. I couldnt get the angles of the arms to match up, so i took the bar out and came to the conclusion that the spines are off a few degrees off on either end not allowing the arms to stay at the same angle. I am assuming this is a flaw. I emailed tony late last night with the pics below so i will see what he thinks. Maybe im overthinking it.

One side is perfectly level on the table.


Other side not so much. If i go the next spline the other way, it gets even worse. This is as close as i could get it.


Gap underneath.


In the meantime while i wait to figure this out, ill fully weld in the tube and brace it to the frame front and rear.
 

Latest posts

Top