WideOpenDesign
Off-Road Parts Superstore
See the full gallery here: http://www.wideopendesign.com/Project/29/Wiloughbuy-Evolution.aspx
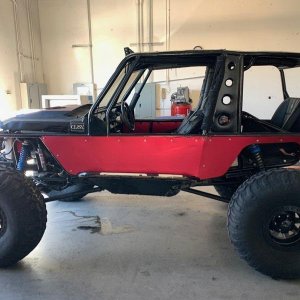
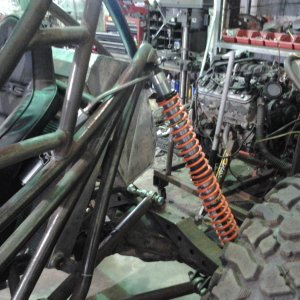
Jeff Willoughby came to us earlier this year with the idea of building one of our Evolution chassis. He wanted to change up the looks of the chassis with some extra tube work in the sides and inset body panels. He brought us a 383 GM crate engine, TH 400, and a 4 speed Atlas. He also had a set of Chevy one ton axles. We threw a set of RCV’s and a locker in the front axle and then a set of disk brakes at the rear. We kept it as simple as possible with this build but packaged it together in a neat way. We put the chassis on a stand and started all of the normal 4-link and drive train placement. As soon as all of that was set we knew we needed to raise the roof in the chassis to fit the seats around the 4 speed Atlas. After we had the seats in we were well on our way with the build. Next, we began the unique part of the build and started placing the extra tube work in the chassis to achieve the look Jeff was wanting.


After these pics the project was well on its way and the canvas was set to put all of the inset body panels in the buggy. Pics get pretty much fast forwarded from here to a finished fully fabbed roller. The inset body panels take a lot of time. We have never done a set in house, but the look they give the buggy is really cool. Inset panels don’t seem to get messed up near as bad as standard body panels either. It’s more work on the front side, but you get a unique look and incur less maintenance. It’s a good trade off if you like the look.


After all of the sides were done we had to do the inset hood panel. This was the hardest part of the entire sheet metal work on the buggy. The hood needed to bend in 3 different planes, so we had to split it right down the middle. While we had it split apart we went ahead and bead rolled it and added a character line to the center of the hood. It was a small touch that added a lot of style to the hood.


Jeff really wanted a cool dash. He brought us a sketch of what he wanted done and we worked off of that. It was pretty cool to have a little guidance and Jeff really liked the finished product.


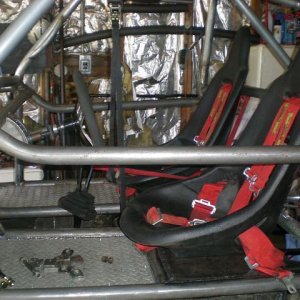
Another cool thing about the interior is the seats. PRP now has a “Mud Trap” seat option that allows water to run right out of the back of the seat. Anyone that has had to splash water out of their seat or ride around in a wet seat all day will see why this is such a good option.


We went with a set of March pulleys on the engine. They look good and usually work well. The front axle had a lot of up travel which meant we needed to move the power steering bracket up. So we took the March brackets and modified them a little bit. Then we added in another brace to support the top of the bracket and everything lined up good from there.


Here you can see how we mounted the steering reservoir and the hydro boost unit. If there is an upgrade I would advise anyone to look into, its hydro boost brakes. They just work too well not to use.

We usually have plenty of room to mount the trans cooler on the passenger side fire wall. But the extra tube work in this buggy pushed the trans cooler over off of the fire wall a little. We filled in that gap with the steering cooler and it turned out looking just fine.

Here are a few shots of the floor boards.


Here are a few shots of the under carriage. Notice how we don't mount anything off of the belly pan. We make sure there is room for it to be impacted and move but not hit the drive train at all.


Jeff Willoughby came to us earlier this year with the idea of building one of our Evolution chassis. He wanted to change up the looks of the chassis with some extra tube work in the sides and inset body panels. He brought us a 383 GM crate engine, TH 400, and a 4 speed Atlas. He also had a set of Chevy one ton axles. We threw a set of RCV’s and a locker in the front axle and then a set of disk brakes at the rear. We kept it as simple as possible with this build but packaged it together in a neat way. We put the chassis on a stand and started all of the normal 4-link and drive train placement. As soon as all of that was set we knew we needed to raise the roof in the chassis to fit the seats around the 4 speed Atlas. After we had the seats in we were well on our way with the build. Next, we began the unique part of the build and started placing the extra tube work in the chassis to achieve the look Jeff was wanting.
After these pics the project was well on its way and the canvas was set to put all of the inset body panels in the buggy. Pics get pretty much fast forwarded from here to a finished fully fabbed roller. The inset body panels take a lot of time. We have never done a set in house, but the look they give the buggy is really cool. Inset panels don’t seem to get messed up near as bad as standard body panels either. It’s more work on the front side, but you get a unique look and incur less maintenance. It’s a good trade off if you like the look.
After all of the sides were done we had to do the inset hood panel. This was the hardest part of the entire sheet metal work on the buggy. The hood needed to bend in 3 different planes, so we had to split it right down the middle. While we had it split apart we went ahead and bead rolled it and added a character line to the center of the hood. It was a small touch that added a lot of style to the hood.
Jeff really wanted a cool dash. He brought us a sketch of what he wanted done and we worked off of that. It was pretty cool to have a little guidance and Jeff really liked the finished product.
Another cool thing about the interior is the seats. PRP now has a “Mud Trap” seat option that allows water to run right out of the back of the seat. Anyone that has had to splash water out of their seat or ride around in a wet seat all day will see why this is such a good option.
We went with a set of March pulleys on the engine. They look good and usually work well. The front axle had a lot of up travel which meant we needed to move the power steering bracket up. So we took the March brackets and modified them a little bit. Then we added in another brace to support the top of the bracket and everything lined up good from there.
Here you can see how we mounted the steering reservoir and the hydro boost unit. If there is an upgrade I would advise anyone to look into, its hydro boost brakes. They just work too well not to use.
We usually have plenty of room to mount the trans cooler on the passenger side fire wall. But the extra tube work in this buggy pushed the trans cooler over off of the fire wall a little. We filled in that gap with the steering cooler and it turned out looking just fine.
Here are a few shots of the floor boards.
Here are a few shots of the under carriage. Notice how we don't mount anything off of the belly pan. We make sure there is room for it to be impacted and move but not hit the drive train at all.




![IMG_2855[1].jpg](https://cdn.hardlinecrawlers.com/xfmg/thumbnail/17/17615-df9f362e63525e6efa61788b453d6ae6.jpg?1782993743)