-
Help Support Hardline Crawlers :
You are using an out of date browser. It may not display this or other websites correctly.
You should upgrade or use an alternative browser.
You should upgrade or use an alternative browser.
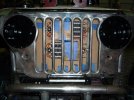
So i bought a 51 Whilly
- Thread starter Hip
- Start date
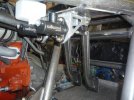
yeah it does, the front end is still floating as i dont have the yoke for the front yet. i can slide the shaft to where i want the u joint to be by the length of the front half. i believe it will be correct when all there. that had been the plan.
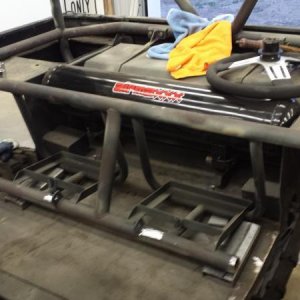
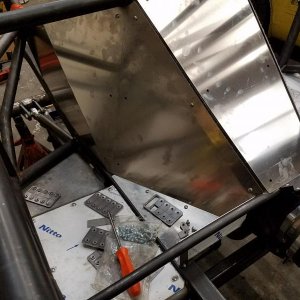
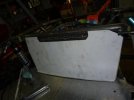
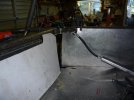
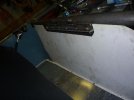
fought with sheetmetal all day today, ended up remaking the rear inside panels again but i like these much better. ill post pictures after i get some dinner.
fought with sheetmetal all day today, ended up remaking the rear inside panels again but i like these much better. ill post pictures after i get some dinner.
the blue and white are just the prepainted surfaces of the same 20 Ga aluminium sheetmetal. my fingers are now all sliced up, i swear i have a hundred little cuts.
it will get skinned on the outside also but i wanted something to keep the crap from the wheels getting in the people compartment.
i need to flex it out with all this crap in place to see what rubs, im worried about droop and springs hitting the bottom of my tub.
it will get skinned on the outside also but i wanted something to keep the crap from the wheels getting in the people compartment.
i need to flex it out with all this crap in place to see what rubs, im worried about droop and springs hitting the bottom of my tub.
Attachments


Last edited:
dove'd85
Well-Known Member
so we need to plan this out... when will you be ready for me to come burn your floors in? and don't for get to get a couple tips and a 1lbs spool of .035:corn:
dove'd85
Well-Known Member
they only have 2 lb spools? i got that and a few tips. soon as today i am tarting on the hump.
also the last two chassis fender bars, then the outside skins.
id reaally like to be done with sheetmetal.
ah i am not sure if that will fit in my spool gun or not... did you happen to take that peice of paper and tip that i brought you for a reference?
i really don't think a two pound spool will fit...
so how about tomorrow night?
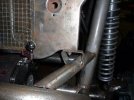
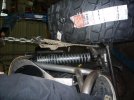
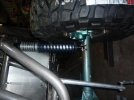
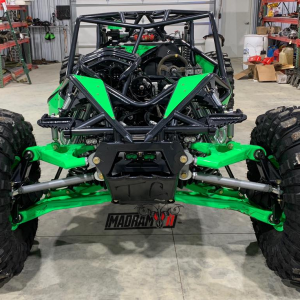
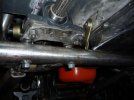
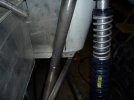
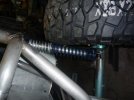
Front tire to spring clearance, spring to chassis clearance. check.
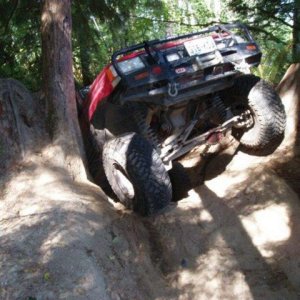
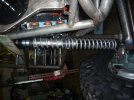
rear spring to tire clearance:eeek: looks like an adjustment to be made here as the tire hits the spring when the frame is twisted up with a hilift as well as the tire pic, at complete stuff, shock on the rubber bump.
rear spring to tire clearance:eeek: looks like an adjustment to be made here as the tire hits the spring when the frame is twisted up with a hilift as well as the tire pic, at complete stuff, shock on the rubber bump.
Attachments
Last edited:
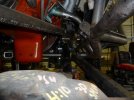
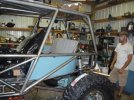
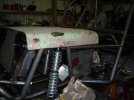
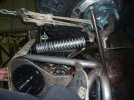
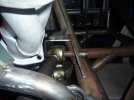
one more at full stuff. the double shear for the upper link mounts. need to get paint on this thing soon. all the rust is from where i have been touching it a lot lately, lot of work right above the drivers feet area and below. i guess you could say ive been working my whilly into a rash.:haha:
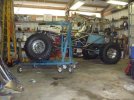
and most importantly my shop helper, she always like to get dirty as she calls it.
and most importantly my shop helper, she always like to get dirty as she calls it.
Attachments

Jason C
Well-Known Member
blue lower springs go on the front.
blue lower springs go on the front.
the blue springs are 16" and the front shocks are 14"? ill pm ya.
Nice progress Hip, I will try and stop by this week for a minute or two. :awesomework:
hey if we think about it when you are here we can load up those 33" rollers you loaned me.
stop by anytime after work. call me if ya can as i have a few errends to run on my way home this week.
hey if we think about it when you are here we can load up those 33" rollers you loaned me.
stop by anytime after work. call me if ya can as i have a few errends to run on my way home this week.
Yeah that was the thought, but I may need to do a couple trips to get them all depending on what I have to drive. I will try and remember to shout first.