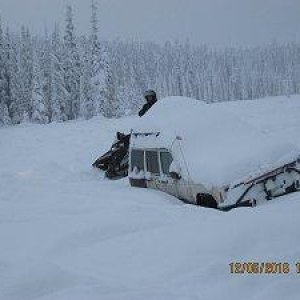
• Help Support Hardline Crawlers :

Yum... Tacos

The frame rails are stripped of all un needed items and prepped for the next step
 

Attachments

  • tmp_3206-20161023_174456678539695.jpg
    tmp_3206-20161023_174456678539695.jpg
    59.7 KB · Views: 198
  • tmp_3206-20161023_1745131137973927.jpg
    tmp_3206-20161023_1745131137973927.jpg
    32.5 KB · Views: 198
  • tmp_3206-20161023_174442-698375936.jpg
    tmp_3206-20161023_174442-698375936.jpg
    56.2 KB · Views: 202
So with the kit you also must toss the stock rear crossmember(bolted in) that used to hold the spare tire. Way back when I built the rear bumper I added a receiver and tied it into the crossmember. Well thats gotta change.
 

Attachments

  • tmp_11932-20161023_102324-1117718318.jpg
    tmp_11932-20161023_102324-1117718318.jpg
    51.5 KB · Views: 189
For ease of removal I cut the member out in 3 pieces. For the center I lopped off the top of the receiver. Worked like a champ.
 

Attachments

  • tmp_11932-20161024_201441-1801407660.jpg
    tmp_11932-20161024_201441-1801407660.jpg
    46.4 KB · Views: 196
Both frame plates burned in. The rear portion simply clamps to the extruded portion of the inner frame and where they ended at the front I recessed them 1/8" into the frame rail. Not my purdiest welding but will be super strong.
 

Attachments

  • tmp_11932-20161024_202856-766937308.jpg
    tmp_11932-20161024_202856-766937308.jpg
    45 KB · Views: 189
  • tmp_11932-20161024_2028401777311302.jpg
    tmp_11932-20161024_2028401777311302.jpg
    51.6 KB · Views: 195
The kit comes with 2 pieces of 1.5" to add a cross member back where the old one was and the front will be for shock mounts. I simply tied the reciever into it--now its super strong.
 

Attachments

  • tmp_11932-20161024_204117-1523545090.jpg
    tmp_11932-20161024_204117-1523545090.jpg
    39.2 KB · Views: 181
One thing I always do it do an alignment bar for the rear measured off the original diff.
 

Attachments

  • tmp_4122-20161025_175547-1801407660.jpg
    tmp_4122-20161025_175547-1801407660.jpg
    66.7 KB · Views: 236
Something I found was the bushings too long for the shackle mount. I just shaved down one side to get a perfect fit.
 

Attachments

  • tmp_20288-20161025_192514-1117718318.jpg
    tmp_20288-20161025_192514-1117718318.jpg
    50.5 KB · Views: 230
  • tmp_20288-20161025_19191527654356.jpg
    tmp_20288-20161025_19191527654356.jpg
    49.1 KB · Views: 226
Working on getting the rear end setup.

They called for 90 degree shackles but I ran them at 10 degrees.
 

Attachments

  • tmp_20288-20161025_184042-1801407660.jpg
    tmp_20288-20161025_184042-1801407660.jpg
    53.9 KB · Views: 226
  • tmp_20288-20161025_205710-766937308.jpg
    tmp_20288-20161025_205710-766937308.jpg
    57.4 KB · Views: 229
Now that the springs are all setup time to whack the perches off and get the housing done.
 

Attachments

  • tmp_30022-20161027_1746511399226879.jpg
    tmp_30022-20161027_1746511399226879.jpg
    49.8 KB · Views: 182
Pinion set and perches tacked into place.
 

Attachments

  • tmp_30022-20161027_185839-715958598.jpg
    tmp_30022-20161027_185839-715958598.jpg
    65.4 KB · Views: 183
Perches burned in and I stripped the housing of all brackets... Love doing it to where ya never knew anything was attached to it.
 

Attachments

  • tmp_30022-20161028_180614-116979721.jpg
    tmp_30022-20161028_180614-116979721.jpg
    47.4 KB · Views: 175
Top