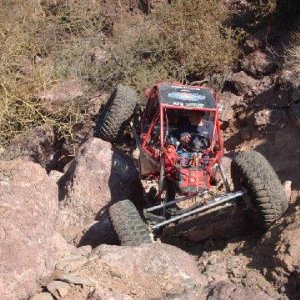
Pm me...... I went to school there. :looser:that is one of the best ideas I've ever seen to compress the springs. I should get ya down to my place (near Glencoe) so I can get your opinion on my build sometime.
Keep up the good work man!
-
Help Support Hardline Crawlers :
You are using an out of date browser. It may not display this or other websites correctly.
You should upgrade or use an alternative browser.
You should upgrade or use an alternative browser.
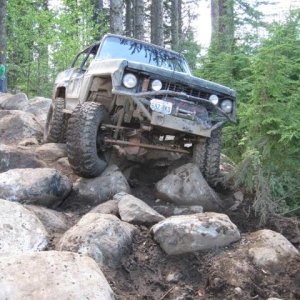
Blueberry Krunch
- Thread starter Mr Stubs
- Start date
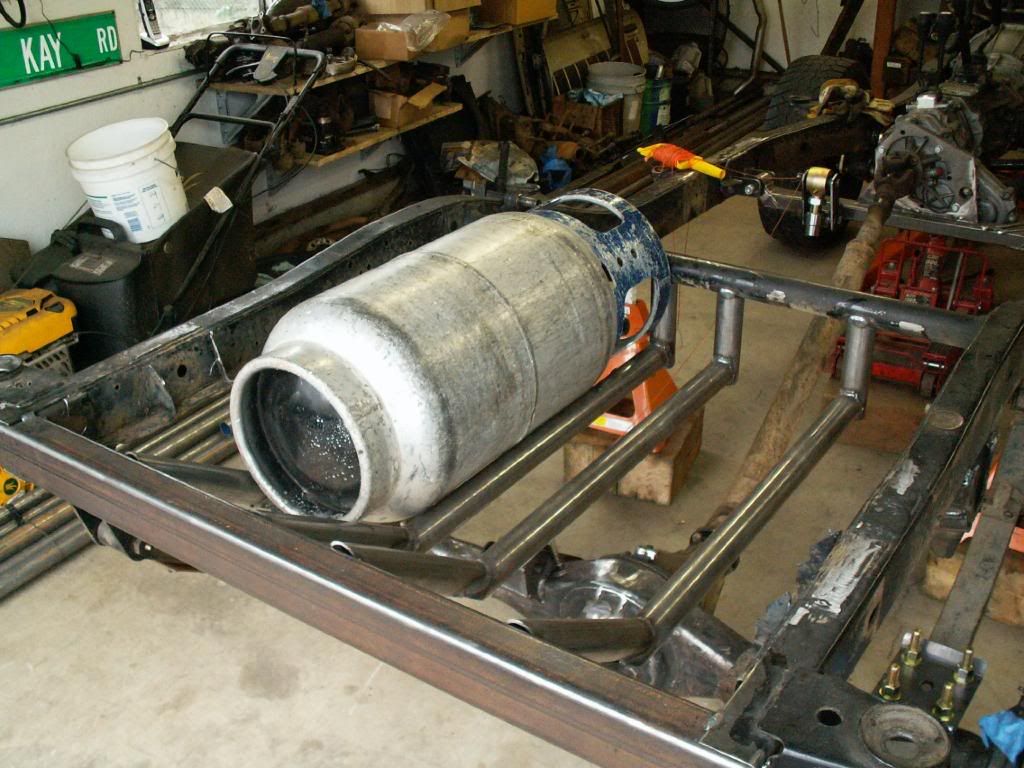
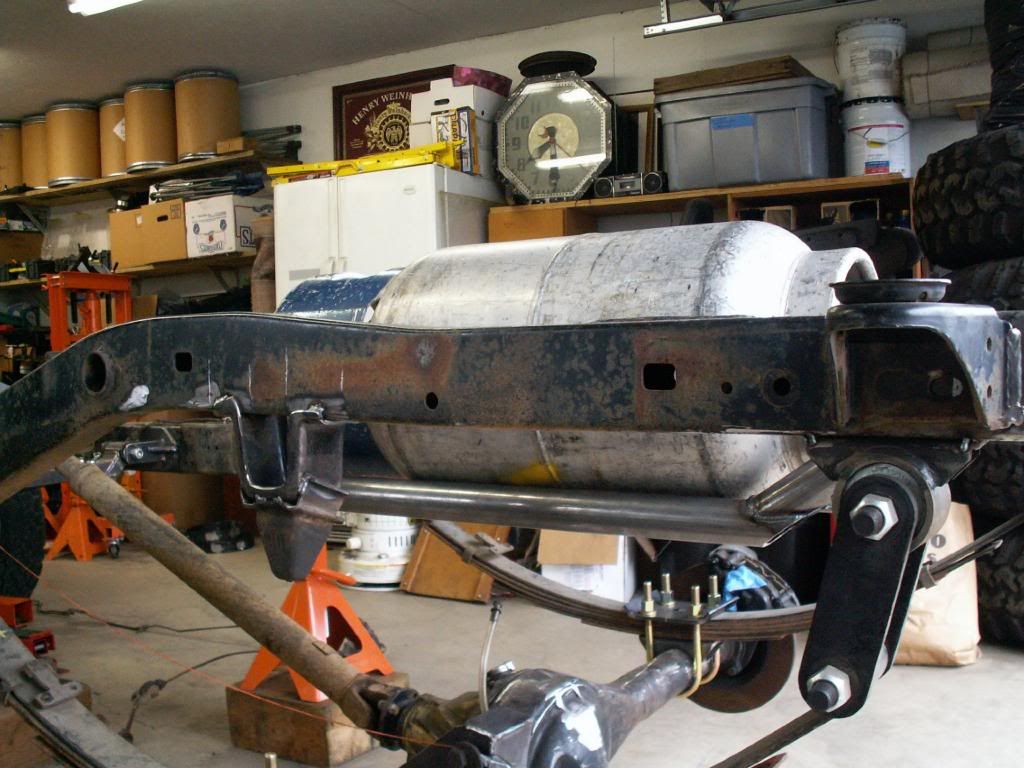
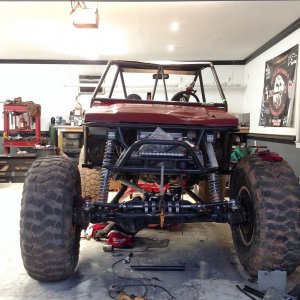
I am close to finishing the pane tank holders. The only thing that I really need to do now is mount the tank clamps. I cant do that right now since will have problems setting the body on if I do.
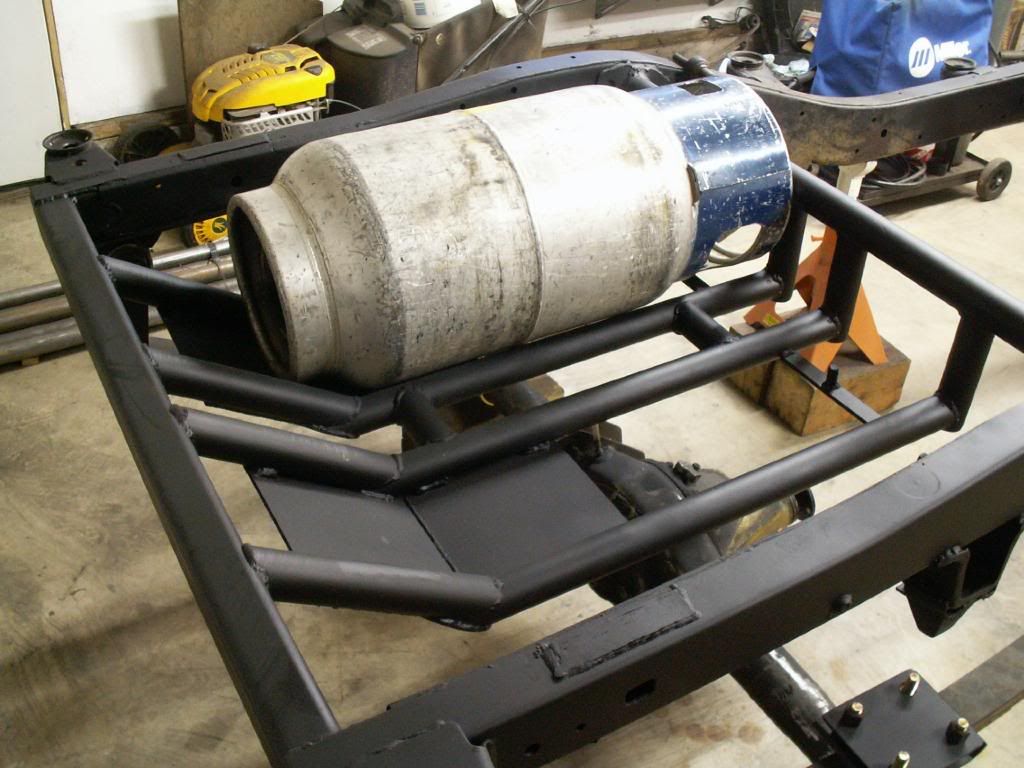
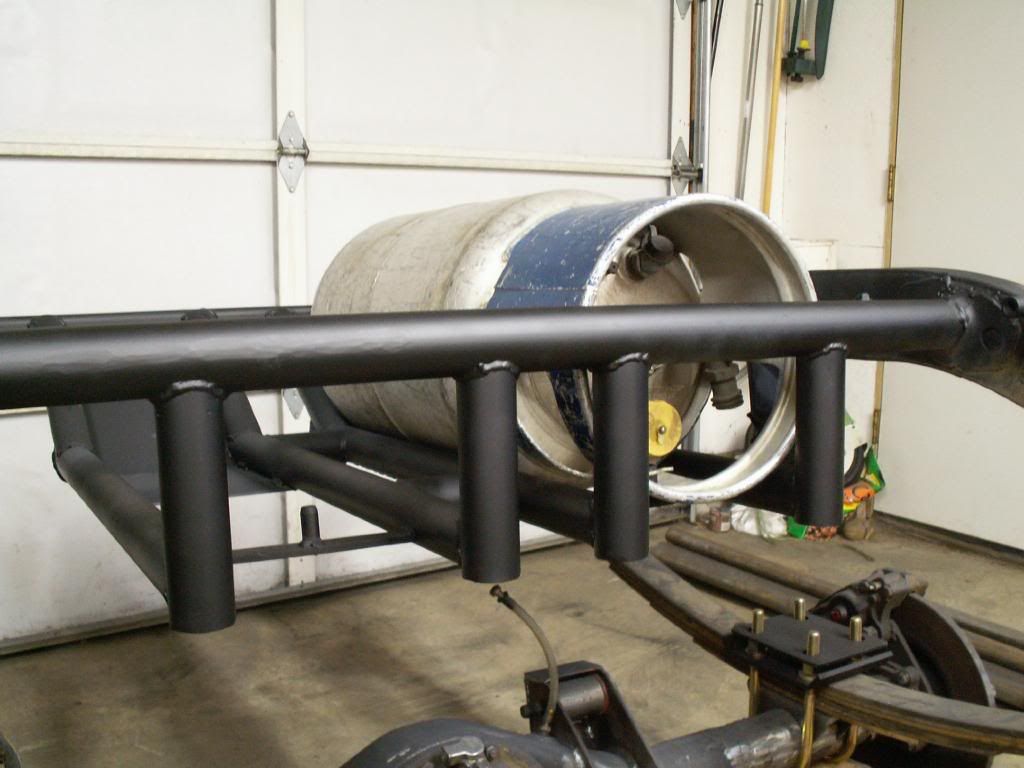
I made these pins to help hold the tanks in place. My reasoning for them is that they are used on forklifts to keep the expansion safety valve up and the pick up tube down. It will also be a back up holder if the tank clamp comes undone during a rollover.
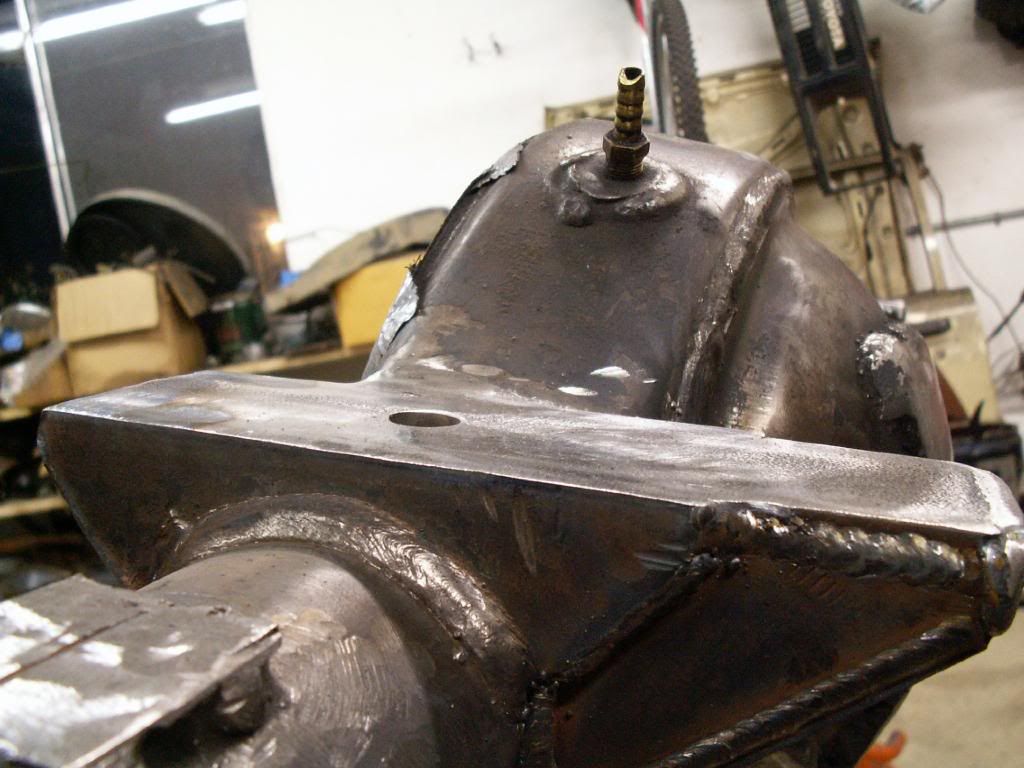
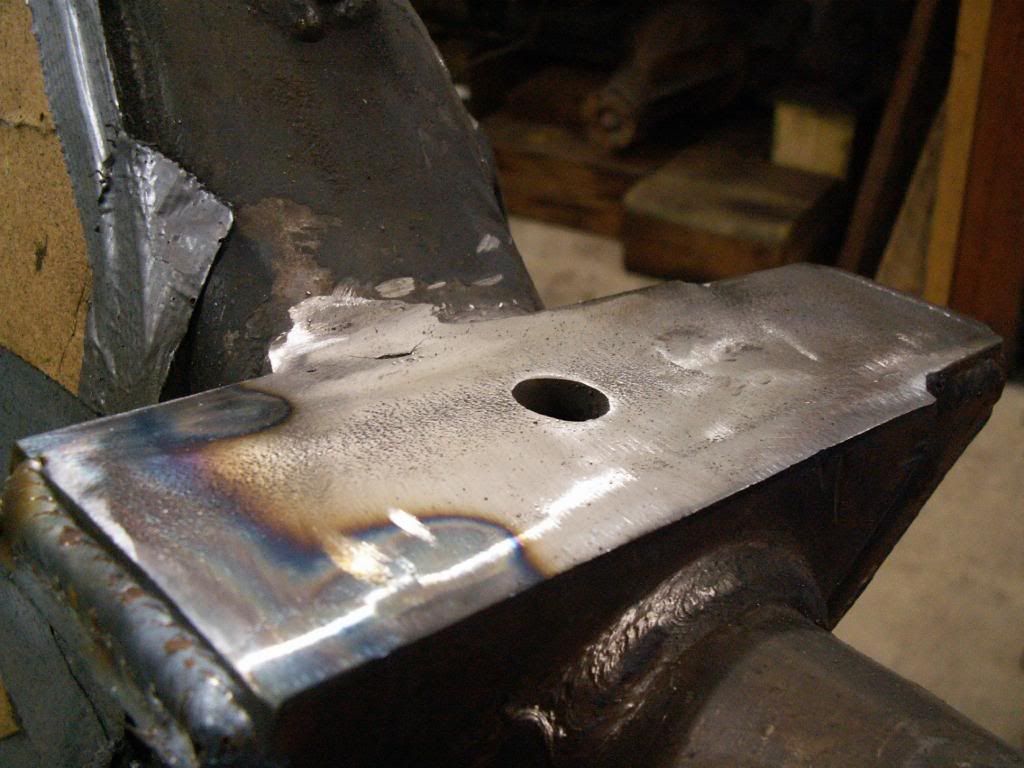
I also made these bump stop strike plates. I like this type because it puts a double nut on the U-bolts. This will keep the nuts from working loose over time.
I made these pins to help hold the tanks in place. My reasoning for them is that they are used on forklifts to keep the expansion safety valve up and the pick up tube down. It will also be a back up holder if the tank clamp comes undone during a rollover.
I also made these bump stop strike plates. I like this type because it puts a double nut on the U-bolts. This will keep the nuts from working loose over time.
I awoke to snow on the ground today so the body isn't going back on today.
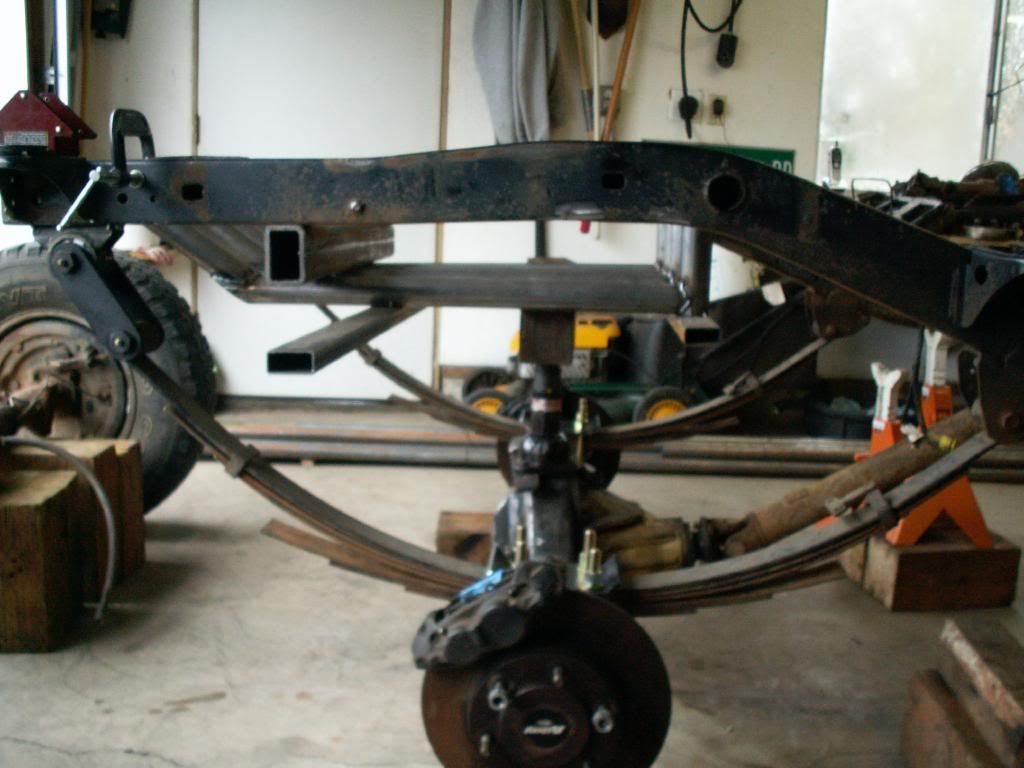
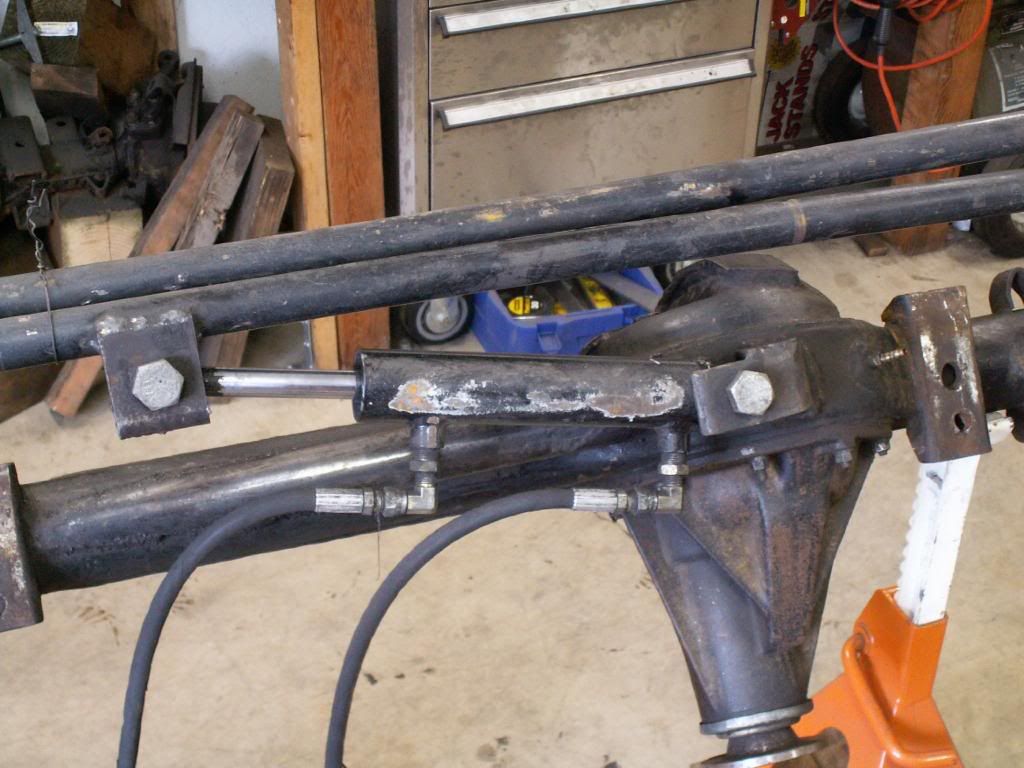
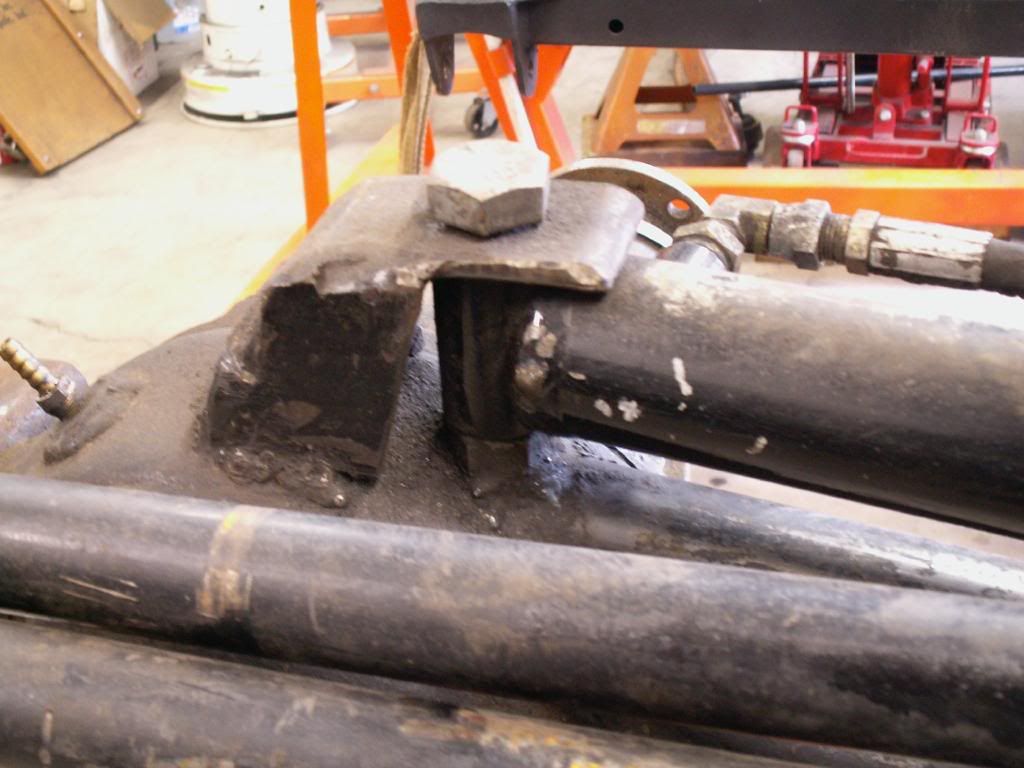
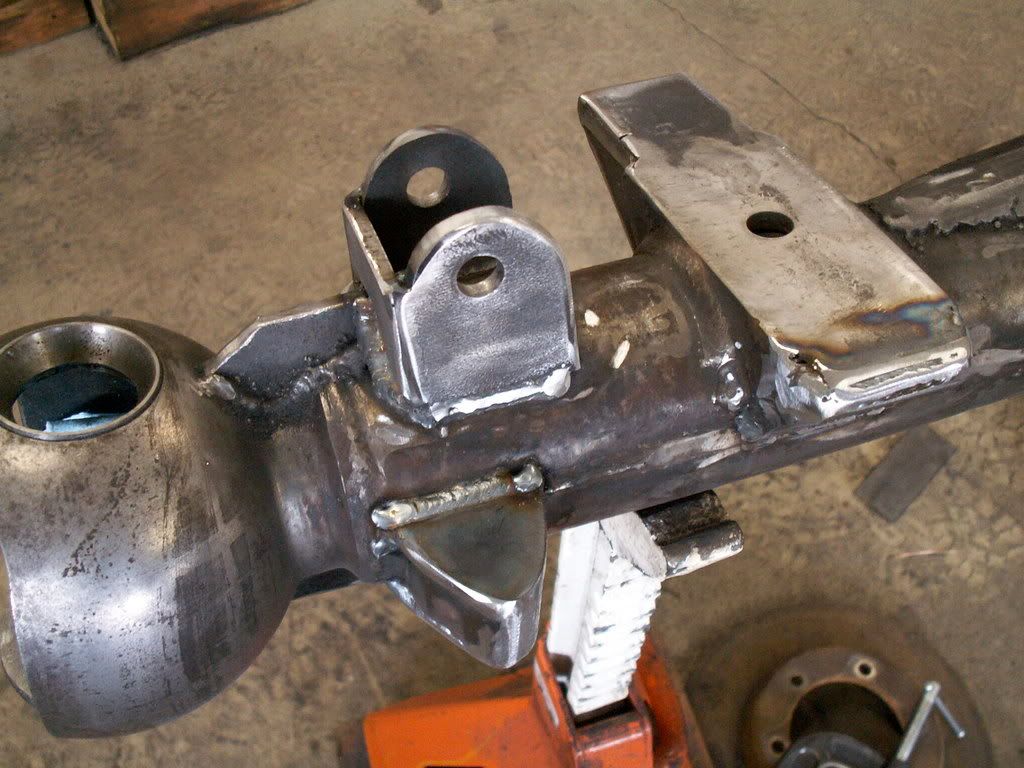
I decided to start on my next headache. I bought this front axle a while ago ( before the prices on used stuff got real good ) along with the rear that I am using. The more I look at it the more I wonder why the hell did I buy this thing. It is loaded with great parts but the fab work is a bit to be desired.
Hydro assist ram angle is way out of line and mounts are, well,
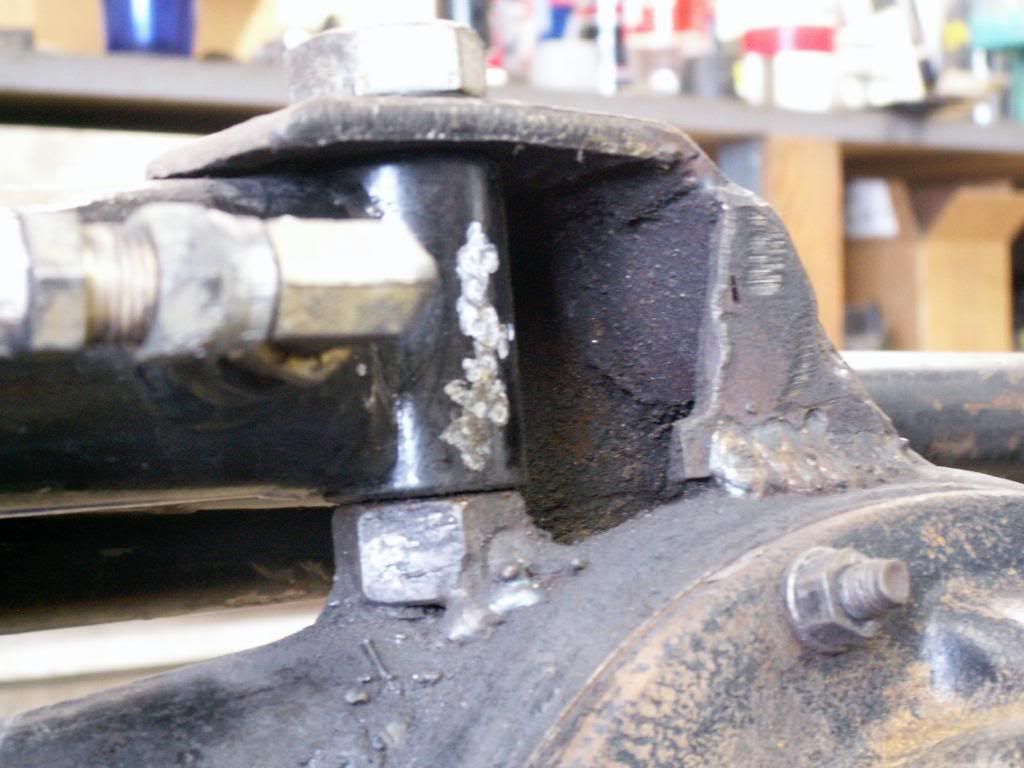
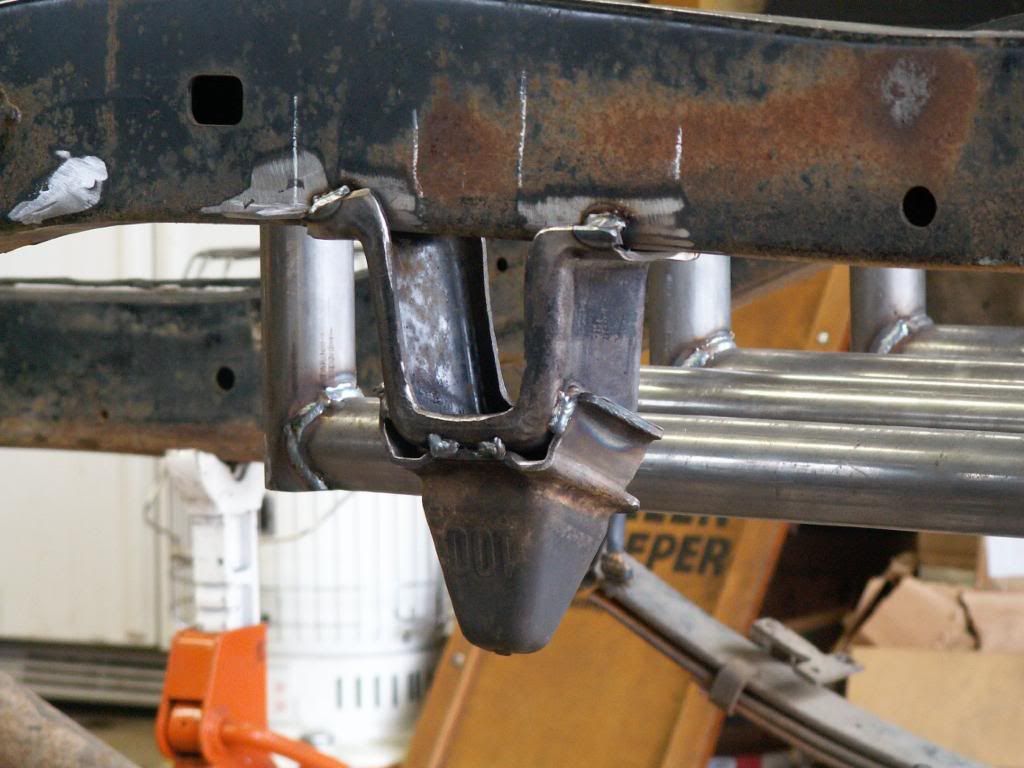
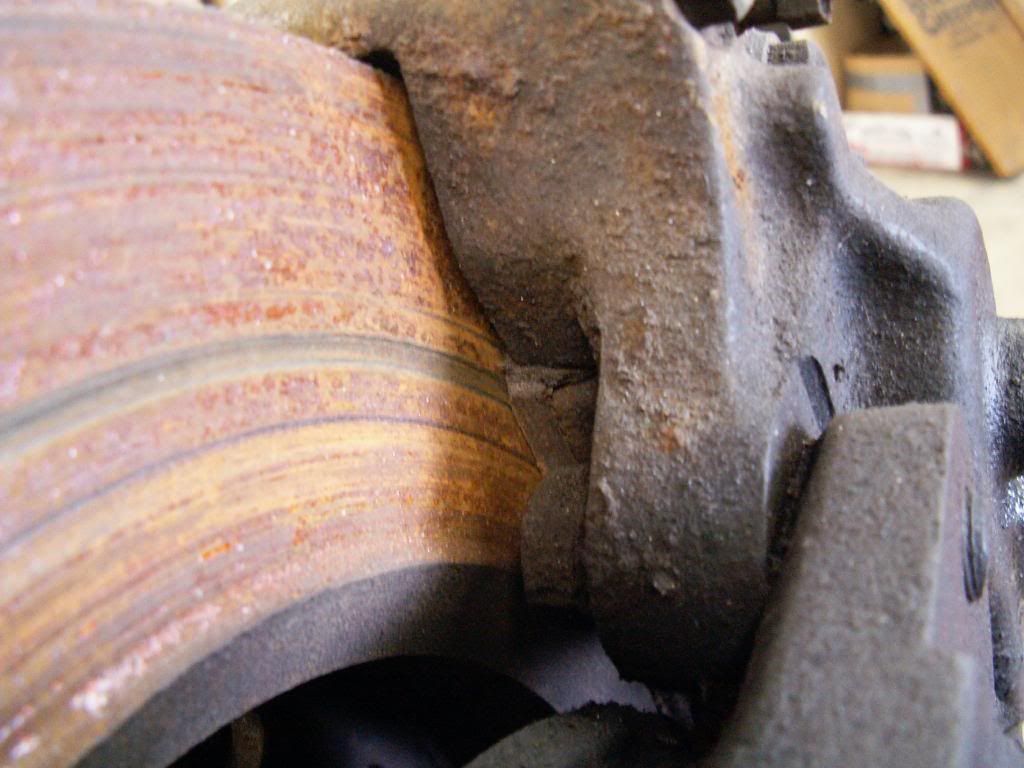
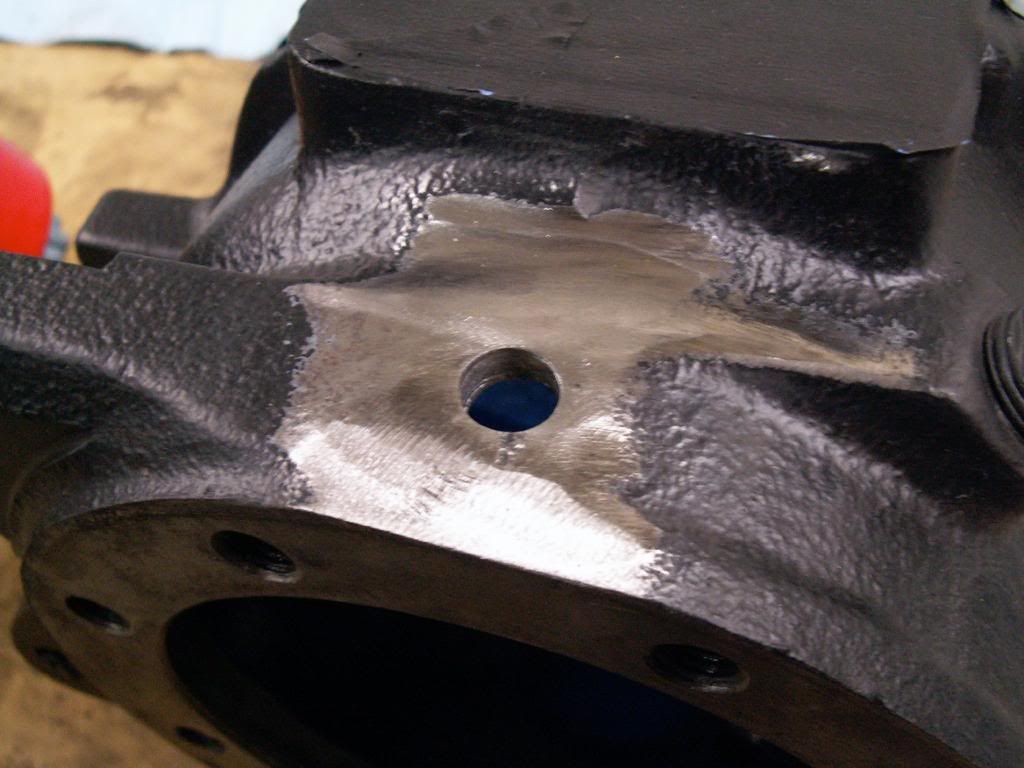
Knuckle gussets. Better to clearance the felt and ring than the gusset itself.
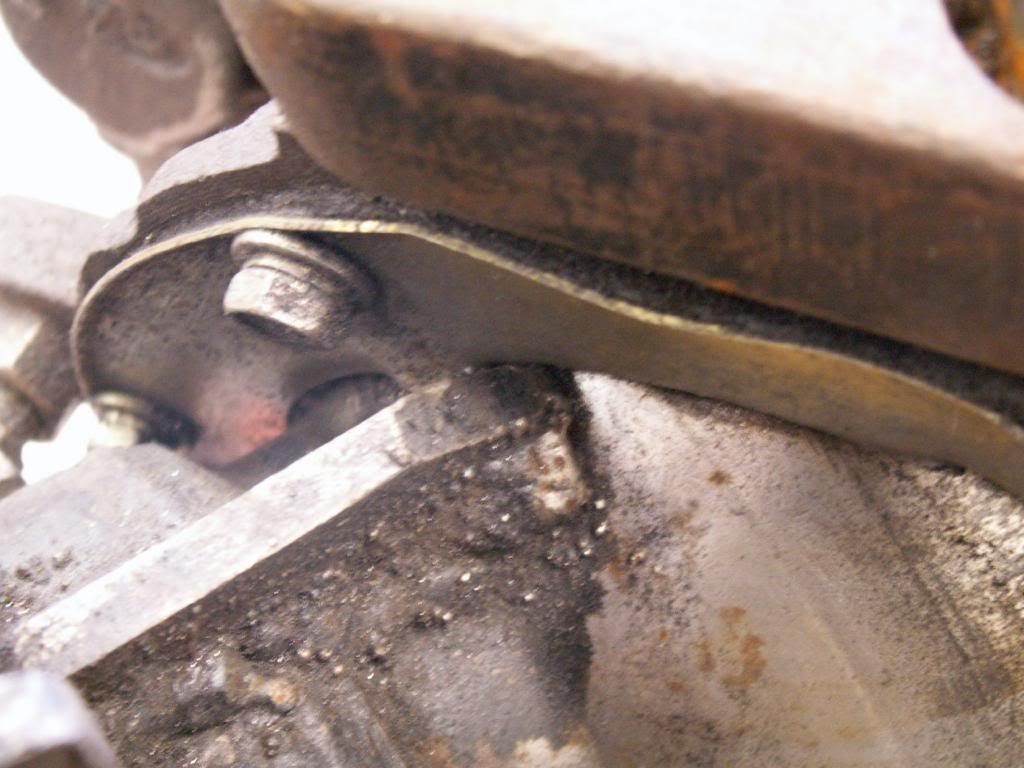
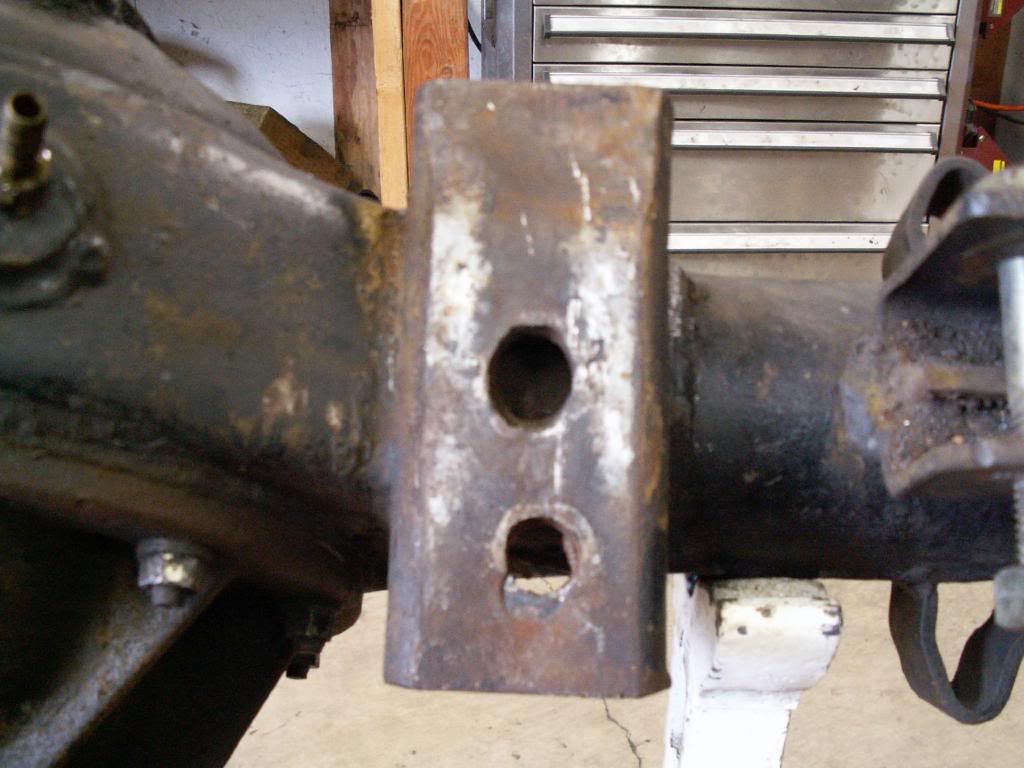
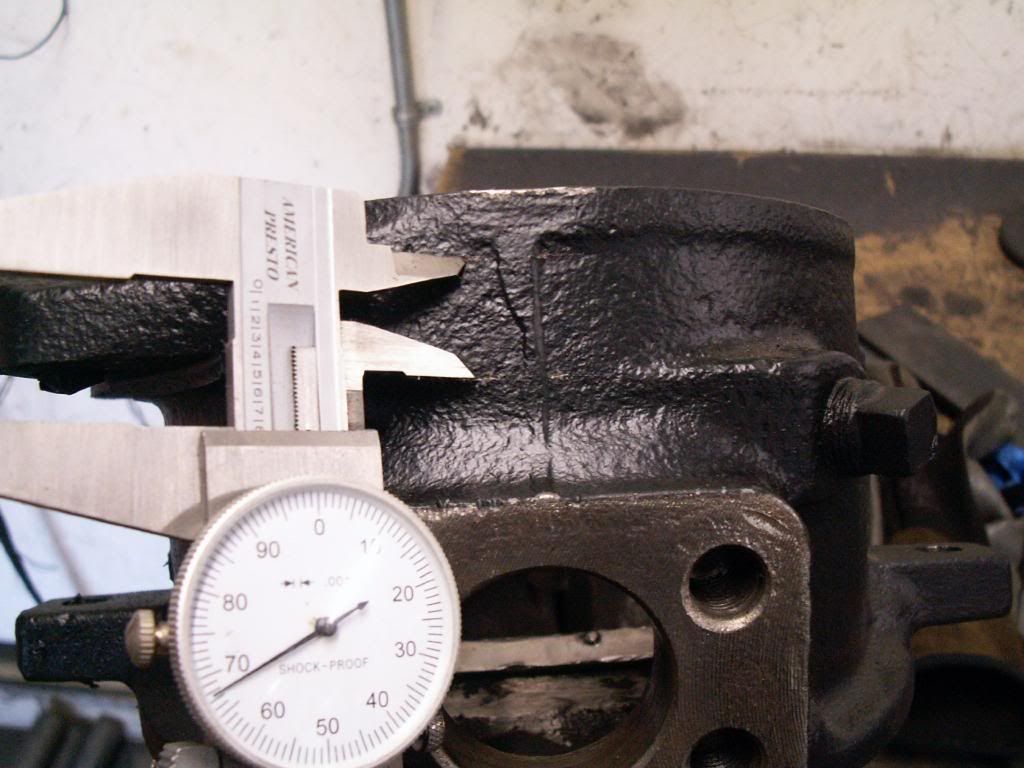
I need to repair the pass side perch. The spring pin hole has been elongated.
Now can anyone see to two problems here?
I decided to start on my next headache. I bought this front axle a while ago ( before the prices on used stuff got real good ) along with the rear that I am using. The more I look at it the more I wonder why the hell did I buy this thing. It is loaded with great parts but the fab work is a bit to be desired.
Hydro assist ram angle is way out of line and mounts are, well,
Knuckle gussets. Better to clearance the felt and ring than the gusset itself.
I need to repair the pass side perch. The spring pin hole has been elongated.
Now can anyone see to two problems here?
dove'd85
Well-Known Member
I awoke to snow on the ground today so the body isn't going back on today.
I decided to start on my next headache. I bought this front axle a while ago ( before the prices on used stuff got real good ) along with the rear that I am using. The more I look at it the more I wonder why the hell did I buy this thing. It is loaded with great parts but the fab work is a bit to be desired.
Hydro assist ram angle is way out of line and mounts are, well,
Knuckle gussets. Better to clearance the felt and ring than the gusset itself.
I need to repair the pass side perch. The spring pin hole has been elongated.
Now can anyone see to two problems here?
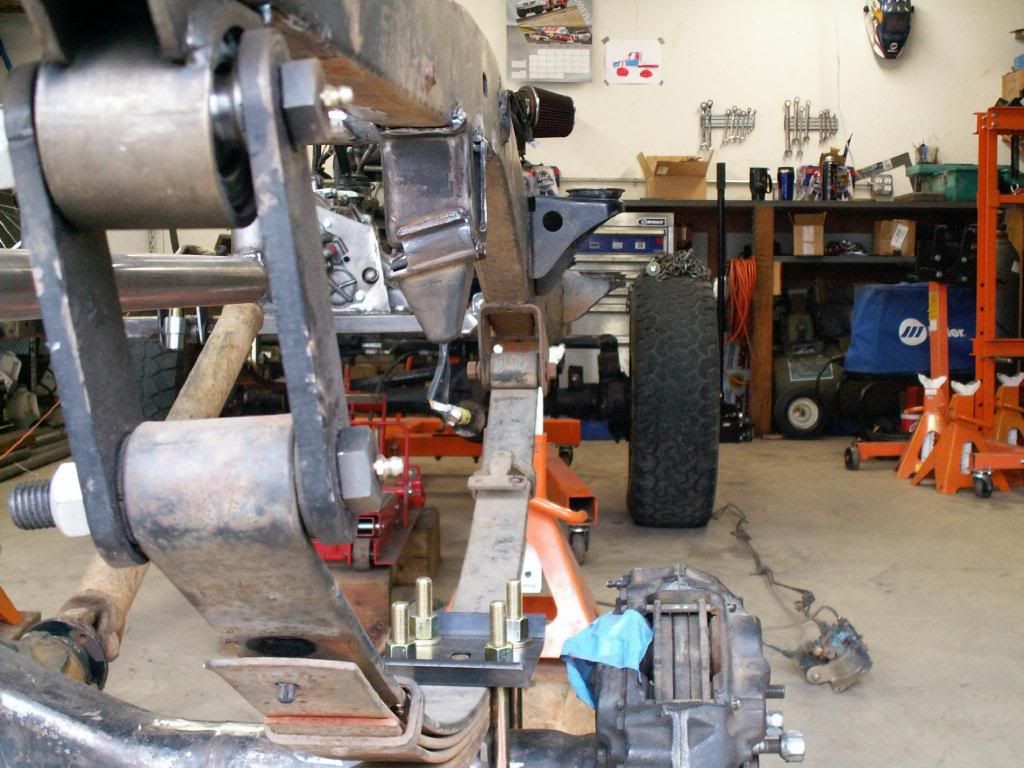
ya haha looks like some genious put the cailper bolt on backwards and it is possible rubbing on the rotor:flipoff:
dove'd85
Well-Known Member
be more specific, what picture:fawkdancesmiley::haha:
oldbeercans
Well-Known Member
the knob you bought the axle from
-cant weld or fab uke:
uke:
-the calipur is on the wrong side of the ear, and the rotor is on backwards or the rotor assembly is put together all wrong. either way its no good.:booo:
he must have used a chiltons manual:haha:
DID I WIN?????:haha:the guy you bought the axle from is making me feel like a genius:corn:
-cant weld or fab
uke:-the calipur is on the wrong side of the ear, and the rotor is on backwards or the rotor assembly is put together all wrong. either way its no good.:booo:
he must have used a chiltons manual:haha:
DID I WIN?????:haha:the guy you bought the axle from is making me feel like a genius:corn:
Last edited:
You forgot the part about him putting in the brake pad backwards and F'n up the rotor..............:cheer::cheer::cheer::cheer:the knob you bought the axle from
-cant weld or fab
-the calipur is on the wrong side of the ear, and the rotor is on backwards or the rotor assembly is put together all wrong. either way its no good.:booo:
he must have used a chiltons manual:haha:
DID I WIN?????:haha:the guy you bought the axle from is making me feel like a genius:corn:
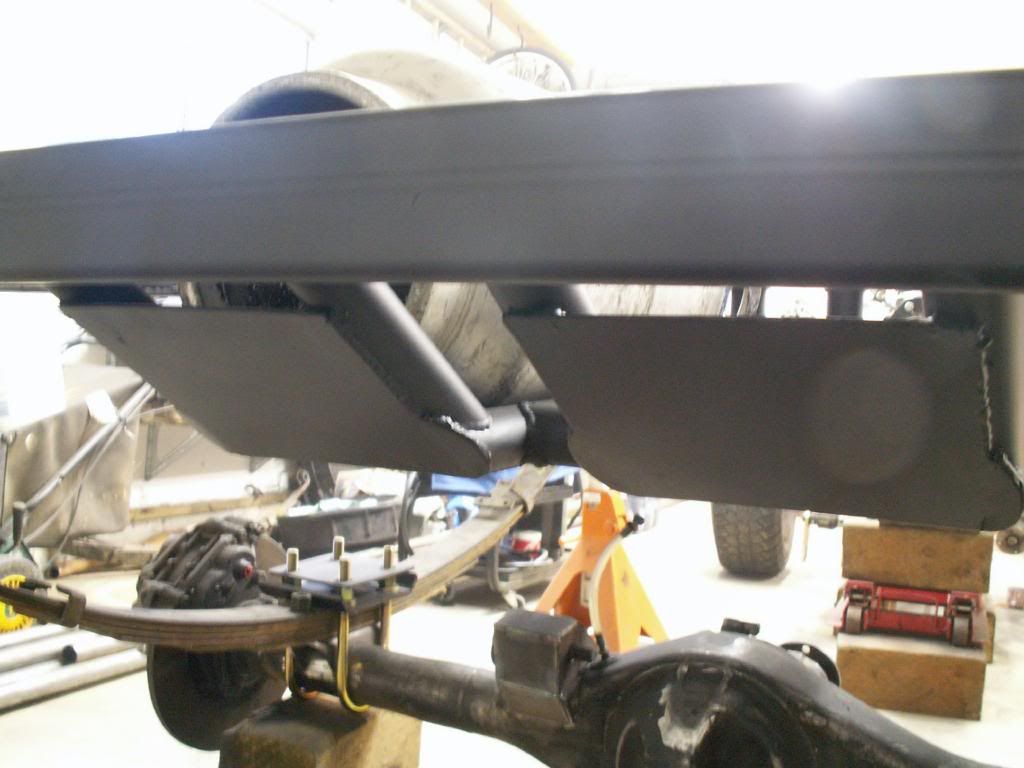
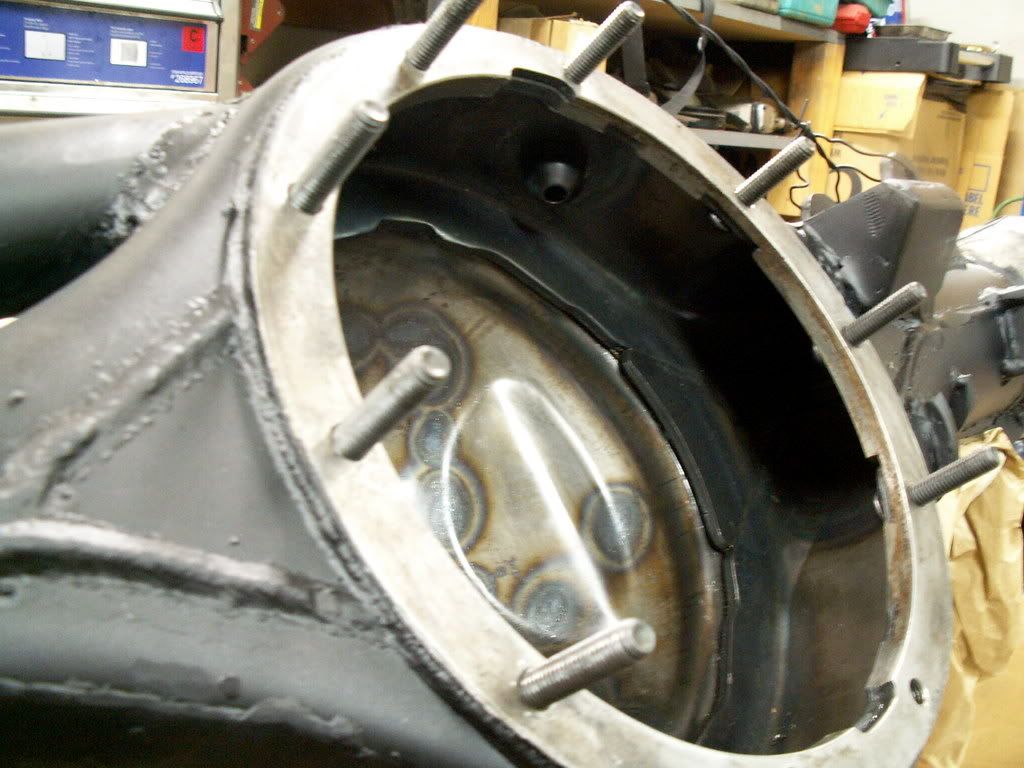
So I have sent a bunch of time cleaning and disassembling this front axle. What a mess.
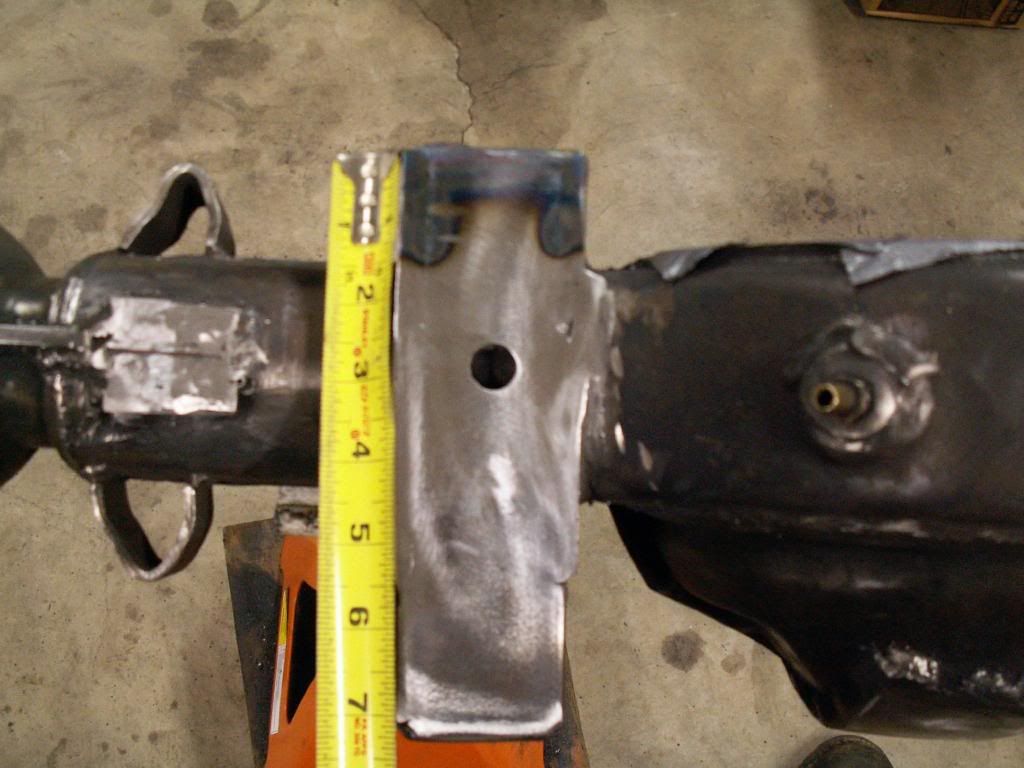
I lowered the spring perches as much as I could. 1/4" is all that is possible.
Then I had a fellow Pirate member suggest lengthening the perches to combat axle wrap.
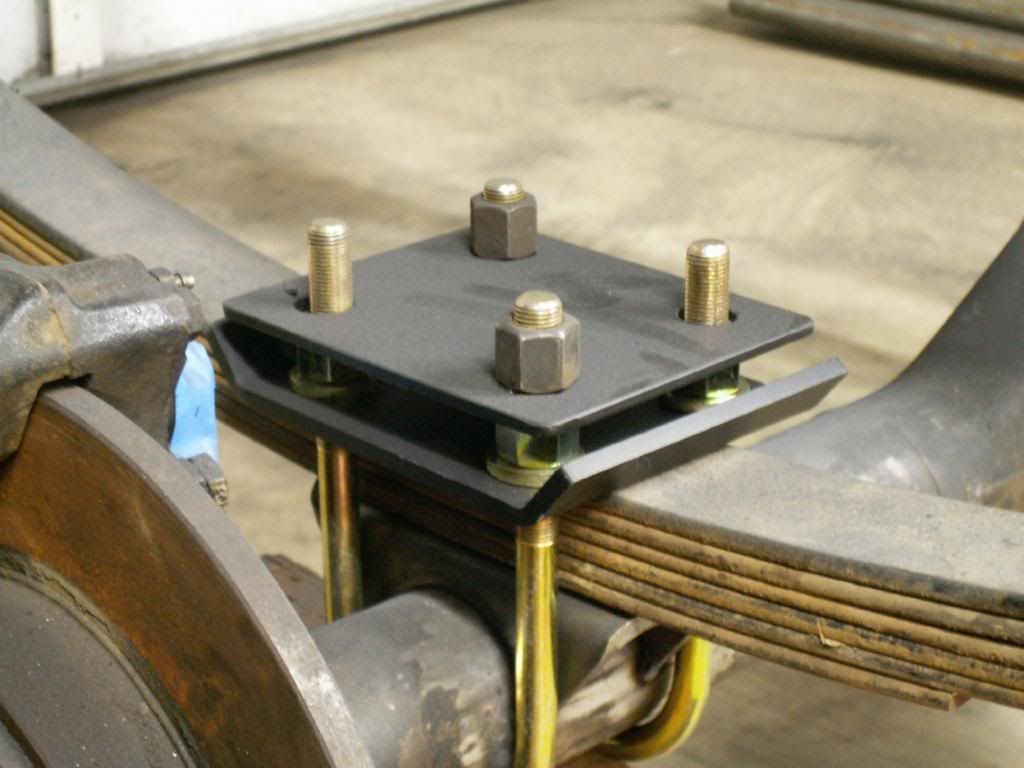
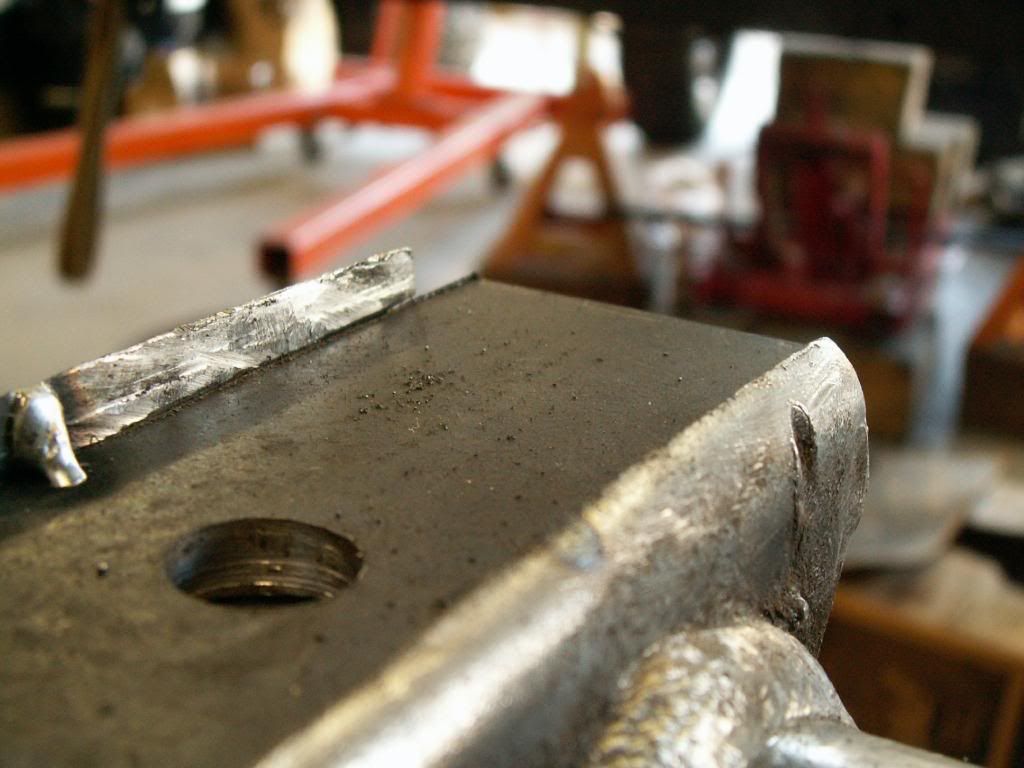
Then I started on the 5th stud mod. Bobby Long style.
This is the sweet spot to drill, dead center of the two casting lines.
I had a lot of drive line bolts laying around and they turned out to be the perfect length with a piece of 1/4". Smoothed out the top of the knuckle for a good flat fit.
I lowered the spring perches as much as I could. 1/4" is all that is possible.
Then I had a fellow Pirate member suggest lengthening the perches to combat axle wrap.
Then I started on the 5th stud mod. Bobby Long style.
This is the sweet spot to drill, dead center of the two casting lines.
I had a lot of drive line bolts laying around and they turned out to be the perfect length with a piece of 1/4". Smoothed out the top of the knuckle for a good flat fit.
So I have spent a bunch of time cleaning parts, painting parts, deciding what parts to buy, ext, for the last few days.
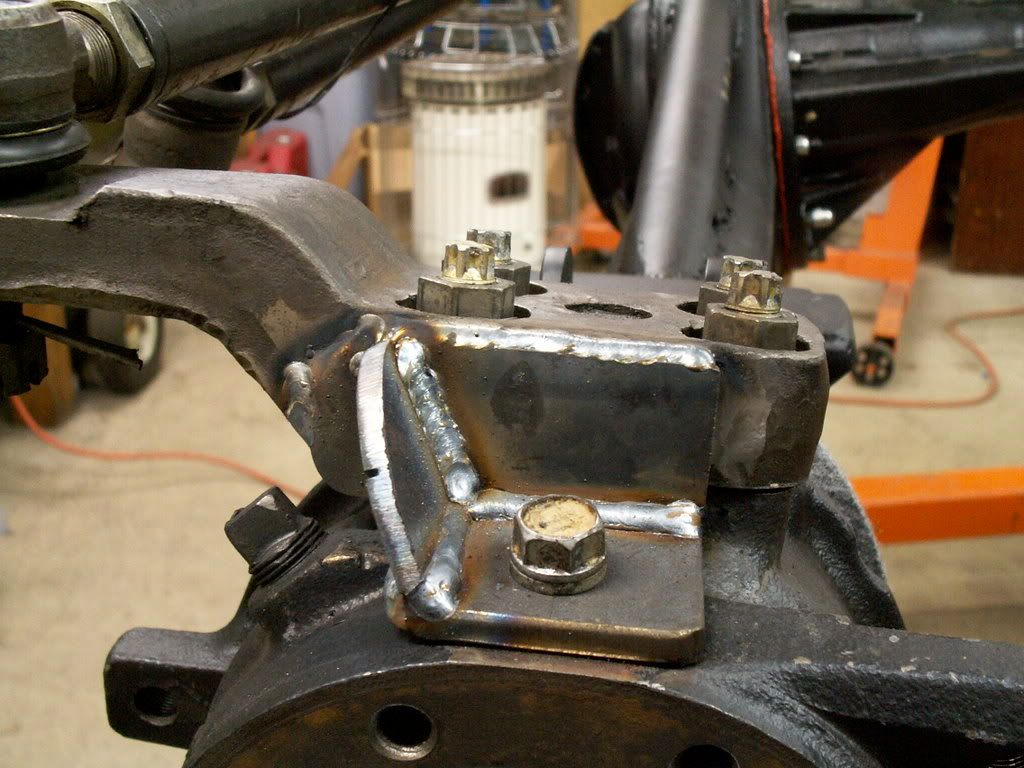
I cut off and replaced the shock mounts and capped the bent steering stops.
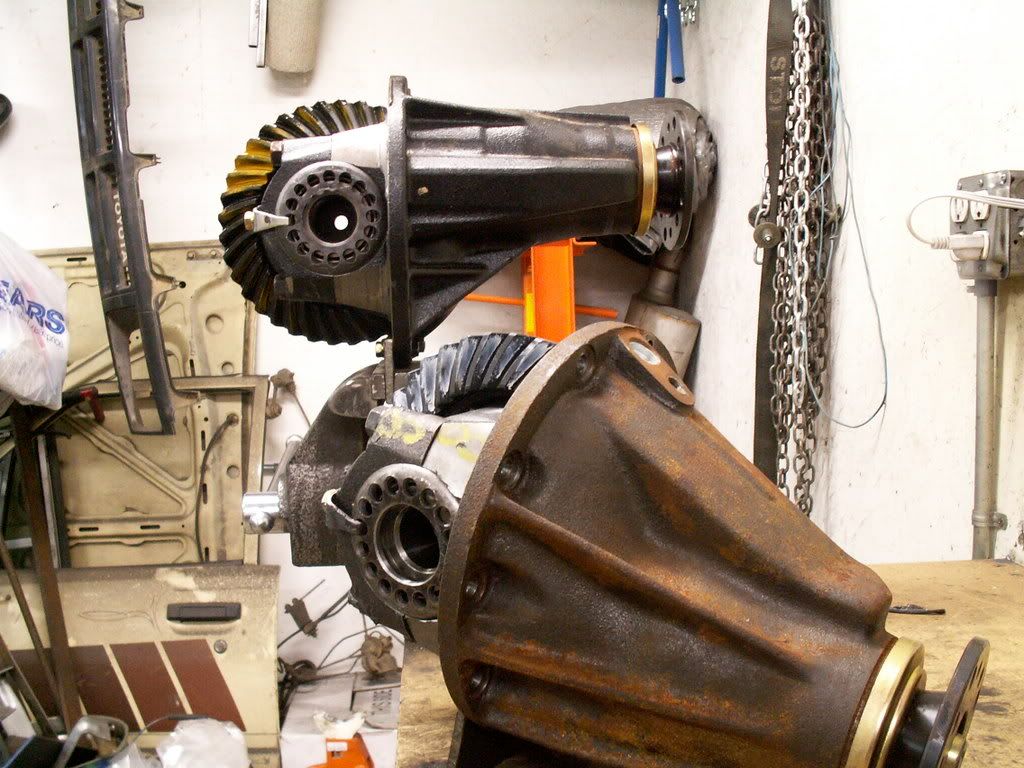
I had a 4 cyl front diff with a Lock-Rite and 4:11s in the front and a welded V-6 diff with 4:11s in the back. I didnt want to kill the rear output shaft so I started to check out prices on R&P. I have set up gears before so I figured it would not be to much trouble again. But typical of me, this followed me home from a Craigslist add. Both have Detroits and 5:29s with Yukon gears. The set up paint is still fresh.
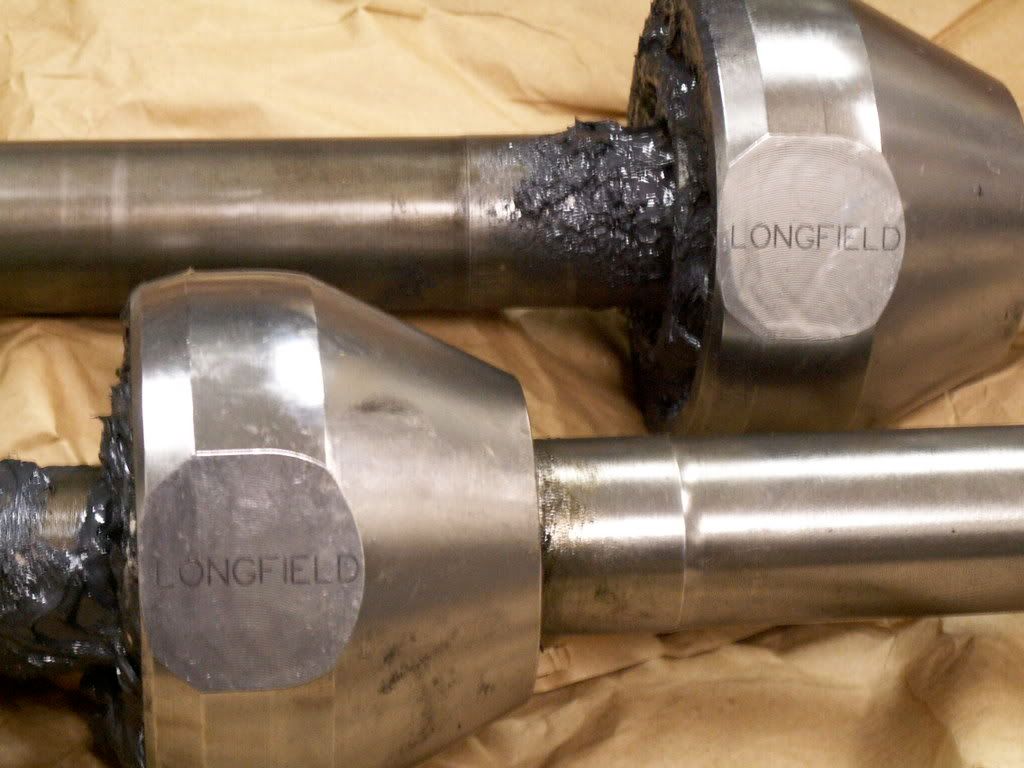
This was thrown into the mix as well!!!! New 30 spline with the 40*
Now that I have more than one pair for this truck do you think I can double them up for extra strength?
I cut off and replaced the shock mounts and capped the bent steering stops.
I had a 4 cyl front diff with a Lock-Rite and 4:11s in the front and a welded V-6 diff with 4:11s in the back. I didnt want to kill the rear output shaft so I started to check out prices on R&P. I have set up gears before so I figured it would not be to much trouble again. But typical of me, this followed me home from a Craigslist add. Both have Detroits and 5:29s with Yukon gears. The set up paint is still fresh.
This was thrown into the mix as well!!!! New 30 spline with the 40*
Now that I have more than one pair for this truck do you think I can double them up for extra strength?
Darby1
Well-Known Member
extending your spring perch back to combat a little of the axle wrap is a sweet idea. first i've heard of that, very clever indeed :awesomework:
dove'd85
Well-Known Member
front axle is lookin pretty beef,:awesomework: i want a HP:booo:,
i have seen a few people fab extended spring perchs with good results,
if i can't make a front trac bar work, i will be making a set for the front of my rig to...:redneck:
:beer:
i have seen a few people fab extended spring perchs with good results,
if i can't make a front trac bar work, i will be making a set for the front of my rig to...:redneck:
:beer:
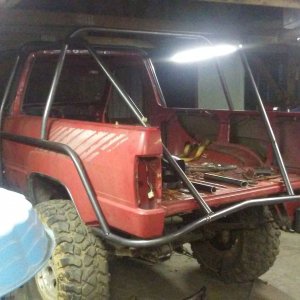
Welded the 5th stud nut to the inside to the knuckle and tack welded the top steering knuckle studs (along with red lock tight)
I have had studs work loose before even with red lock tight. I think that studs break because they work loose first.
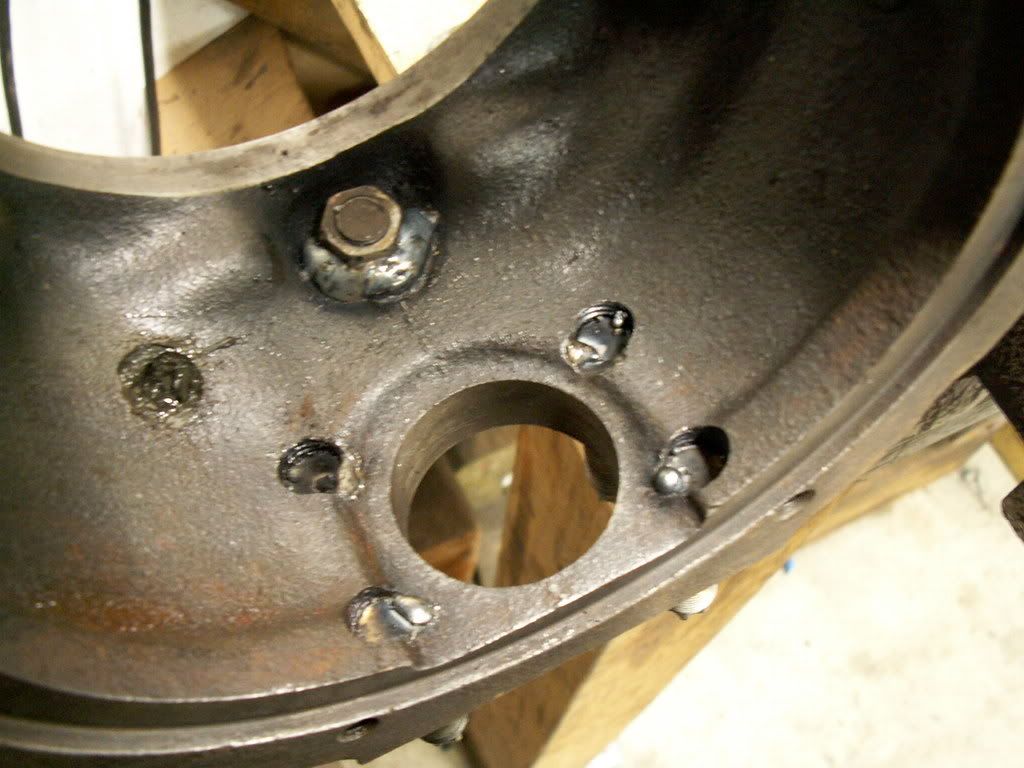
I have had studs work loose before even with red lock tight. I think that studs break because they work loose first.
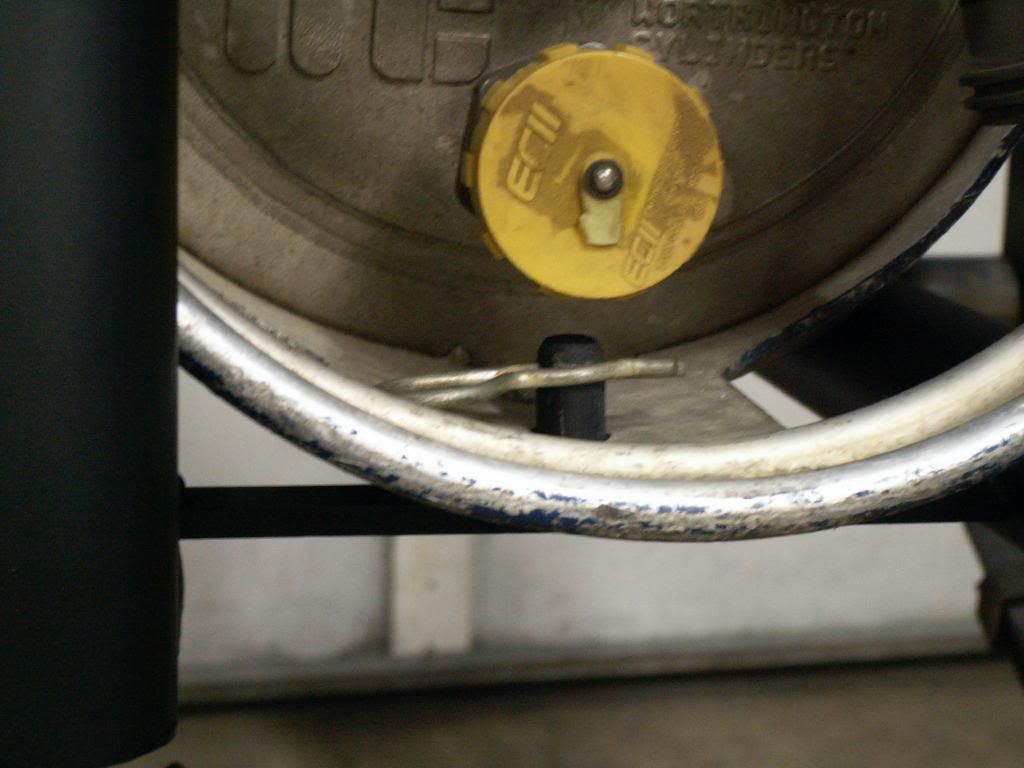
Installed a magnet in the front diff today. It had the drain plug shaved already. I like the piece of mind of a magnet that catches steel flake or pieces of broken gears before they cause bigger problems.
I got a few small magnets at the local hardware store and JB welded them in the diff. It is strange to watch JB weld creep away from a magnet on one side and crawl over the top of it on the other side. It contains metal!

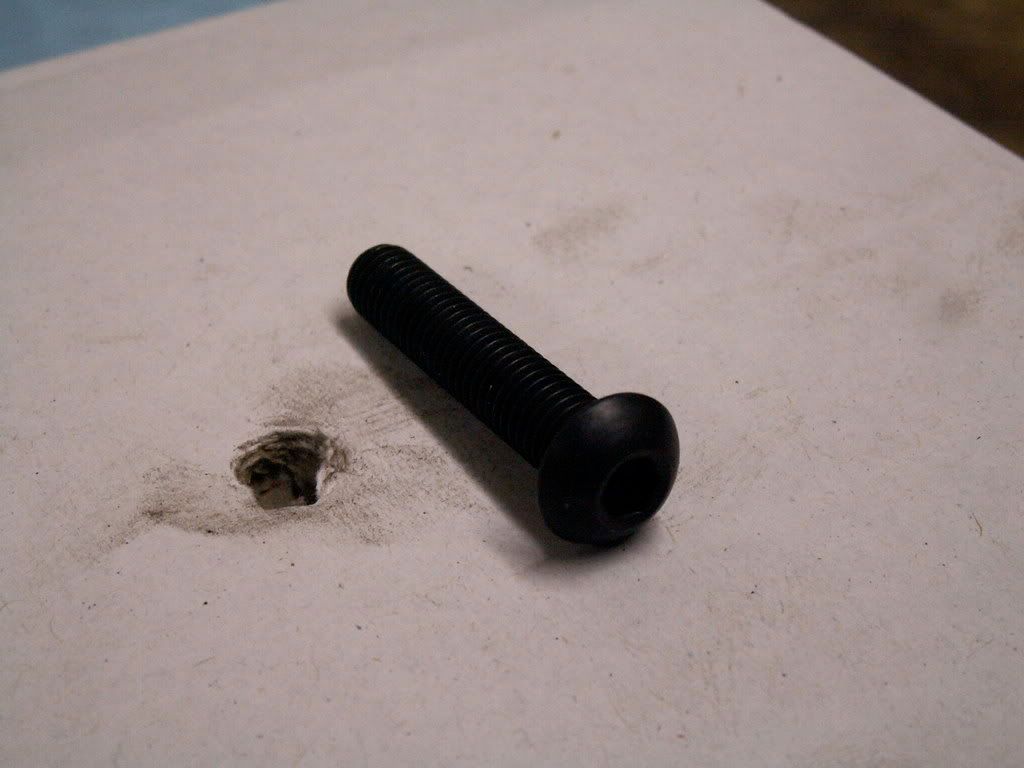
I like to get rid of the diff studs and use button head bolts. I thread them in from the inside and use red locktight. The size of them is 8MM X 1.25 pitch X 40mm.
I got a few small magnets at the local hardware store and JB welded them in the diff. It is strange to watch JB weld creep away from a magnet on one side and crawl over the top of it on the other side. It contains metal!
I like to get rid of the diff studs and use button head bolts. I thread them in from the inside and use red locktight. The size of them is 8MM X 1.25 pitch X 40mm.
militaryota
Well-Known Member
:awesomework::corn:

dove'd85
Well-Known Member
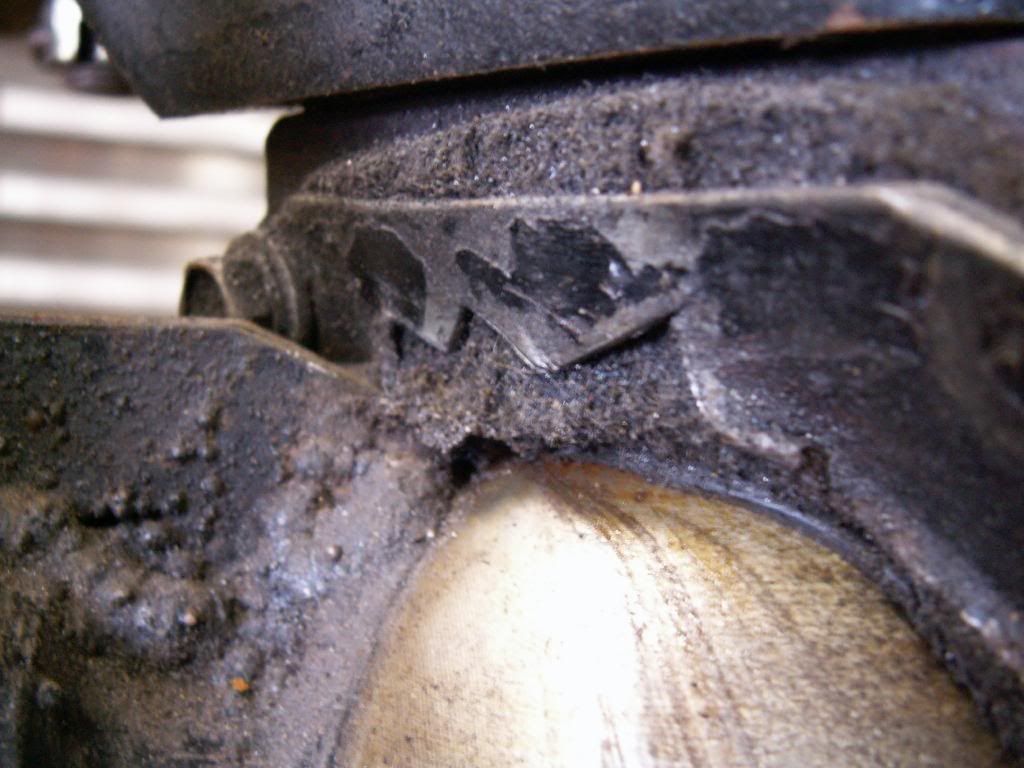
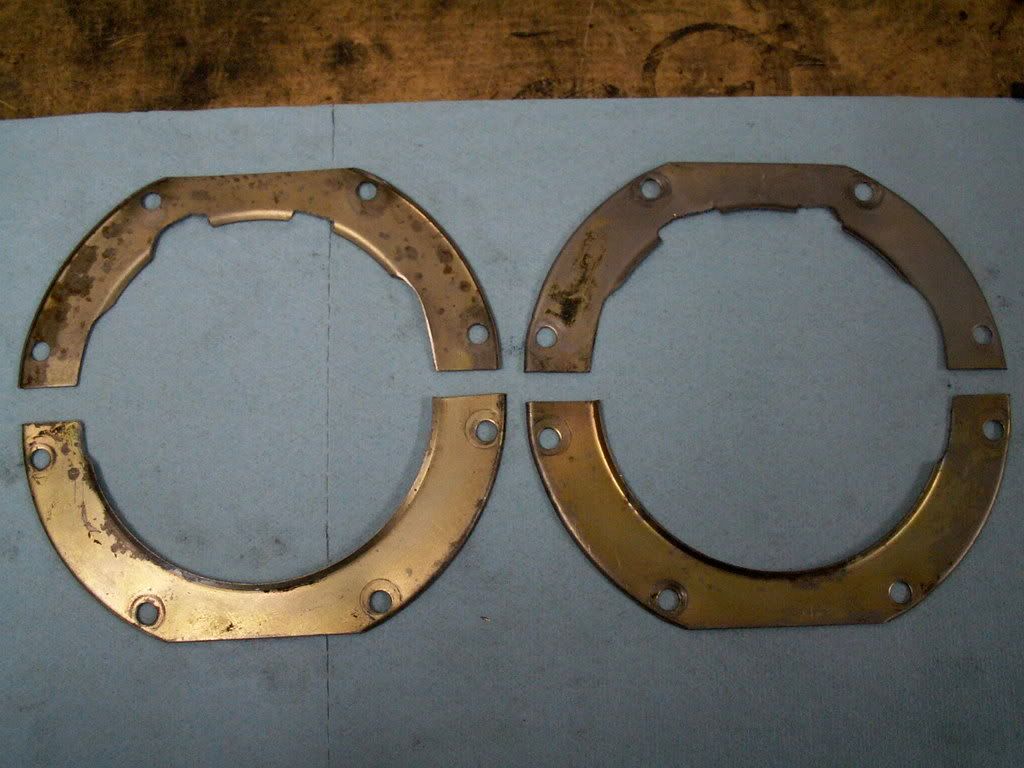
Modified the felt ring for max steering....
haha why did you do that? couldn't you have ground down the knuckle ball gussets or what ever seams to be hitting the felt ring.. hope you don't mind a leaky axle:redneck:
other then that it looks good
haha why did you do that? couldn't you have ground down the knuckle ball gussets or what ever seams to be hitting the felt ring.. hope you don't mind a leaky axle:redneck:
other then that it looks good