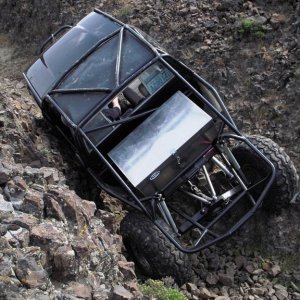
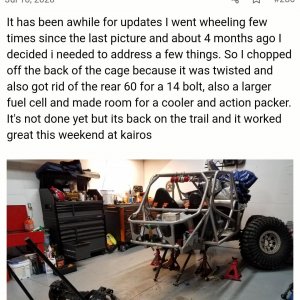
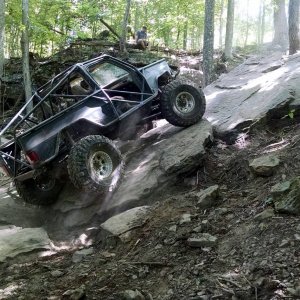
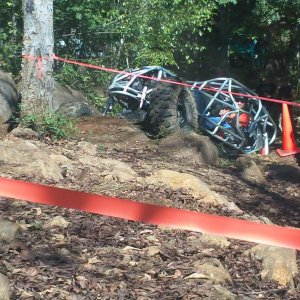
• Help Support Hardline Crawlers :

Dad's stang...

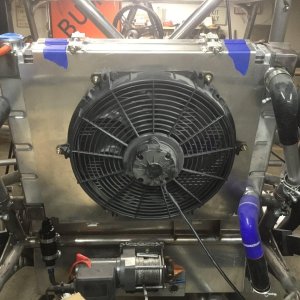
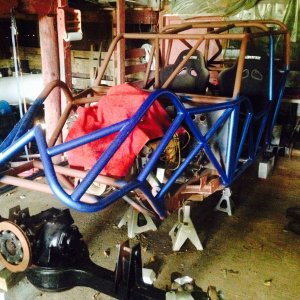
By request(and I had to agree) I pulled the radiator back out and threw some paint on it..

dad180.jpg
 
So one thing that was bugging me was the fact that the interior was going to be new but yet the dash looks AWFULL!!!!!! The black paint is peeling to show the blue underneath it. Well come to find out to install the new defront ducts I have to pull the pad off the metal dash. SO I gently worked it off--and it was a slow process to get it off but I was able to with no damage to it. I did find its in EXCELENT shape. I also found there are 4 studs on the backside that has no nuts on them--so that will be fixed when installed.

dad184.jpg


And after more work I was able to totaly strip everything off the face of the dash that needs to be removed for paint. So I got a start on sanding it last night before I ran out of steam and will attack it again when I get home.

dad185.jpg
 
Made progress this evening (damn work cut into it). But my finger tips are sore as there are allot more little edges to sand down. Just the steering column, very underside and the edges of the dash to do and its ready to go to the next step.

dad186.jpg


dad187.jpg
 
Looks awesome:awesomework: One thing I love about your wiring his how tight and clean it is. I would just hate to have to make a repair to it because it is so tight!
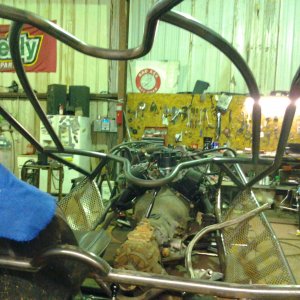
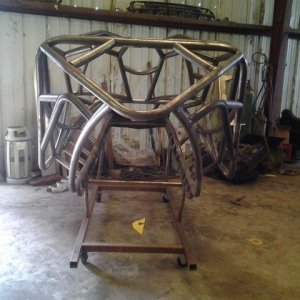
 
Typical CrashFab build....everything is neat, clean and perfect. :awesomework:

Great build to watch progress as this one means so much more to those involved than any other build ever could.

Mike, if you don't mind, I would like to swing by one day to lend a hand and maybe drink a few :beer::beer::beer:
 
Well it was up early after a short nap,lol. Well I looked at seeing how to get the steering column out of the way--and figured it out. Its more a steering tube than a column. So I got the last of the dash stuff sanded down. Once I got that done I happen to look up--and damn the A-pillar looks just as bad. So that too got sanded down up to the cover piece where the headliner starts.

So now its all taped/masked and prepped.

dad188.jpg


dad189.jpg


All primered up.

dad190.jpg


And painted. I am really happy with how it turned out. Its going to make a HUGE difference on how the interior is going to look.

dad191.jpg


A pillar.

dad192.jpg


I dissassembed the steering tube and cleaned it all up. Greased the upper bearing, turn pivat and cleaned the turn signal switch. Primed and painted that as well.
dad193.jpg


Perfect timing as I am totaly exhausted and need to catch up on sleep and back to it early in the AM..
 
So this morning after the paint had a chance to dry I went and pulled all the tape/paper. I am very happy how well it turned out.

dad194.jpg
 
The coil bracket was--you guessed it--rusty,lol. So I grabbed a new one.

dad195.jpg
.

So I put in the new temp sensor and coil and finished up the wiring there--so thats DONE!

dad196.jpg


I pulled the drain plug on the fuel tank and drained the 6 year old fuel from the tank. It of course smelled old but looked incredably good. Once done I finished up the fuel line from the car to the pump--this is much better than it was.

dad197.jpg


So I threw a few gallons in the tank--thats DONE!
 
So I had a problem after I put the brake master in but chose to ignore it and press on with other things. It was time to go back to it. After I got the master installed and the new hardline made from the master to the 4 way TEE---well when I was tightening one of the new lines there went the damn threads. That was one of the lines that was near impossable to remove so I figure thats what damaged it.

dad198.jpg


So I had looked around and there was no listing at my parts store I use (good place and knowledgeable folks). Ok I am under the gun and got an idea.

Here is what I came up with.

dad199.jpg


When I tried to install it I chose one little change on the main feed line. All I had to do was bend 2 lines slightly to make it work.

dad200.jpg


So once I got to that point I bled the whole system with only a couple small easily fixable leaks(some times you gotta crack a line and reseat it). Once done I adjusted the drums--Another thing DONE!!!!!
 
Its starting to feel great now that I am able to put more things into the DONE slot--and I am getting closer to being ready for paint.

Now here is another DONE thing and one thing I was really excited about--its now sitting on its new shoes!!!!

dad201.jpg


So now the hood and trunk lid are ready to be hung back onto the car!
 
Mike,
Have you had the bell-crank clutch assembly apart yet? On my old CJ, I actually broke on of these in the worst place possible. You might want to pull it apart and take a peek at it.
T
 
Mike,
Have you had the bell-crank clutch assembly apart yet? On my old CJ, I actually broke on of these in the worst place possible. You might want to pull it apart and take a peek at it.
T

Thats the rotaional assembly(goes between the tranny/frame) for the clutch tony?
 
Thats the rotaional assembly(goes between the tranny/frame) for the clutch tony?

Yeah.
Should be a tube with some nylon bushing in it. On my old rig (not a mustang), there were actually metal on metal wear spots, that were more than 2/3rds worn thru. Finally snapped right in the rocky section of Rusty Nail trail down in Moab. Wasn't fun trying to drive out,when the clutch pedal didn't work.
I'm not saying yours is bad. Only that NOW is the time to inspect it. After all, it's old.
Tony

Thanks tony---that will be an easy inspection and I will take a look at it tommorow,,,:awesomework:
 

Latest posts

Top