• Help Support Hardline Crawlers :

Flatlands #1

FlatlandFSJ

Well-Known Member
Joined
Feb 12, 2014
Messages
1,095
Location
SoWal Florida
Well..here it is and how it went down...kinda. We are on the way to pick up Ray's new to him yota truggy thing. The topic of small chassis's comes up and long story short, I made a joke about him just having my first chassis instead of buying someone else's. Still haven't figured out why, but he was up for it.

Discussed a few things, stuff he liked and things he didn't. It was settled, tiny little yota buggy on tons. I made a 2" long sketch and next thing I saw was 10 sticks of dom.

1865f6aa666931e4c29c4e0c519f175b.jpg


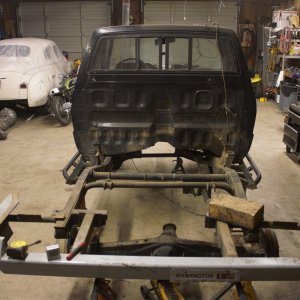
Took me a bit and a shim or two to get it all squared and right, but eventually I got the main rails and sliders put together

4f3bbbb88bb91d18181adcbc6d6bb07e.jpg


Yea..it's a wood table

Started making my way up, b pillars, lower part of the windshield,door bars tacked in to start getting things squared up at the beltline.

4aae8dbeee16d41040e79a691886d3d7.jpg


d21f7fea40b87ee03ea48002e2138234.jpg


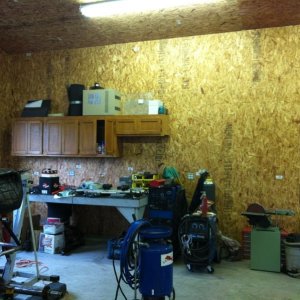
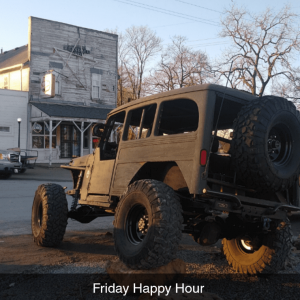
You're going to notice quite a few things going on in the background throughout the thread. When we started this adventure I also started building my shed into shop.

A pillar and roof bar. All the bpillar tube is 188 as well as the sliders and main rails.

That should be plenty for a yota powered buggy right?????? Heh stay tuned.

ee8dbb1b6aadbdd7edc3d7f8df9792a5.jpg


e1acc41cec18724bc3487f63614cf263.jpg


Start of the oh so important x brace in the bpillar.

feaa1b5e5f13383fc771223e2b8a74d7.jpg


This particular section of the build is lacking pictures.

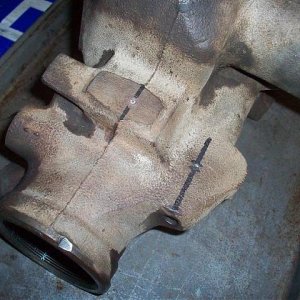
While I was getting the bulk tube work done on the chassis, we went on a few rides.Grayrock being one and GMP being the other, Ray quickly decided that yotapower wasn't for him.

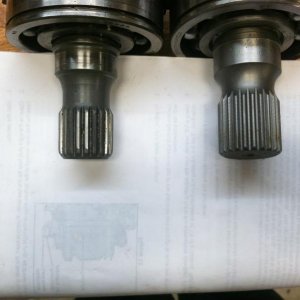
He dropped the yota off, I stole the axles and cool stuff, warn comp winch,powertank, and a few other odds and ends. Leftovers went back on the trailer never to be heard from again.

...
 
Windshield and roof bars, checking seat stuff.

c7328a5b8945ee0433414e8d2dfbce79.jpg


Getting the artec stuff fitted to the 60 from the yota

5d43930135e4a25b3f2aedc4d04bc379.jpg


8ef8c0504bcdb155b76772ae07eab3aa.jpg


435db7eae9cc7c29c23a4c7fd0e40de4.jpg


You may start noticing a slightly bigger motor then a 22r.

d03aa806aa8596323354af9dc09836da.jpg


He decided sbc/th350/atlas would be a good idea. So I stuffed some mock up stuff I had into it and started seeing how it would work in the space I built for a 22r and 5speed.

Atlas seems to fit, always looks good fresh out the crate.

ba5ac66bb0a1e822a1de2ca8e08a3a46.jpg


Link mounts for the axle side, 1/4" with 1/8" weld washers.

572a0465c4b6355421ae082257b15d42.jpg


e4c71f22187c085fe0ef14565b6d4b6e.jpg


First time I mocked up tires and all on it.

7467a8d5d48809e6c92e021cf902dc0e.jpg
 
Somewhere along the lines, the go faster bug was caught. Thankfully Ray got it, it made telling him I built his chassis for trailing arms alot easier. Since that required a new set of shocks..we went big, 2.5" remote res 16" from accutune on all 4 corners.

c01929939e04f76b1ec36d7c0f818fc0.jpg


Mocking up bumps and shocks, this being an idea I pulled from my head and not a cad file, it took me a lil bit to make everything fit the way I wanted.

44fce540ed8af9792655f3f5352c875b.jpg


Shock boxes for the rear

d0ef7faf33ca3e2a283ecfb7029325b2.jpg


dbc77868a26591bb7eb4cf96b1d1a640.jpg


e477d42c8b642ac1847c902e4178606d.jpg


92802c663b1113f52ba6b25ff66aa017.jpg
 
Checking things at bump up front.

17bab9ad135a901c2defac032d9770ef.jpg


First we ditched the yota power, now we ditched the sbc...Ray decided if we gonna do it, we might as well put a big boy ls in it. Snatched the sbc, stuck a p-ayr mock up motor in it.

61433d1919daa23f540c6e3271ab8807.jpg


d22debedc4c20bd21d4494a32775bf9e.jpg


71f172157f3fc33ef3fbe5fecea60d09.jpg


Radiator and shroud mounted...ish

2eb0d705e7c4f5a41f729c03944f3eab.jpg


43db5c888ae8c57514c5e1838145ee16.jpg


2e09c82b5eb8f34c441b4daca5b75b95.jpg


Getting the dash together, brakes and orbital mocked into place.

63beeb16ad8cf8f965ce934d618fd057.jpg


Still got a decent view, even with the low roof.

56a3fc2800cdbe1ff5155602e44a82e2.jpg


Mocking up the front coilover

70027b721333ae7885616b81d3a99968.jpg


Checking rear coilover and trailing arm stuff.

5925b907a71f6f1c5b5ef06ee1557e51.jpg


I'll have another set of posts coming later today, almost got you guys caught up with the build.
 
We are hard mounting everything. Got a TMR rear Atlas support and also have a front support going in.
 

Attachments

  • KIMG0448.JPG
    KIMG0448.JPG
    85.1 KB · Views: 263
Running WOD's carrier bearing. Here its just mocked into position but gets welded in later. Also running WOD's links...love their stuff!
 

Attachments

  • KIMG0503.JPG
    KIMG0503.JPG
    63.1 KB · Views: 250
  • KIMG0157.JPG
    KIMG0157.JPG
    72.7 KB · Views: 259
Wanted to make sure we had plenty of turning power so I ordered the big 2.75" ram from PSC.....will be pushing it with a CBR pump. This ram is big...its tight in the Artec truss.
 

Attachments

  • KIMG0227.JPG
    KIMG0227.JPG
    59.9 KB · Views: 257
  • KIMG0475.JPG
    KIMG0475.JPG
    64.6 KB · Views: 254
Rear axle already had an artec truss on it but Dillion cut it up to fit the chassis at bump and added bump pads. Then just for the hell of it threw on a back bone truss.
 

Attachments

  • KIMG0497.JPG
    KIMG0497.JPG
    75.1 KB · Views: 290
  • KIMG0413.JPG
    KIMG0413.JPG
    115.5 KB · Views: 268
For drive shafts everything is 1410 and .250 wall. I ordered the extreme duty kits from EOR. These things are beef. You can see the extreme duty weld yoke on the left compared to a standard weld yoke.
 

Attachments

  • KIMG0451.JPG
    KIMG0451.JPG
    96.1 KB · Views: 254
  • KIMG0443.JPG
    KIMG0443.JPG
    54.4 KB · Views: 259
Picked up some 5052 aluminum for the fuel cell and started mock up. Will be running a Hydramat inside.
 

Attachments

  • KIMG0303.JPG
    KIMG0303.JPG
    54.8 KB · Views: 250
  • KIMG0452.JPG
    KIMG0452.JPG
    67.3 KB · Views: 232
  • 32781.jpeg
    32781.jpeg
    32 KB · Views: 989
Thxs fellas! The chassis design and everything else is all Dillion. I just told him I wanted a mix of a bomber style chassis with a little southeastern influence lol.
 
Getting close to caught up.

Seat and steering wheel getting close to final placement, Ray then swapped to the ultra style seat, which has a taller head rest portion to help keep his head off the shock mount, it'll show up later in the pictures.

aa8969f1ae70d02989a4d747877b4850.jpg


Getting the rough templates made for the dash and console

f7e8ef31e9357f37262d8a5f3303d3a2.jpg


Floor stuff as well

1041489beb652e796b2ff7d5ebdce66e.jpg


Stuck a set of some big ol boggers on it.

5c0cf8bcb3ea614273f554a4a4234955.jpg
 
Getting some protection put around the yokes on the atlas. Just in case a ujoint let's go, don't want the shaft whipping around to the seats.

50477f10a66c8fd8c804629c75e3a232.jpg


97f305f8fcd68579ece90fae65e9062a.jpg


Top plate on the brake mount

1958cea1a75ce157b3807e9e3ec18d74.jpg


Main mount for the brakes

4c4779f93cf2364225adea78a9ee9d49.jpg


Started working on the headers, these ended up being the only thing that caused a problem with the addition of a V8 instead of the 4banger.

19fd12ff5022b3a24c9e5a43b8115674.jpg


16b0d3de633bfda552473dbbebfde529.jpg


Couple small sections to rework, but this side comes out easy enough. That was the main concern with the space they had to live in

6da0bc441858ba43b9ea9dad3c0c97b9.jpg
 

Latest posts

Top