You are using an out of date browser. It may not display this or other websites correctly.
You should upgrade or use an alternative browser.
You should upgrade or use an alternative browser.
Project "Secret Squirrel"
- Thread starter Jeepless
- Start date
Roccrawler
Well-Known Member
- Joined
- Mar 27, 2006
- Messages
- 6,325
Very nice work :beer:
GRNTACO
This Space Blank
crash said:Fixes ripping your studs off :;
I will have it done tonight or saturday morning...
Ok, I will wait for the pics. I am guessing the stud goes through that piece steel you have there then gets attaced to the arms?
TMFabrication
Well-Known Member
- Joined
- Apr 1, 2006
- Messages
- 376
I keep checking this thread for new updates, can you build it faster please:flipoff: Top notch work, can't wait to see how the rest comes out
crash2
-Oh no I picked a side-
TMFabrication said:I keep checking this thread for new updates, can you build it faster please:flipoff: Top notch work, can't wait to see how the rest comes out
Tell me about it--this damn job is just getting in the way :redneck:
crash2
-Oh no I picked a side-
Jeepless said:looks like I am the patient one....:flipoff:
Why don't you go---wax something shiney

War-Jeeper
Mailbox Killing War-Ho
Jeepless said:looks like I am the patient one....:flipoff:
Patient my ass yer always over there when i look at the crashfab cam asking if its done yet hahaha:flipoff:
THat would be me droping ooff more parts....cause the GF doesn't like them in thebed.....:haha: :haha:War-Jeeper said:Patient my ass yer always over there when i look at the crashfab cam asking if its done yet hahaha:flipoff:
Roccrawler
Well-Known Member
- Joined
- Mar 27, 2006
- Messages
- 6,325
please finish the pics for the 5th bolt in arms as I will need to do that to my bros truck..
bobbed_84_toy
ALWAY$ BROKE
Jeepless said:THat would be me droping ooff more parts....cause the GF doesn't like them in thebed.....:haha: :haha:
I have the same problem with my GF:wtf: :wtf:
I'll just never understand them females :haha: :haha:
crash2
-Oh no I picked a side-
So I went ahead and tacked the tab to the steering arm and drilled my pilot hole and then removed the tab and fully drilled the holes. For this one I am using 1/2" bolts. I have heard of people tapping the knuckle but its only a tad over 1/4" thick and IMO not thick enough to tap and be able to rely on it...

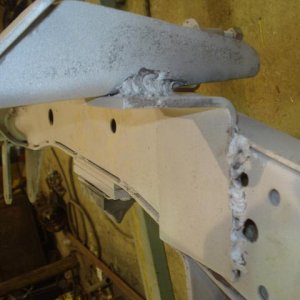
Here you can see the area you are trying to nail. Its a purfect cubby hole for the bolt head to sit in...


The only problem with the cubby hole is the edges are kinda round. So I went and used my die grinder bits to cut the roundness down so the bolt head sits pretty flush to the knuckle...
Here you can see the area you are trying to nail. Its a purfect cubby hole for the bolt head to sit in...
The only problem with the cubby hole is the edges are kinda round. So I went and used my die grinder bits to cut the roundness down so the bolt head sits pretty flush to the knuckle...
crash2
-Oh no I picked a side-
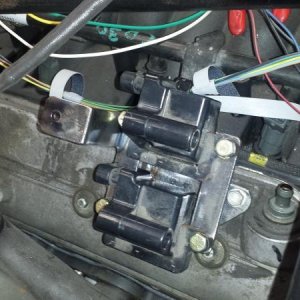
So you ask how do you keep the head of the bolt from rotaing while you are trying to tighten it? Here is how you fix that.

As you can see you will also need to grind a flat edge on the bolt head to clear the inner bell on the housing.
As you can see you will also need to grind a flat edge on the bolt head to clear the inner bell on the housing.
crash2
-Oh no I picked a side-
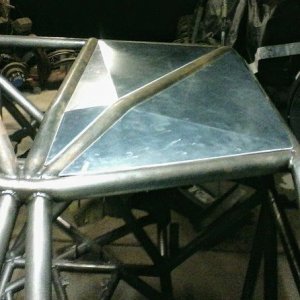
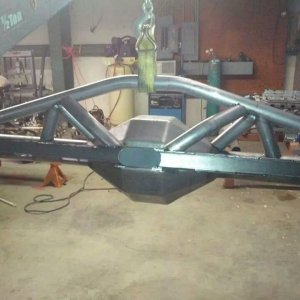
Now that was done---was time to fully weld the tabs to the arms.

And here it is fully bolted up..... :;

Also here is a view of the bolt head with the knucle on the housing. There is "just" enough room to pop it into place :;
And here it is fully bolted up..... :;
Also here is a view of the bolt head with the knucle on the housing. There is "just" enough room to pop it into place :;
crash2
-Oh no I picked a side-
So since that was done and jack brough me some more parts I figured it was time to try out the double flair parts I got for my hydro flair tool.
Here is the clutch hydro line all done :;

Here is the clutch hydro line all done :;
crash2
-Oh no I picked a side-
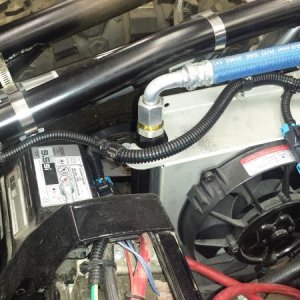
Jack also informed me of a new goodie he picked up.... :redneck:

I started to instal it when we found some missing parts so---I threw it back in the corner and kept going forward
I started to instal it when we found some missing parts so---I threw it back in the corner and kept going forward
TheMasterbater
Well-Known Member
mmmmmmmmmmmmmmmmmmmmmmmm ROOOOOOOOCCCCCKKKSTAR! :clappy:
crash2
-Oh no I picked a side-
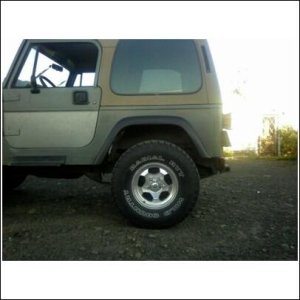
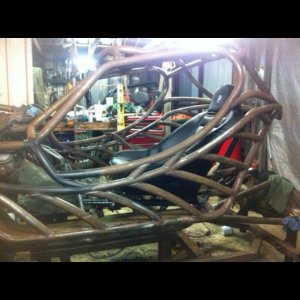
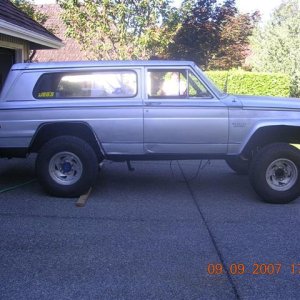
Ok well it was time to throw the tires on it. Unfortunately we havent gotten the u-bolts/spring plates for the front so a few c-clamps and it was ALLLL good
In any case I am pretty happy how it looks so far :;


In any case I am pretty happy how it looks so far :;
84Toyota4x4
Well-Known Member
Sweet! I expected the mount for that 5th stud to be a little more beefy, but I guess with the 4 others it should have TOO much stress on it.
Also, its trying to hold the arm to the knuckle, not just squish it between the nut and the top of the knuckle via the studs now, so I guess that makes a difference too in a way, lol
~T.J.
Also, its trying to hold the arm to the knuckle, not just squish it between the nut and the top of the knuckle via the studs now, so I guess that makes a difference too in a way, lol
~T.J.
crash said:I figured it was time to try out the double flair parts I got for my hydro flair tool.
Lemme guess, you saw Brad's and just had to have one huh. He did the same after seeing mine in action. :flipoff: