SXOR single seater build

Hardline Crawlers - Rock Bouncer Builds, Tech & Off-Road Trail Talk

Help Support Hardline Crawlers:

hokie_yj

Well-Known Member
Joined
Mar 23, 2012
Messages
1,499
Reaction score
127
City & State/Province
Surgoinsville, TN
I've been gathering parts for this build for almost two years. Progress will probably still be slow, but I'm going to copy my build thread here. Hopefully somebody will get some entertainment out of it.

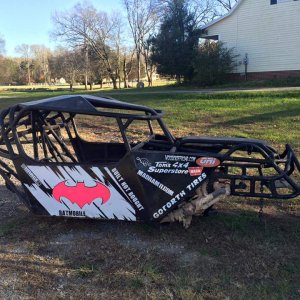
I found a deal on my favorite chassis design that was just too good to pass up. I picked it up as a rolling chassis. It's been built for several years, but it's never been finished. It will most likely be a slow build as I plan to keep my other buggy for now also.

I've been in love with this chassis design ever since I saw this buggy several years ago.


848354664_BDF4M-L.jpg


Hopefully when it's done it will look something like these. The first pic is actually the same buggy as above, it's just been updated and re-skinned.
851948626_Uq6Df-L.jpg


DSC_4703.jpg


Specs:
-'05 SXOR rear engine, single seat chassis
-empty flipped 609 housings
-3-link front, 4-link rear with .250 wall links
-14" SAW air shocks
-New SXOR Liberty hood and lexan skins

Here's a couple quick pics. I'll get some more detailed ones up soon.

P1000638.jpg

P1000639.jpg

P1000640.jpg
 
Parts list so far.

Engine: 6.0L LQ9 with cut down stand-alone harness and re-programmed computer.

null_zps44f5bf27.jpg


Transmission: Hughes built Powerglide with Atlas adapter

Front axle: 35 spline Moser inner shafts and custom made CTM stubs for the Dodge unit bearing outers with CTM joints. Yukon nodular 3rd, spool, 5.13s, 1350 yoke

Rear axle: FF 60 outers, with 35 spline shafts. Yukon nodular 3rd, spool, 5.13s, 1350 yoke.

Wheels: 17x9 Stazworks double beadlocks

null_zps607035f6.jpg

null_zpsb7b241e5.jpg


Tires: 39" BFG Reds

null_zps791b877b.jpg

null_zps2f571dc7.jpg
 
Re: Re: SXOR single seater build

I love that chassis! I got to Co-dawg in a 2 seater, they flatout work!
296856769_orzsp-O.jpg


Looking forward to updates!
 
Thanks! It's always been one of my favorites too.

Hopefully progress will pick up soon. I'm finally getting settled in to my new house/shop.


Sent from my iPhone using Tapatalk
 
Damn! I was wondering what happened to this. Thought you might have sold it. Glad to see its still around and youre still getting the parts together. Looking forward to the buildup.
 
Yeah, life kinda got in the way for a couple of years. I hope to have some real progress soon.


Sent from my iPhone using Tapatalk
 
I found a pair of new 14" ORIs last week. I went ahead and picked them up, and they came in today. I'm going to order another pair just like them either this week or next, but they're on a 6-8 week lead time right now. I went ahead and mocked them up on the front, and I thought I'd pull the rollers off and see how it looks with the 39s. I've still got to swap the tires over to the other wheels, but at least it gives an idea of how it's going to look.

It's sitting at full bump right now, and the belly height is 15.5". Right now it's about 74" outside to outside in the front ad about 70" in the rear. I didn't think to measure the backspacing of the wheels before I mounted them, but it looks like they're 4-4.5". The Stazworks wheels I'm going to run are 6" backspacing. The front may clear alright, but I think I'll definitely have to run spacers in the rear to clear the shocks, or find new wheels.

Anyway, on to the pics.

null_zps68668003.jpg


null_zpsfb08f3db.jpg


null_zps81b1b194.jpg


null_zpsd20b8404.jpg
 
Progress is still slow, but at least it's progress.

The factory 9" housings needed a little beefing up so I got a couple of DIY diff cover kits from BTF. I've got a couple ideas for trusses for both axles. I just need to pick up some steel and start making sparks.


I picked up a set of motor mounts for the LQ9 from Rock Tactics. Ignore the ugly TIG welds, I'm an electrician not a welder. :icon_lol:


I got the motor up on the stand and gave it a good cleaning and a coat of paint. Soon I'll be ready to mock it up in the chassis and start building the mounts.


Since Powerglides are known for having weak bellhousings I decided to just go ahead and go with a Ultra Bell. I made the rough cut with a sawzall, but I need to come up with a better way to to make the finish cut. I was a little nervous taking a sawzall to a high dollar transmission.


The new Atlas showed up this week too. I love when the brown Santa comes to visit.


Specs:
Competition case - 3.0 ratio
27 spline input
Driver side front output clocked flat
Competition 32 spline front output
Competition short tailshaft
1350 non-cv yokes
 
Thanks! I'm slow, and not a very talented fabricator like a lot of you guys. I just hope I don't screw it up too bad. laughing1
 
Believe it or not I'm still working on this thing. Slowly.


I've made a little progress over the last few weeks.


I finally got thebellhousing cut the rest of the way down on the powerglide, and gave it a good coat of paint.


The Ultra-Bell bolts up here to the pump bolts. It's really an easy install, and pretty cheap insurance.


Then I bolted on the Atlas adapter, and added a Stef's Fabrication deep aluminum pan and Lokar locking dipstick.


I didn't get a picture with the tape, but it's right 18.75" overall length. That's why I chose a Powerglide for this build. Space is tight, and it offers a lot of strength in a small package.


Since this is a rear engine buggy I'm runnin a front sump pan from a GTO. I got a trap door baffle that bolts in place of the factory baffle from Improved Racing. I plan to also add a 3 Qt. accumulator so hopefully oiling won't be an issue.


I've also been working on the rear axle. I decided to run Spidertrax/Wilwood brakes on all four corners to save some weight, plus they're pretty cool looking too.


I'm still kicking around the design for a bracket to bolt them to the Dodge knuckles in the front, but the rear was pretty simple. I had the hubs turned down so the rotor hat would slip on from the front. I got the caliper brackets from Racing in the Dirt, and I just had to weld a little spacer on them to get the spacing right.


I also added an Artec backbone truss. It's made to go on a fabricated 9" housing, but I chopped it up and grafted it onto my housing. It's tacked on, just waiting on my new blue welder to show up before i burn it in.


I can't decide if I want to truss the top of the housing or not. What do you guys think?
 
Thanks!

A buddy of mine was here just a little while ago and we were looking at it. I'm thinking I'll at least put something between the link towers and tie the link towers back to the backbone too.

I know this thing will be pretty light so bending it may not be as much of an issue as on some rigs. But I drive by Braille, and I don't want to ruin a weekend with a destroyed housing either.
 
Great plan you have going on. The HP to weight ratio is definitely tipping the scale to one side. Should be a fireball in the dirt.
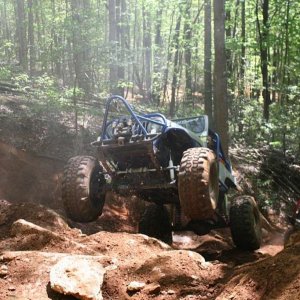
 
I will, but don't expect miracles. I'm slow. Lol.

I did order some Ruffstuff trusses today. They're for Yota mini truck axles but I'm thinking I can make them work on my housings, we'll see.
 
I've made a little progress the last couple days.

I picked up my new to me welder yesterday. It's way more welder than I'll ever need, but it's nice to finally use a real machine. The only problem is now I can't blame the machine for my horrible welds.


I immediately put it to work welding up the backbone truss on the rear axle. I spread the welding out over two days. I used the lowest settings possible and just made 1-2" welds in different areas, and let it cool. Hopefully I didn't warp the housing too bad. I guess we'll see.


This machine can even make a hack welder like me look halfway decent.


In between welding on the rear axle I started mocking up the Artec ram mount on the front axle.


Tomorrow I'll start trying to hack up the RuffStuff trusses for the top of both axles.
 
I worked some more today on the rear axle. I got the long side of the truss cut out and about half welded. Tomorrow I'll finish welding the long side and start mocking up the short side.


I finally finished the rear axle today. That was a lot of cutting, grinding and welding! I think I've blown a whole stick of DOM out of my nose the last 4 nights.

That's one RuffStuff Toyota truss hacked into 4 pieces. It's not fancy, but I think it'll get the job done.


I also added RuffStuff weld washers on all the link and shock tabs. I'm not posting pics of those though, the welds are UGLY. LOL
 
Lots of overtime and the cold weather have kept me out of the shop for a couple weeks, but I finally got a little more done this week. I got the truss and ram mount finished on the front axle. Not a lot of progress, but here's some pics.


I've got the knuckles off now and got the tie-rod hole drilled out for a 3/4" bolt. While they're off I'll mock up the Spidertrax brakes, and make my caliper bracket to bolt to the knuckles. I'm going to run Dynatrac Pro Steer balljoints. They're pricey, but hopefully they'll be worth it. I hope they'll hold up ok to the full hydro and 39s. I've got a set ordered and they should be here by the middle of next week.
 

Latest posts

Back
Top