• Help Support Hardline Crawlers :

Time to play with the big kids.

Push the brake MC's as far forward as you can. The more important number is the pivot for the pedals if your building your own. You need to really make sure you get full pedal stroke on the MC's so they'll bleed properly.
 
Last edited:
Push the brake MC's as far forward as you can. The more important number is the pivot for the pedals if your building your own. You need to really make sure you get full pedal stroke on the MC's so they'll bleed properly.

So build the pivit points hight so they have more of a awing radious at the point of the master cylinder shaft? I think I understand. I just need to be sure to get full stoke out of the MC's. I have the same setup at you do. Dule 1" Willwood MC's. I building a similar bracket too. I may mess with the pedal design tho. I have the MC bracket about 5" away right now and It looks like I will get all the movement I need. :eeek:
 
hey chris are you going to have this thing finshed for your trip down 4th of july to the rocks?

I better because I'm leaving for Reno next week Thursday for the Werock comp and then hopefully hitting up Calroc's Donner the weekend after. :eeek:

So build the pivit points hight so they have more of a awing radious at the point of the master cylinder shaft? I think I understand. I just need to be sure to get full stoke out of the MC's. I have the same setup at you do. Dule 1" Willwood MC's. I building a similar bracket too. I may mess with the pedal design tho. I have the MC bracket about 5" away right now and It looks like I will get all the movement I need. :eeek:

Just don't commit to anything until you make sure the pedals work. I had to move and lengthen the pivot point 2 times to make it work the way I wanted it to. The bigger the Arc the better though so the vertical change on the height were the push rod connects doesn't change to much and bind up in the bore of the MC.
 
Hey pook if you could get me a quick measurement that would be great. I just need to know how far back you set you master cylinder bracket from the dash tube.

Just looked at that brake picture again, I moved the MC's farther ahead later on. They were sitting at about 5" forward (dash bar -> mounting flange). They now sit 8.5" forward.
 
Well got a little farther tonight. We got the seat belt tabs all done, gas tank chassis mounts finished up. I got the engine skidplate all tacked up, just needs a few finishing touches to be 100%.

www.koolcoatceramiccoatings.com hooked me up by ceramic coating my entire exhaust system. I dropped it off at lunch time yesterday and got it all back this morning. I went with the black finish since it gives the best temperture drops.

If it works as advertised it should save me from having to do an exhaust wrap. I may add a couple heat shields for added heat control, but will try as is for now.
 

Attachments

  • image220.jpg
    image220.jpg
    42.7 KB · Views: 263
  • image221.jpg
    image221.jpg
    33.9 KB · Views: 268
  • image222.jpg
    image222.jpg
    40.1 KB · Views: 273
  • image223.jpg
    image223.jpg
    43.5 KB · Views: 268
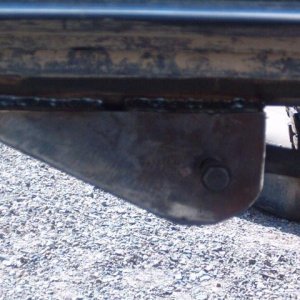
Its built the same way S&N does them, .25" plate for the bottom only thing I did different was I added an 1.25"x.25" flat bar on edge to stiffen it up. Hopefully it will keep its shape.


I'll take some pictures when its out for final welding. I might add a few more light braces to beef it up some more.
 
Got the chassis and tabs fully welded, still way behind were I wanted to by today, and I'm stuck working for awhile.

Temporary steering cooler (going to get larger one later) and harness mounts all in. Mini rocksliders added, and the chassis stripped and painted.

Really wanted to powdercoat it but that will have to wait for next winter.
 

Attachments

  • image306.jpg
    image306.jpg
    45.7 KB · Views: 265
  • image307.jpg
    image307.jpg
    56 KB · Views: 263
  • image300.jpg
    image300.jpg
    54.5 KB · Views: 270
  • image302.jpg
    image302.jpg
    58.3 KB · Views: 262
  • image304.jpg
    image304.jpg
    66.1 KB · Views: 268
looks like you might make it huh?
good luck its looking good:awesomework:

Its going to be tight. Still need to get the diffs and steering finished.
Machine the lower links. And set up the steering, need to find some arms that will work or build some.


Plumb and wire it all up. Its going to be close.

Sitting here at work is killing me. 2 more things running on the CNC mill and I can go home.
 
Last edited:
wiring and plumbing suck they take to long and the car looks done but its not
we spent two days doing my brothers rig felt like forever
 
I'm going with all AN fittings, areoquip hose and plastic brakelines, so I'm hoping it will go pretty fast.

Motor Harness is more or less done so its just the ARB compressor, fan etc that needs to be wired from scratch.

That reminds me I need to modify my radaitor necks.
 
I'm going with all AN fittings, areoquip hose and plastic brakelines, so I'm hoping it will go pretty fast.

Yes it will....alot faster than hard lines for sure.....I've done both.

[/QUOTE]Motor Harness is more or less done so its just the ARB compressor, fan etc that needs to be wired from scratch.[/QUOTE]

If your NOT useing relays make sure your switch can handle the startup draw of your main cooling fan.....

[/QUOTE]That reminds me I need to modify my radaitor necks.[/QUOTE]

Make sure the fit-up of your neck parts are PERFECT and if I were [you] I would set your current a little on the low side when you start goin at your welds......nothing personal......but ya know.......better be on the safe side:redneck:
 
Sweet!!!! Pook, I can't wait to head up to Canada with Stealthrunner, Mark M., and Money. I have been trying to get my rig done as well.... The S&N Chassis looks awesome. :awesomework::awesomework: I had a blast with Johnny 5 and Big Ern. What a perfect day at the outlet mall. Tonight Stealthrunner is busy working on the Formula in the driveway as we speek.. He is getting the fuel cell mounted. Sealthrunner needs some motivation:flipoff::flipoff: Drive or Jack!!!
 
Top