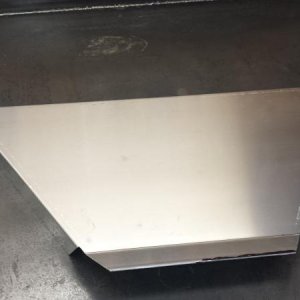
• Help Support Hardline Crawlers :

Time to play with the big kids.

Actually there isn't much left on the check list. :redneck:

Some tabs for body panels, a bit more in the interior and need to finish up the front diff brackets and steering stuff. I'll be wheeling real soon :beer:
 
Got the winch drum powdercoated, cut/tapped the cross rods and reassembled.
 

Attachments

  • image107.jpg
    image107.jpg
    33.7 KB · Views: 323
  • image108.jpg
    image108.jpg
    31.9 KB · Views: 315
  • image109.jpg
    image109.jpg
    28.2 KB · Views: 323
Got a bit farther on the bumper. Winch fits good in its new home.
 

Attachments

  • image100.jpg
    image100.jpg
    36.3 KB · Views: 323
  • image101.jpg
    image101.jpg
    30.6 KB · Views: 316
  • image102.jpg
    image102.jpg
    38.3 KB · Views: 321
  • image103.jpg
    image103.jpg
    34.6 KB · Views: 313
  • image106.jpg
    image106.jpg
    37.4 KB · Views: 314
The hole out the bottom is for when its being used as a suckdown winch. It'll be running against the round tube closest to the radiator and the corners have been welding up and smoothed into a radius.

When being used as a winch it'll be ran over the front bumper tube. If I need to I'll make one but my last rig never had a fairlead, the rope just ran on the tubes with no issues.
 
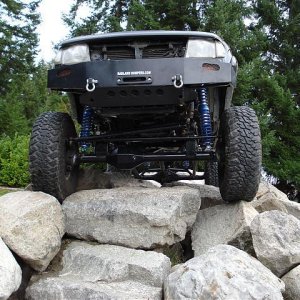
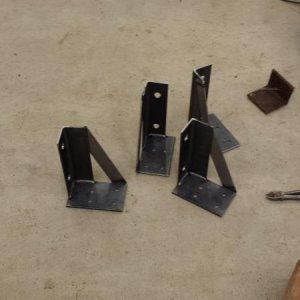
Pook, You rig is really looking good. I have been slaving on a guys jeep to get it done so I can get back on mine. I have been looking at the way you are mounting some of your stuff. Could you post a few more pics of your seat mounts? Thanks dude, really appreciate it. :awesomework:
 
Bumper more or less done and tacked up. Reworked the lower links for a bit more turning radius.

I spent a lot of time getting my ftoy to turn sharper (around 40 deg's) this one will turn 48 deg on the inside and 50 on the outside. I'll be limiting it back to 46 inside and 48 outside to allow for tierod and knuckle flex.
 

Attachments

  • image002.jpg
    image002.jpg
    46.8 KB · Views: 364
  • image005.jpg
    image005.jpg
    47.3 KB · Views: 363
  • image006.jpg
    image006.jpg
    42.4 KB · Views: 370
  • image001.jpg
    image001.jpg
    52 KB · Views: 359
  • image004.jpg
    image004.jpg
    44.2 KB · Views: 365
No paint, just finished up a bunch of little stuff. I'm getting all the little tabs in and stuff routed were it needs to go...so I'm hoping that will make final assembly go real fast.

I could not fit a piece of tubing between the rad and pulleys for my air intake, so after looking at the stock Air tube and its non round shape, I came up with this. It will be bolted to the rad support, to help keep the intake air from getting hot I spaced it up off the rad.

I also extended the firewall up the hood so I can keep the guys at tech happy.
I also gained some visibility by doing this. I won't be running the dash right across and will be keeping that passenger foot well area totally open.
 

Attachments

  • image211.jpg
    image211.jpg
    52.3 KB · Views: 281
  • image212.jpg
    image212.jpg
    50.7 KB · Views: 283
  • image202.jpg
    image202.jpg
    42.1 KB · Views: 288
  • image201.jpg
    image201.jpg
    47.6 KB · Views: 277
  • image200.jpg
    image200.jpg
    46.6 KB · Views: 288
Dash is all welded up, just need to finish the tabs on the chassis (its just resting there in the pics) and add cut out the holes for the switches. I wanted to keep everything up were I can see it easily. So without having to turn my head I can double check if the ARB'S are on/off and all with in easy reach of the steering wheel for quick on the fly control.

Kill switch is in. Easy spot to run a lanyard up the window bar.

2in-2out cutting brakes finally found a home. The dual action makes them a real pain to install since the swing in a pretty good sized arc.

I went with three small mechanical gauges, similar to the ones I had in the ftoy. Those ones worked good so I figure why reinvent.
 

Attachments

  • image210.jpg
    image210.jpg
    45.3 KB · Views: 283
  • image209.jpg
    image209.jpg
    49.4 KB · Views: 279
  • image204.jpg
    image204.jpg
    44.8 KB · Views: 278
Hey pook if you could get me a quick measurement that would be great. I just need to know how far back you set you master cylinder bracket from the dash tube.
 

Attachments

  • BRAKES2.jpg
    BRAKES2.jpg
    49.9 KB · Views: 265
Top