• Help Support Hardline Crawlers :

"Wishin' 4 One Tons" The 86ish Grand Waggy

FlatlandFSJ

Well-Known Member
Joined
Feb 12, 2014
Messages
1,095
Location
SoWal Florida
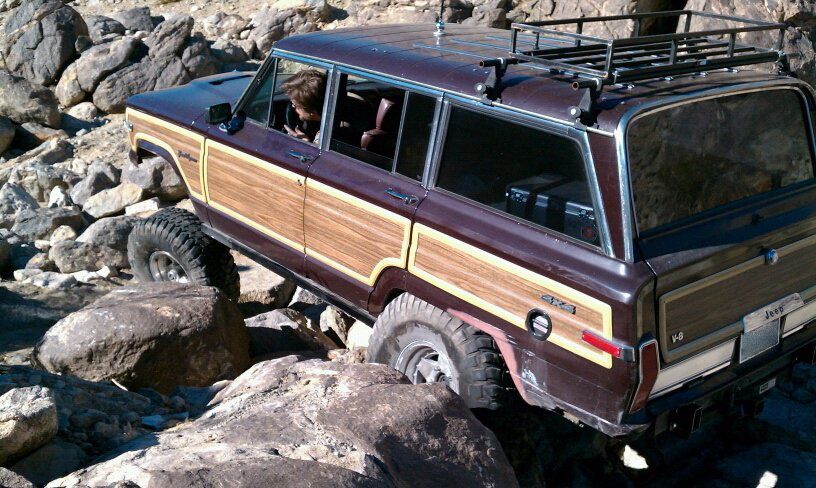
Figure Ill jump on the bandwagon as well :dblthumb:


Some have seen pics in the random thread, but I guess its time to actually dig thru 2 years of pictures and make a thread on the piece of **** that is my waggy.First bit Ill catch you up to were I started caring and started taking pictures.
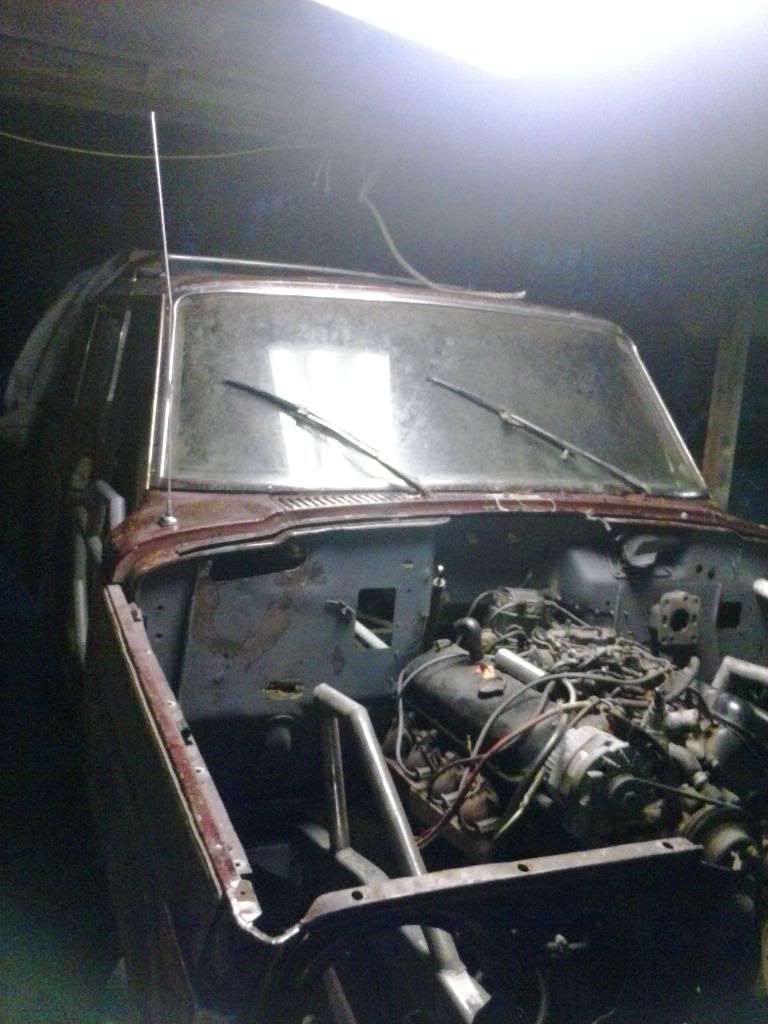
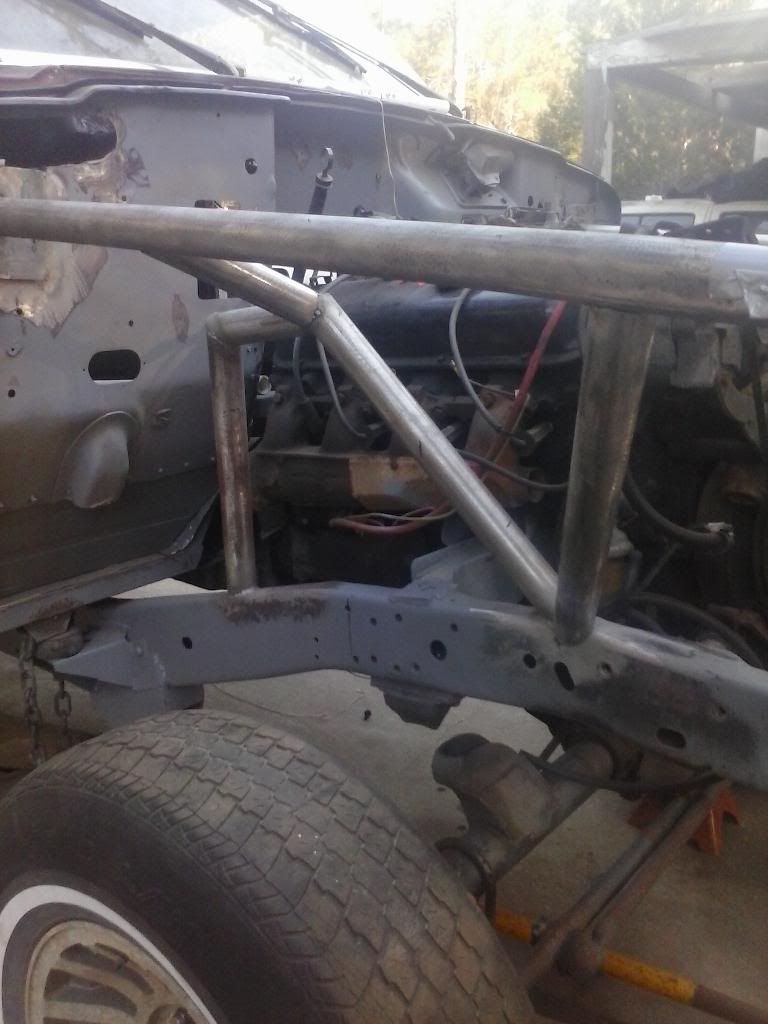
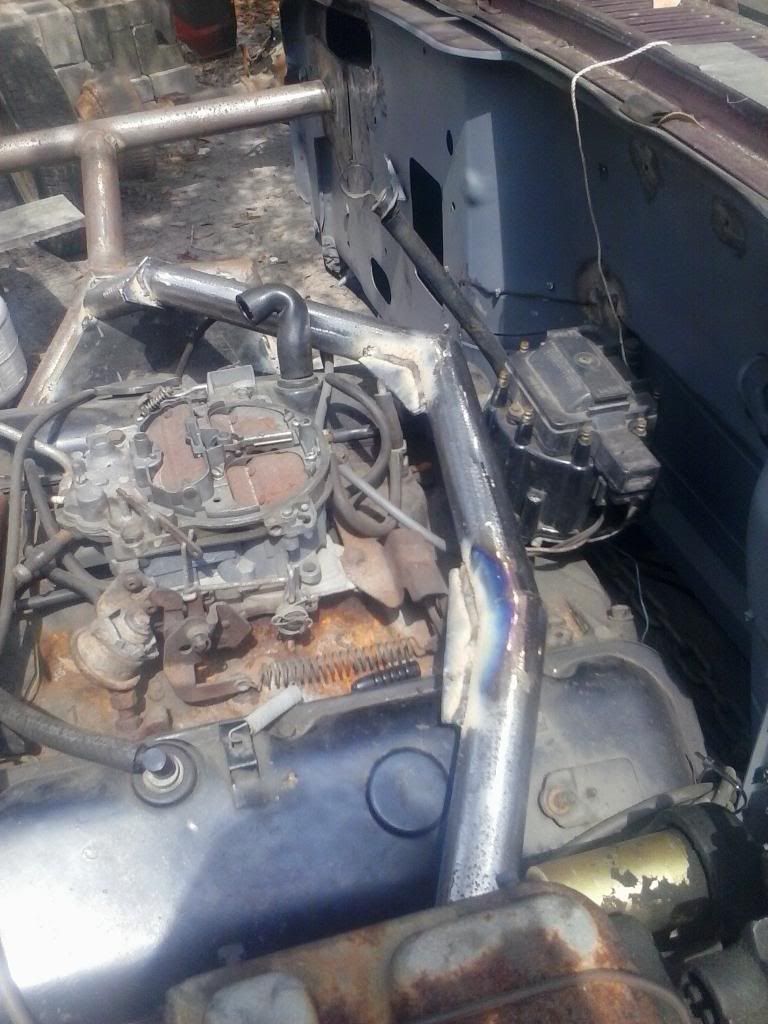
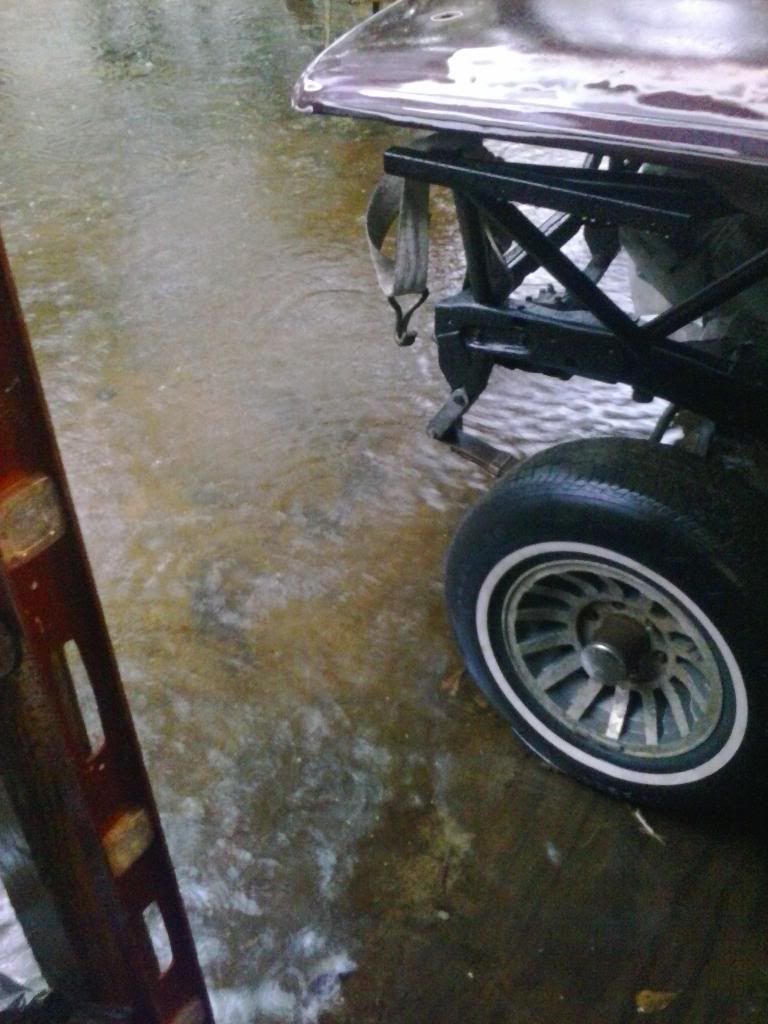
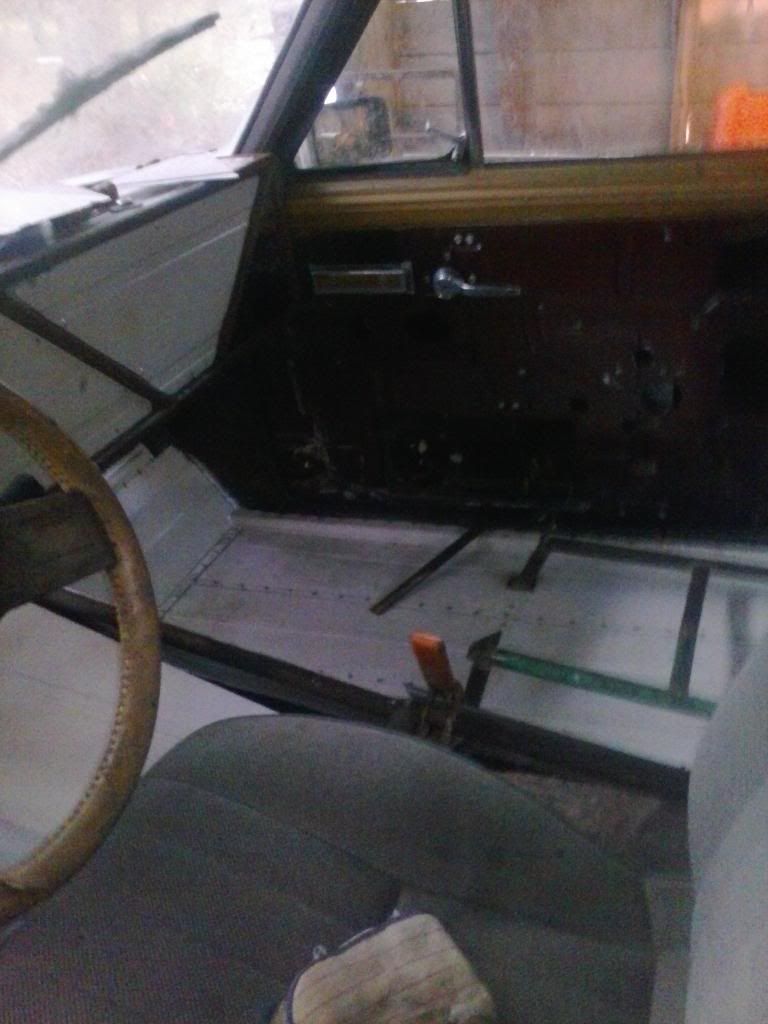
The original plan for this thing was to just toss some 33's on it and drive it, but....well yea **** happens. It had been sitting for 7-8 years with the hood open and the drivers window down(more or this later). So it was no surprise the motor was more or less done for, pulled the drainplug and about a gallon of water came out before any oil did :****: Snatched the 360/727/229 and unloaded the torque flight to a guy on vacation from Louisiana, guess he really needed it cause I loaded it and the 229 onto a hitch style cargo basket on the back of a mini-van. At this point it was kinda stalled til I found a new motor/trans. In this time I had stripped the waggy back to nothing,started mesing with a dash and found out the entire driver side of the floor was gone from it sitting with the window open. So I chopped out everything from the flat portion of the fire wall to the small step below the rear seat. Sitting in the truck with the stock seat/floor I knew i would never be able to get a cage in it and be comfortable(I'm dam near 6'5) so while I had the floor out I decided to drop it 1.5" which also picked the body up about an inch and let me shove the 454/400 way up in the frame.

Specific pics will be lacking til I kinda figured out what I was doing

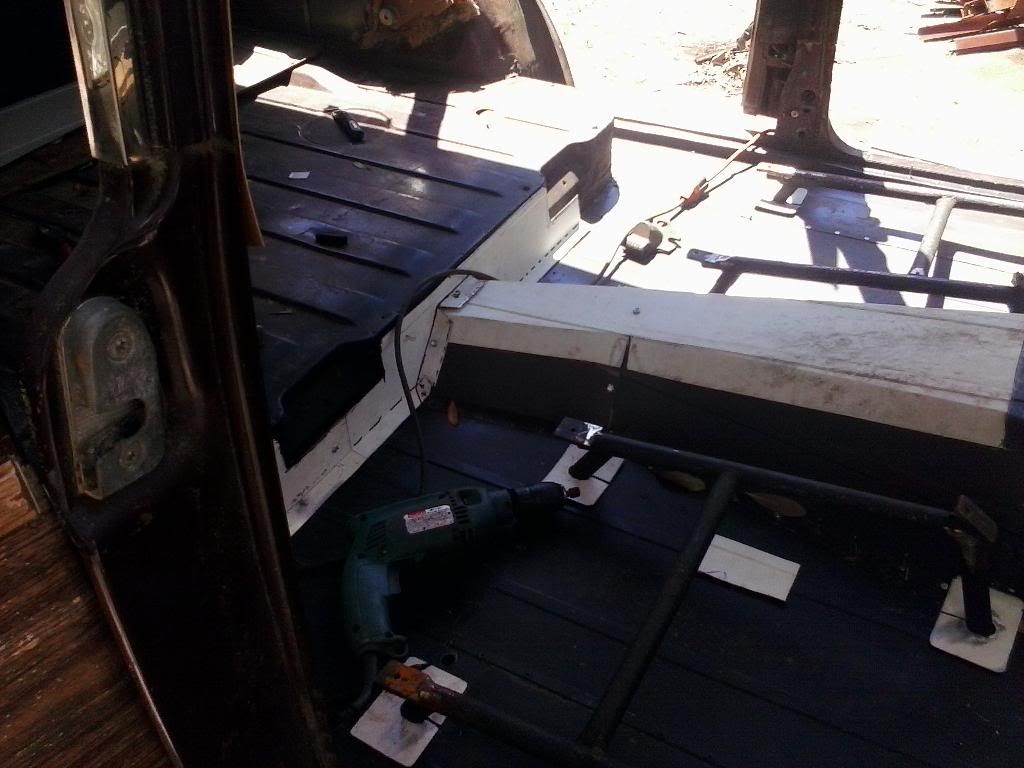
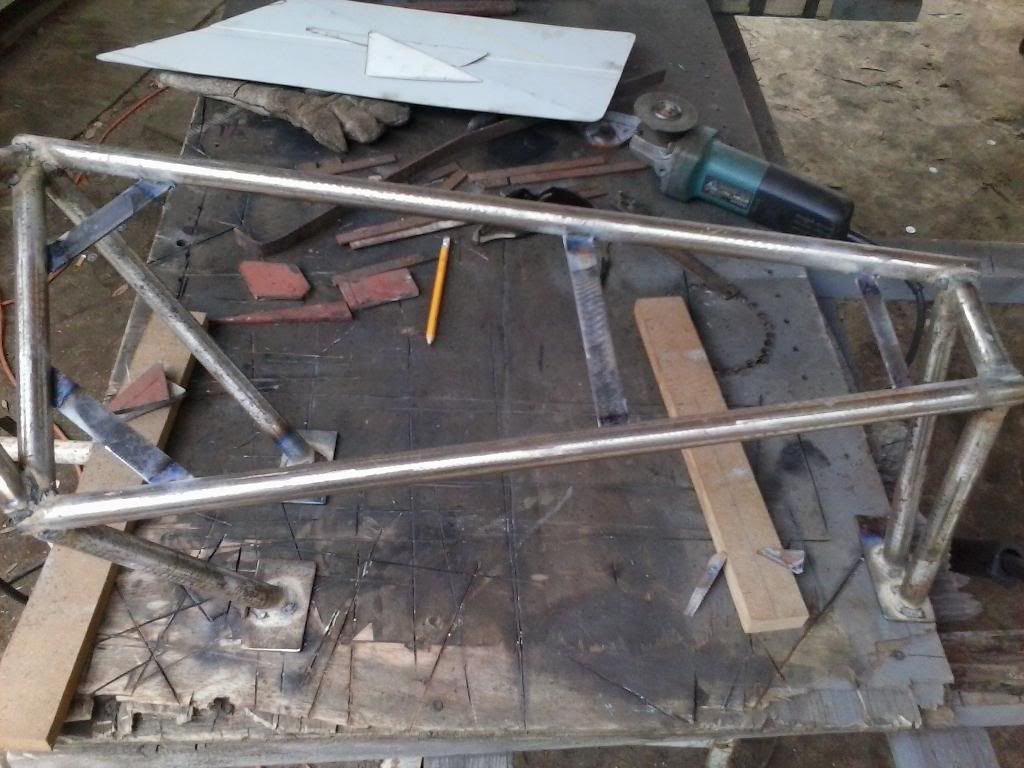
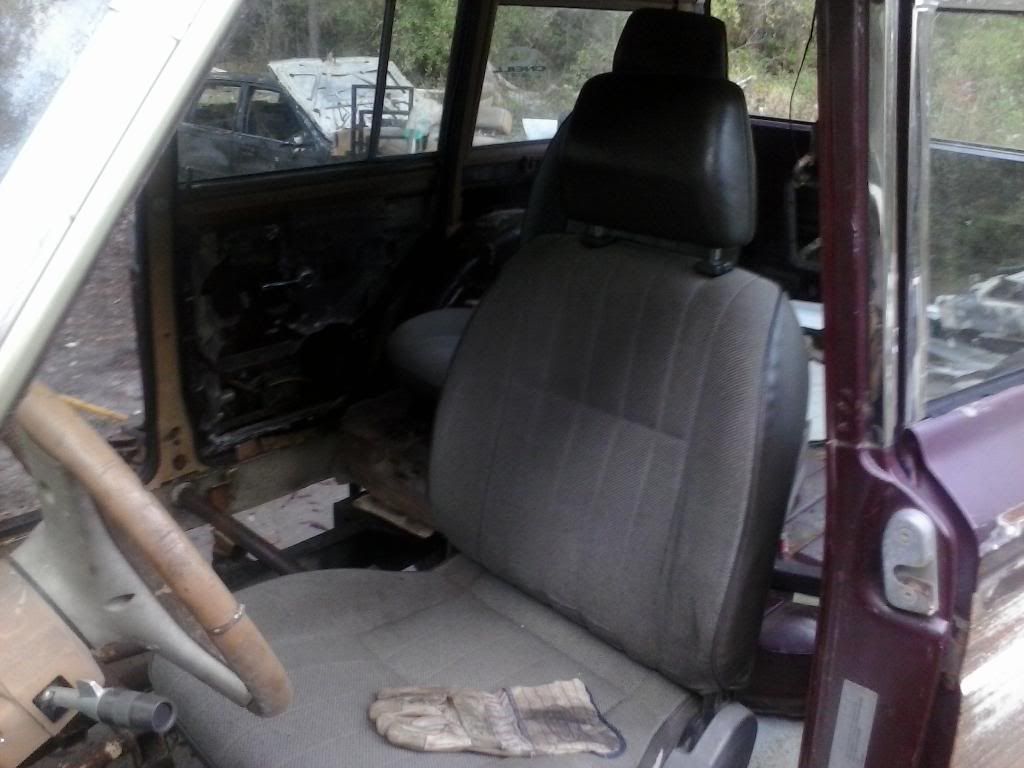
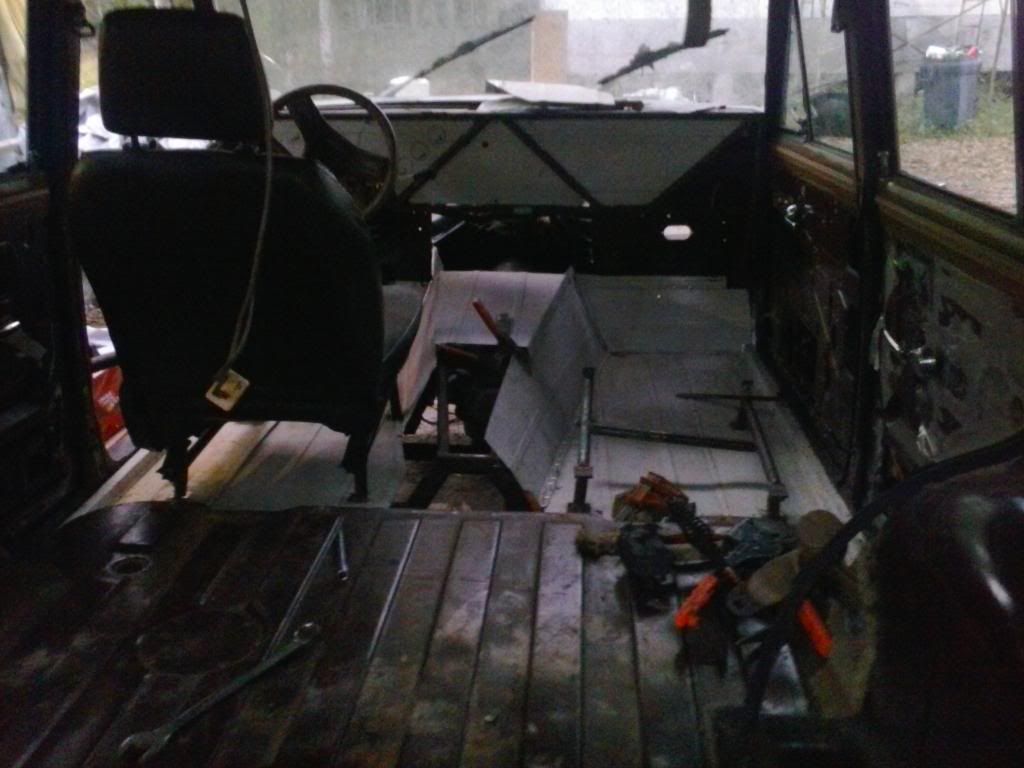
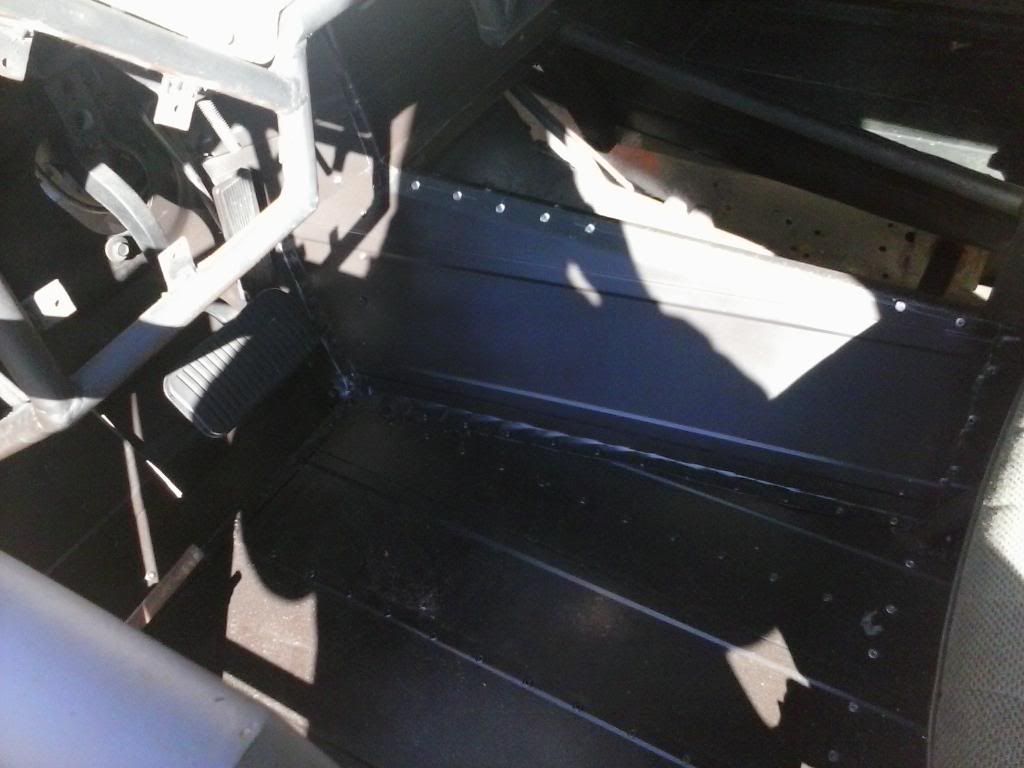
Floor chopped out some new cross bracing/seat mock up
IMG_20131205_154618_zpsa9itimr6.jpg


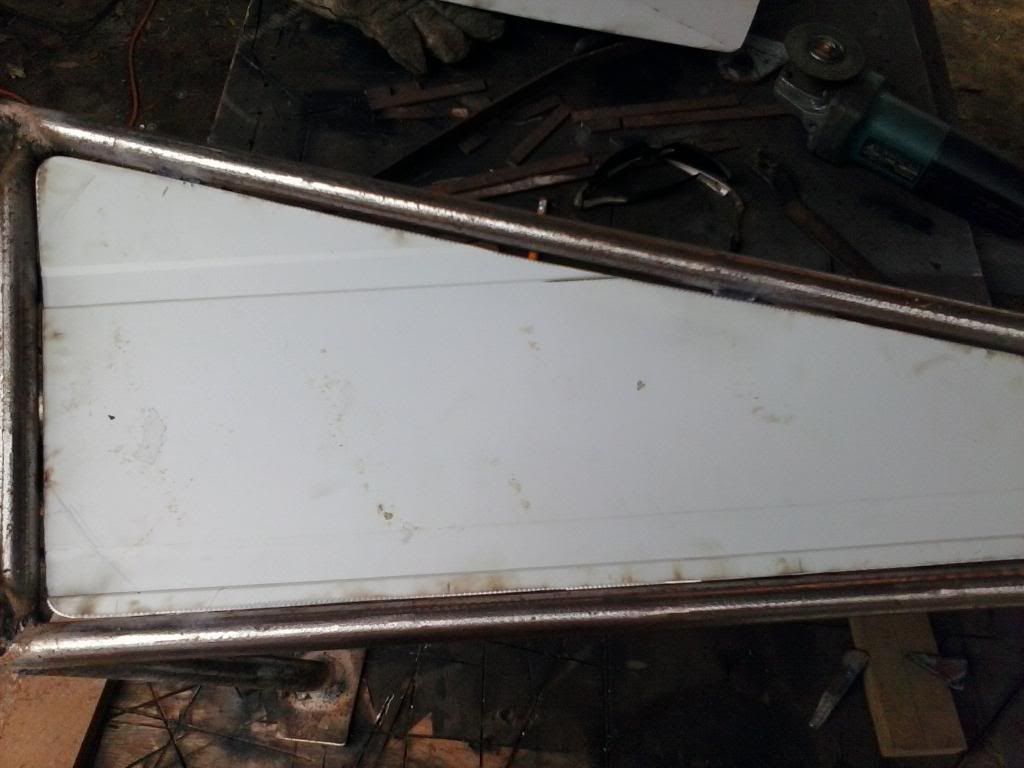
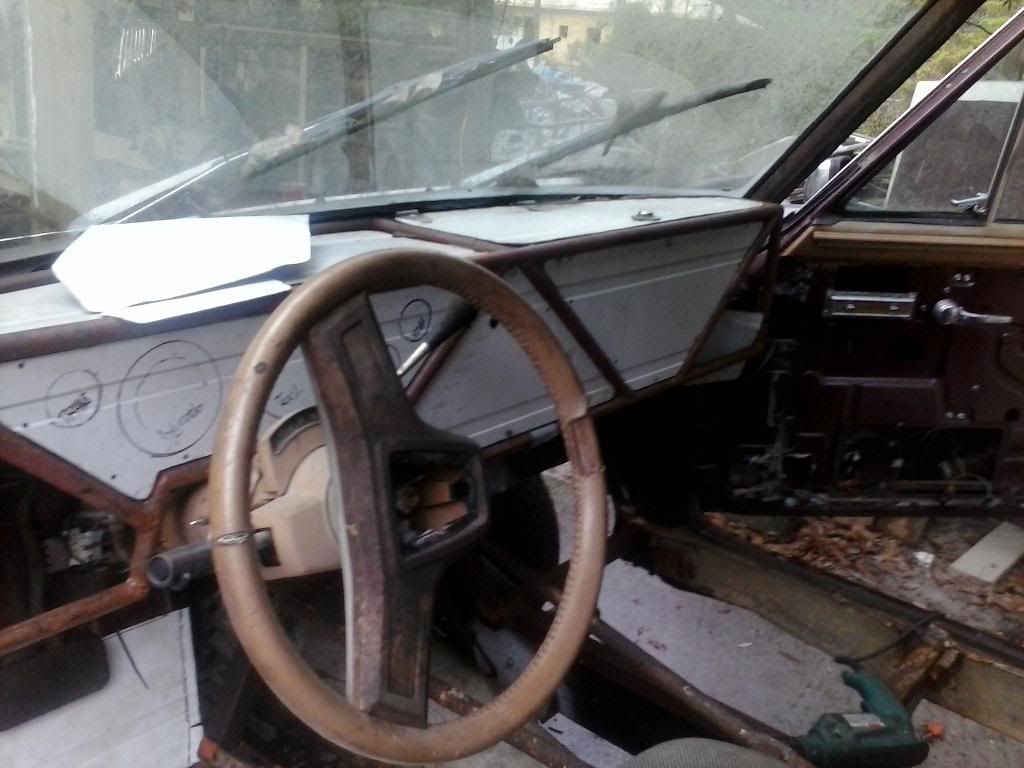
Dash and some of the floor bracing, rust is the new powercoat right?
IMG_20131205_154600_zpsjaammeog.jpg


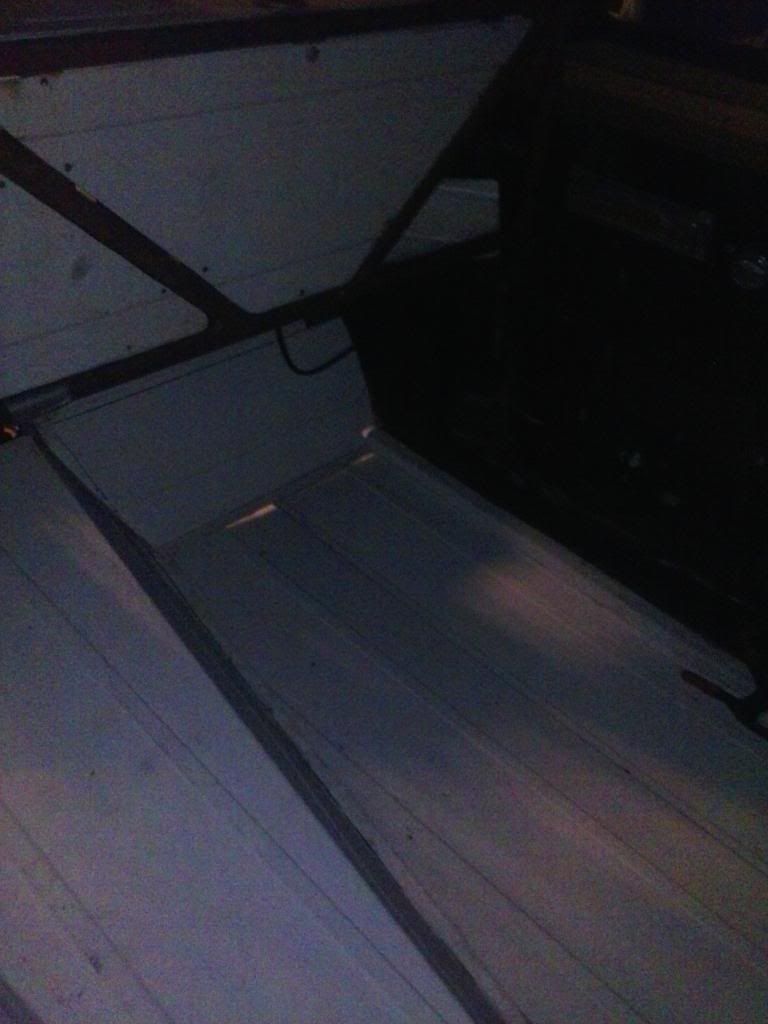
Floor coming together...kinda
IMG_20131208_174403_zpsc2xvgdnt.jpg


Seat mount, these are tied into the crossmembers for the floor, should be easy enough to chop them off and get them mounted to the cage when it goes in
IMG_20131222_073634_zps4j5tj2bn.jpg


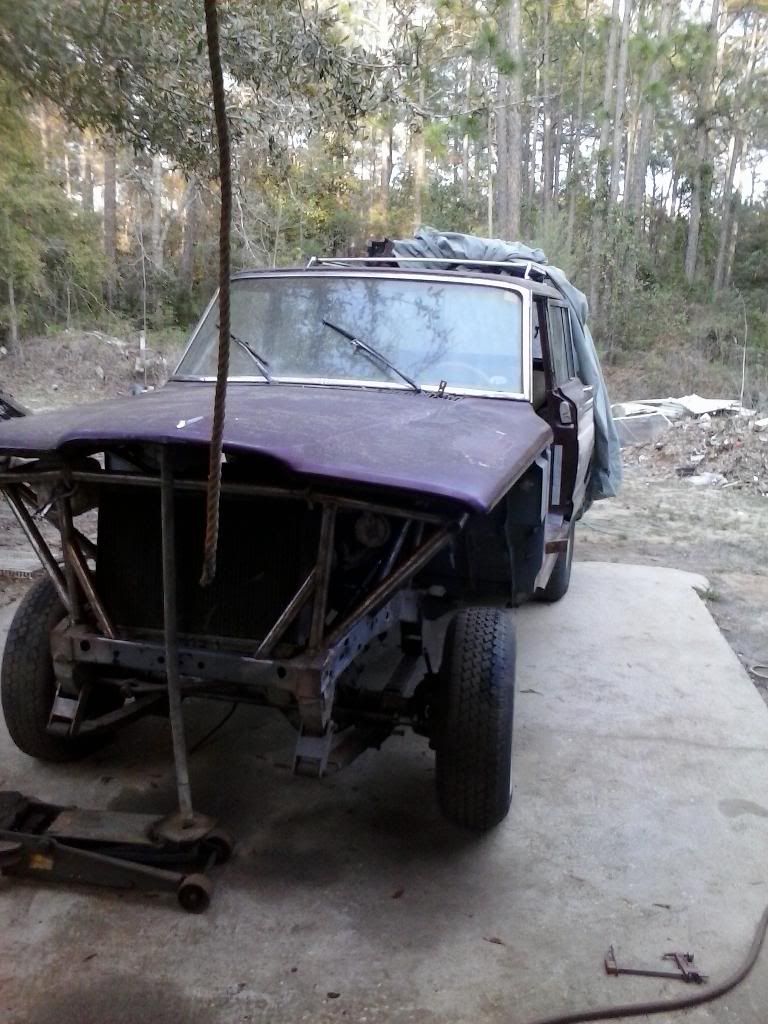
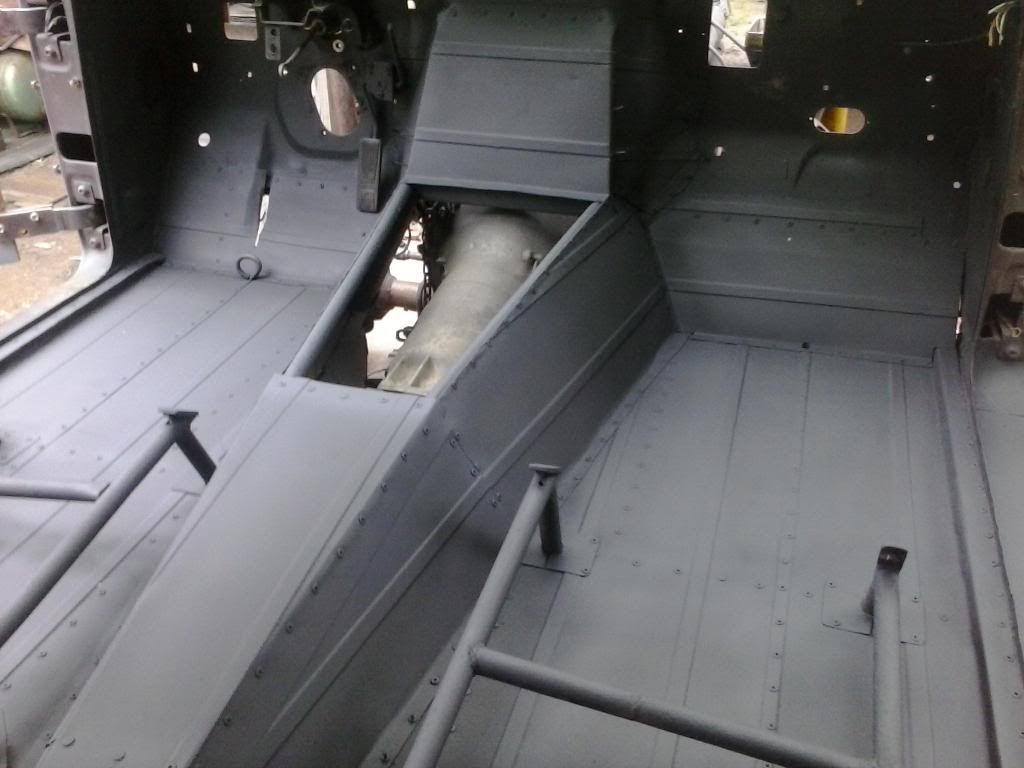
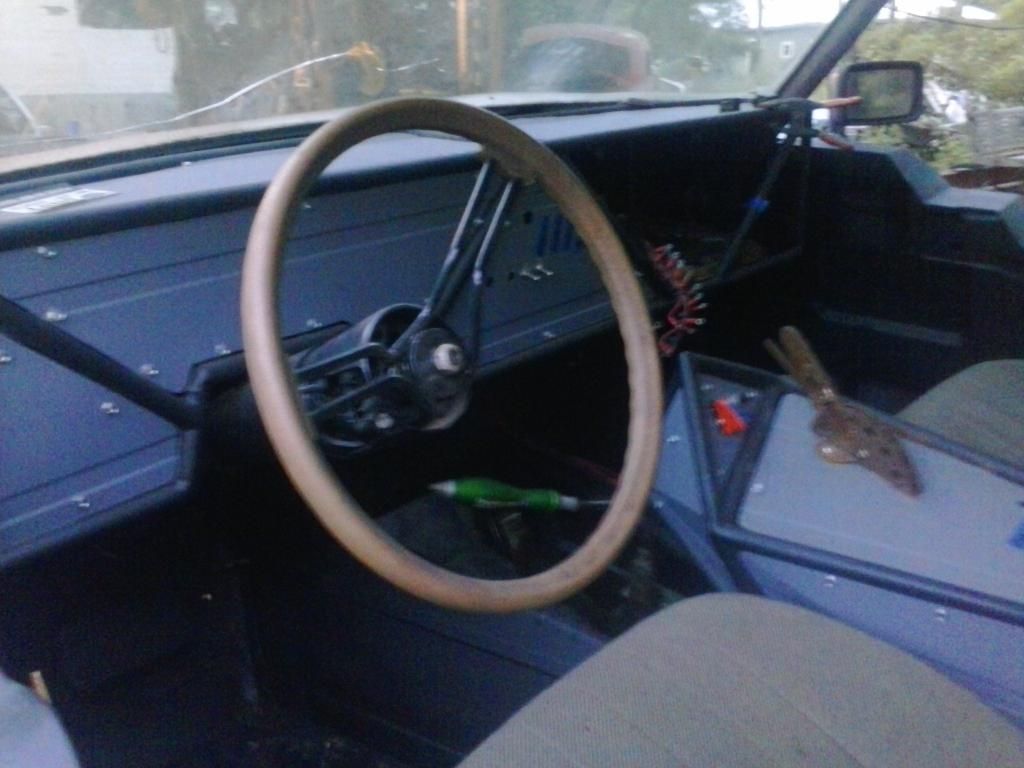
Over shot of the floor/dash coming together
IMG_20131222_163035_zpsmgjj91gd.jpg


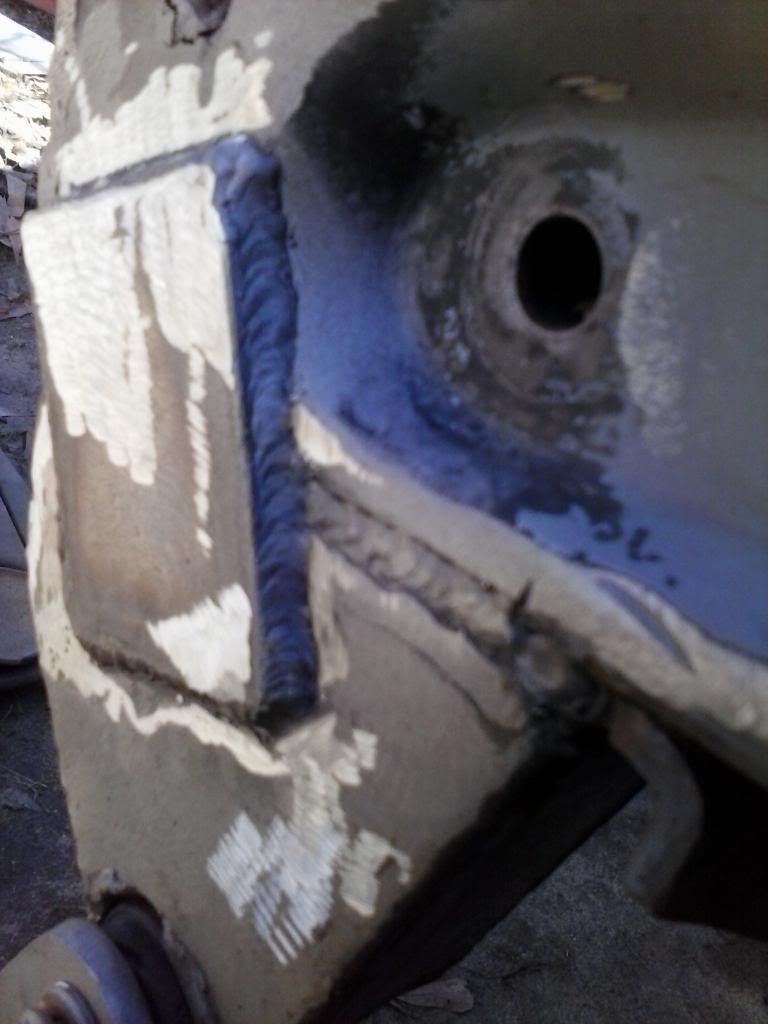
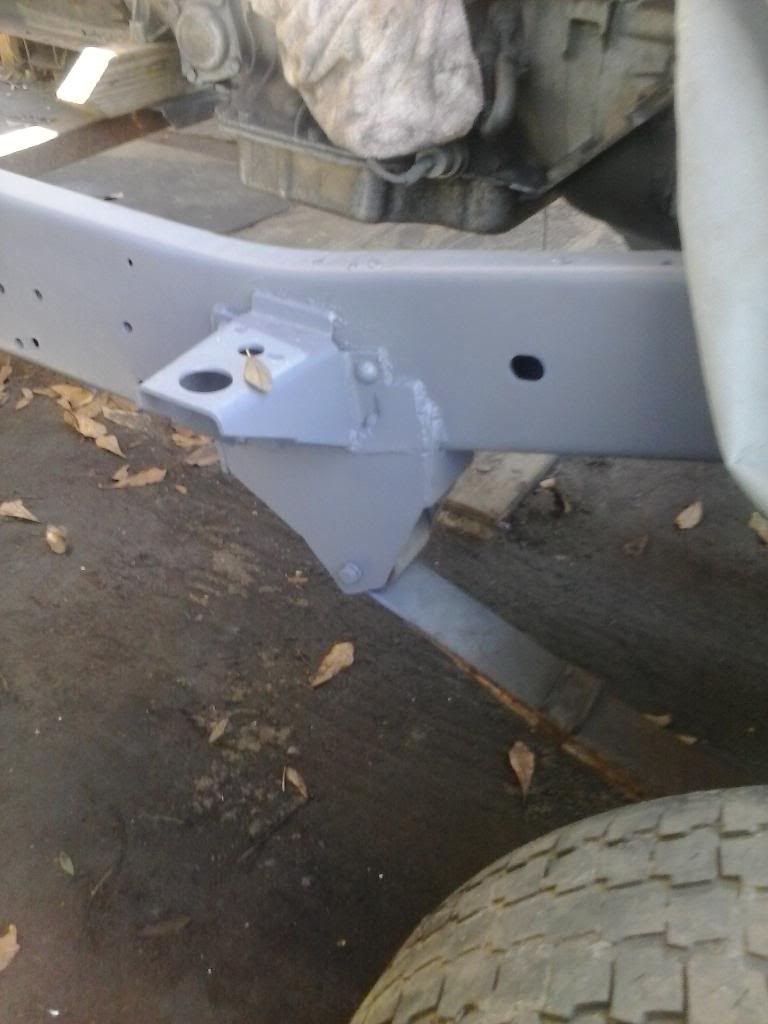
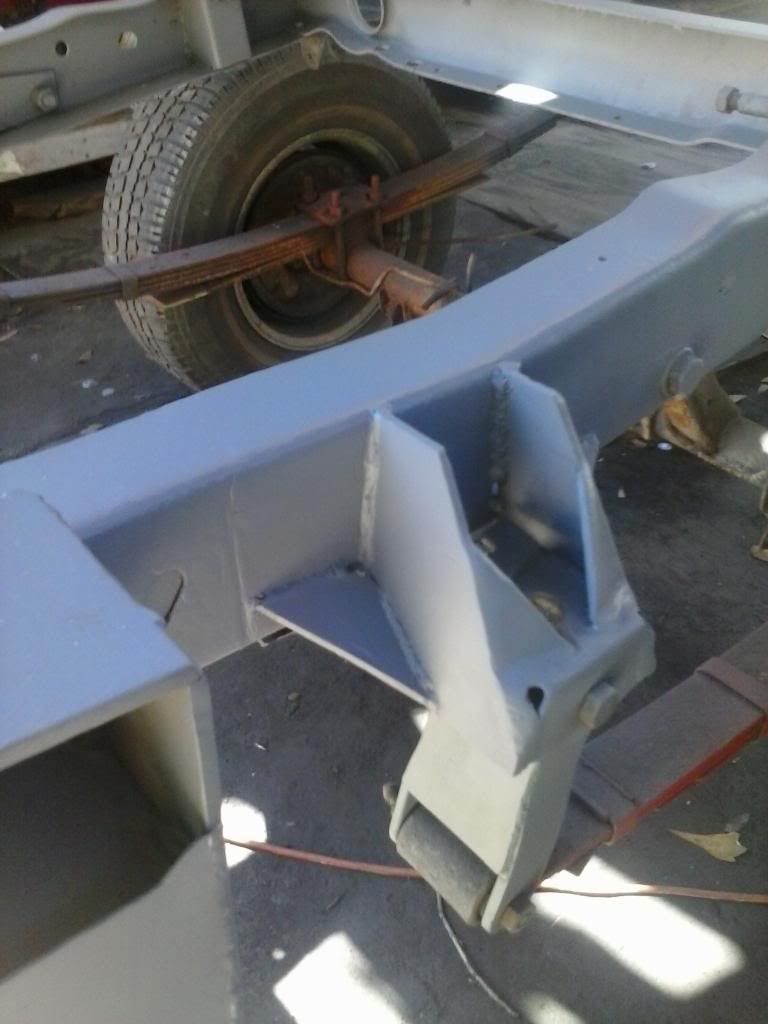
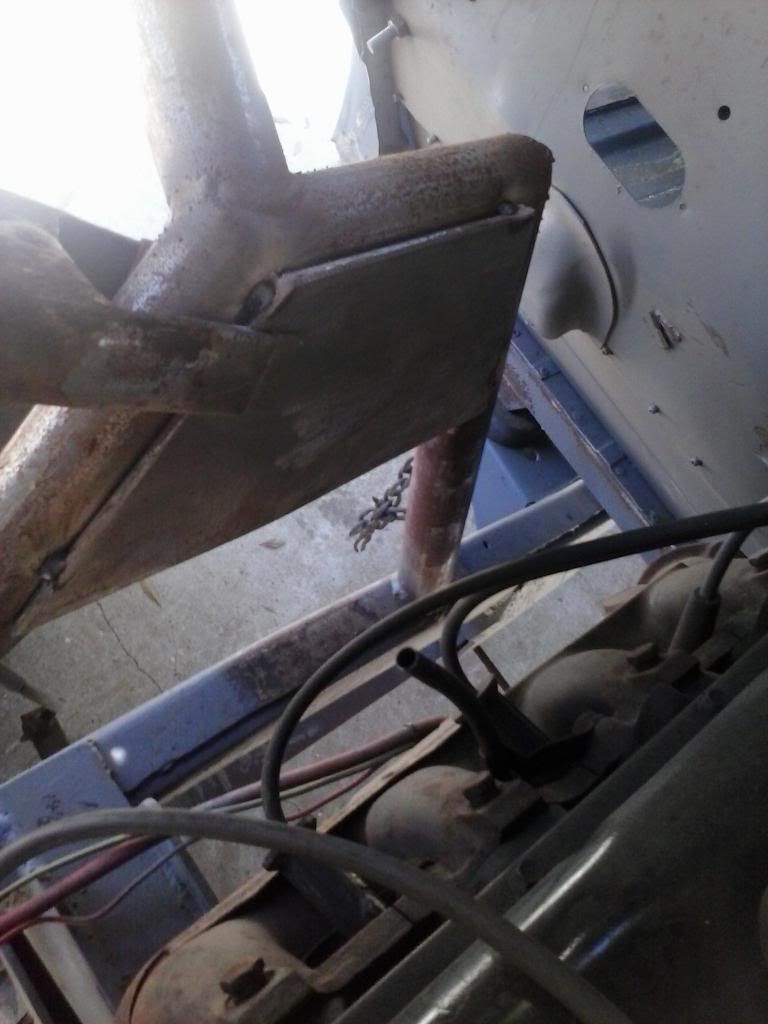
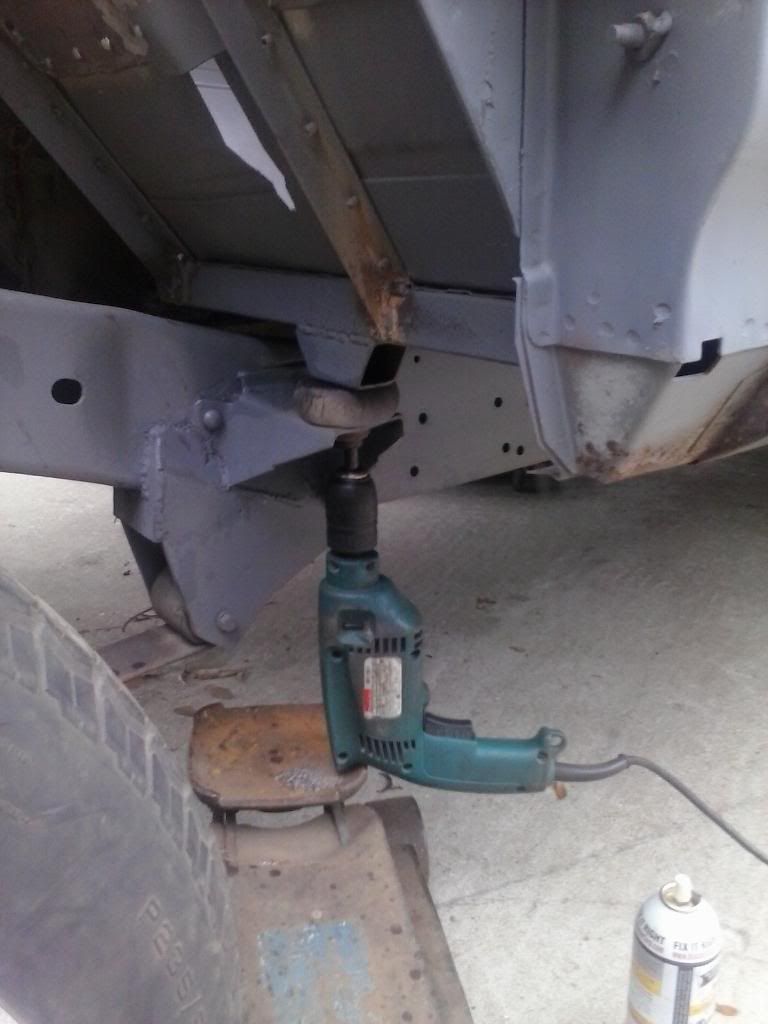
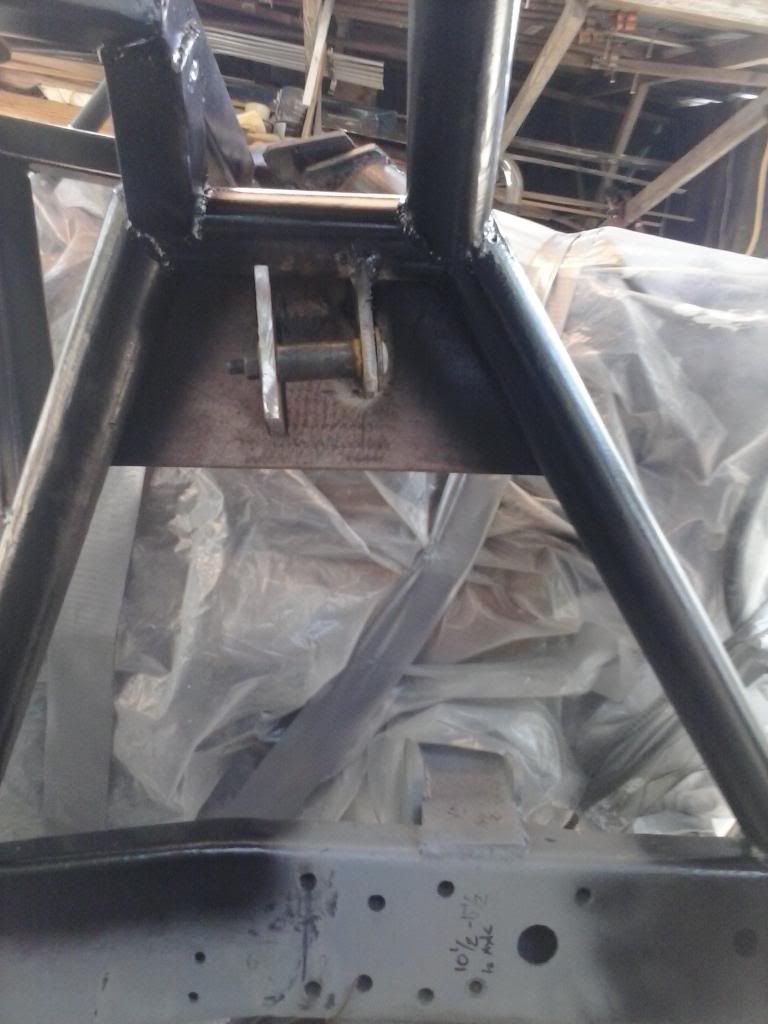
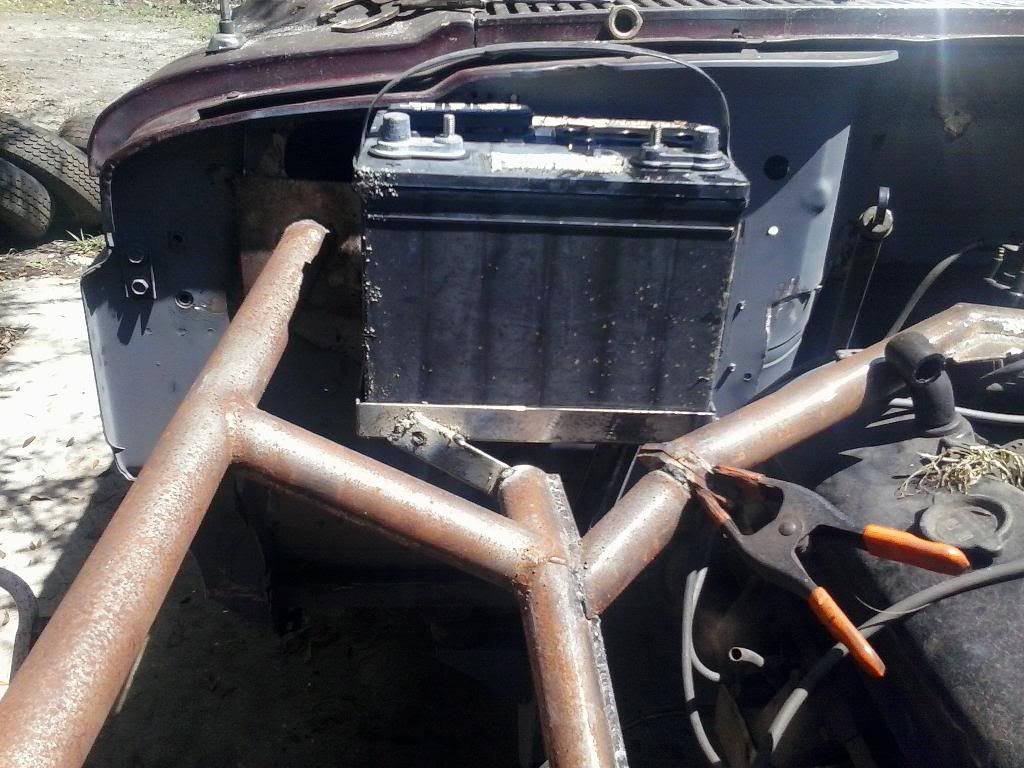
Cleaned up the front rails a little bit
IMG_20140109_141828_zpsnlqwkalr.jpg

IMG_20140109_161325_zpsz12ivmwv.jpg

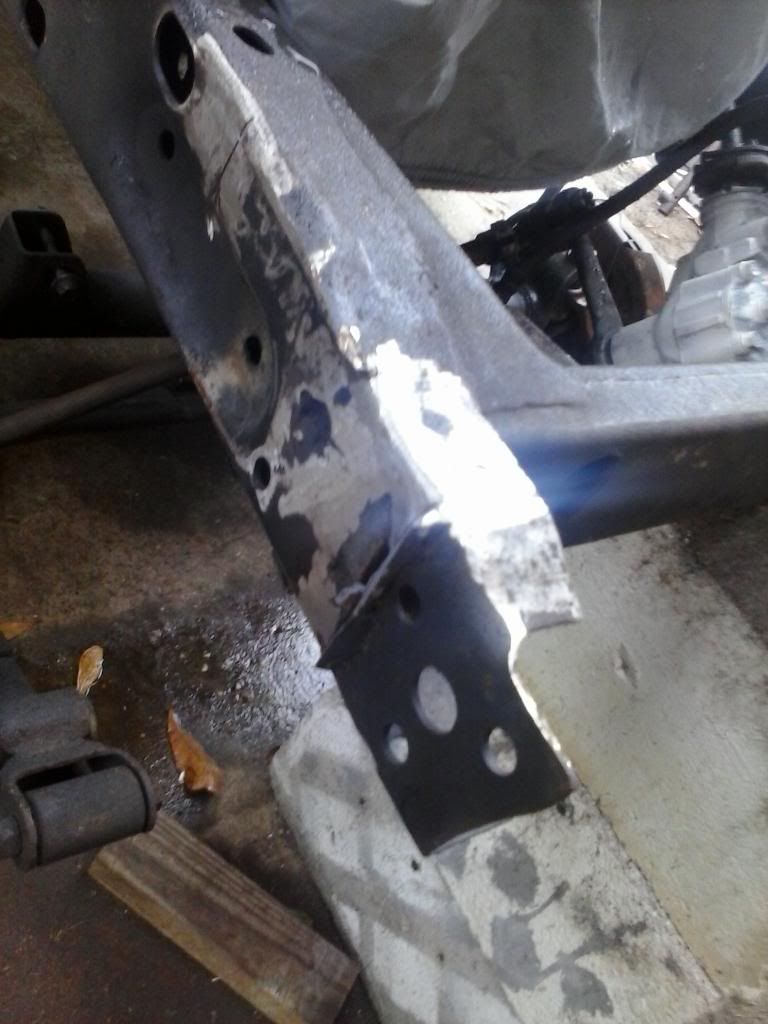
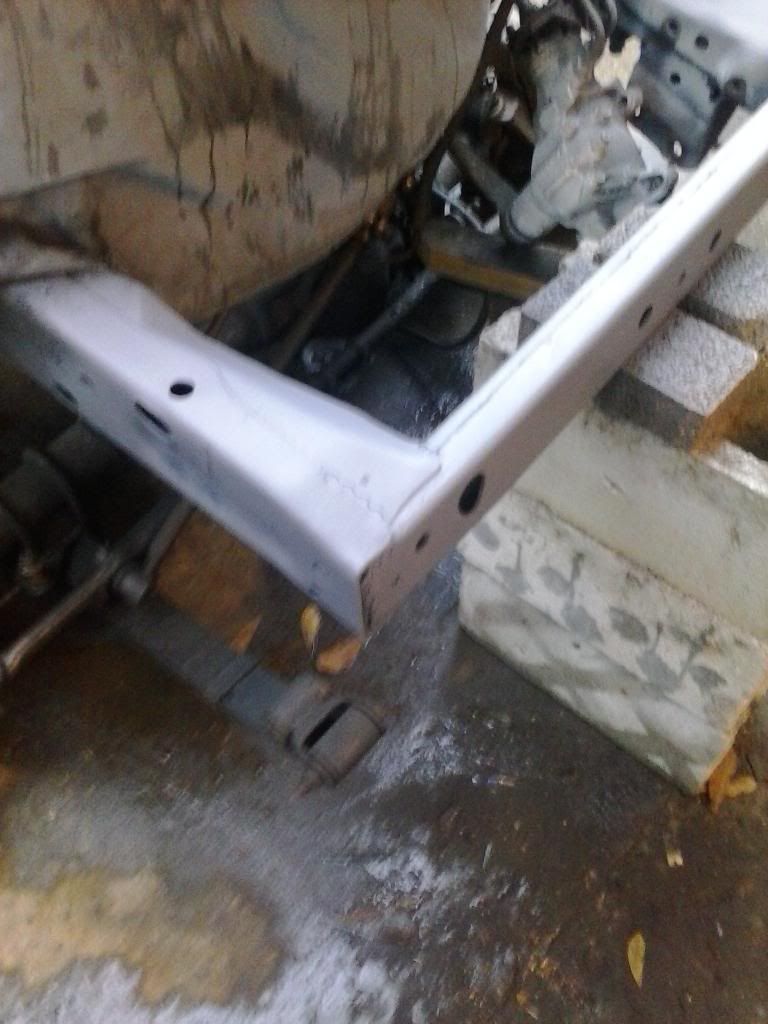
Ended up wraping the corners with some 1/8th plate to tie them together a little better

At this point I had decided to slow down and take a little more time doing things right rather then quick.

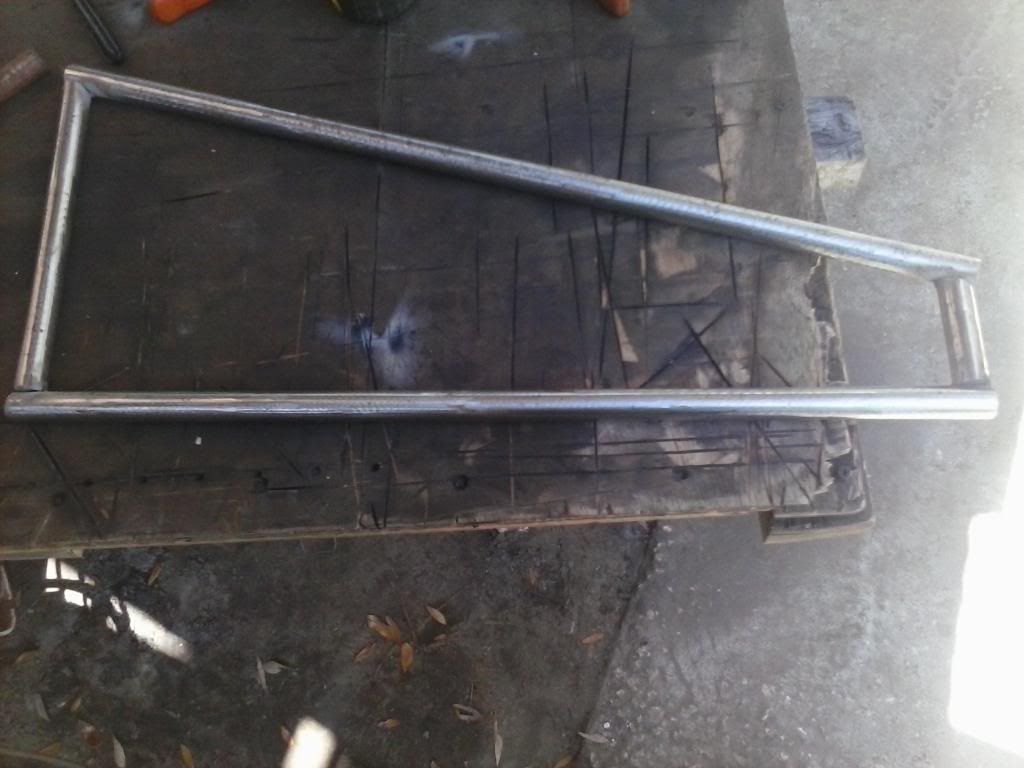
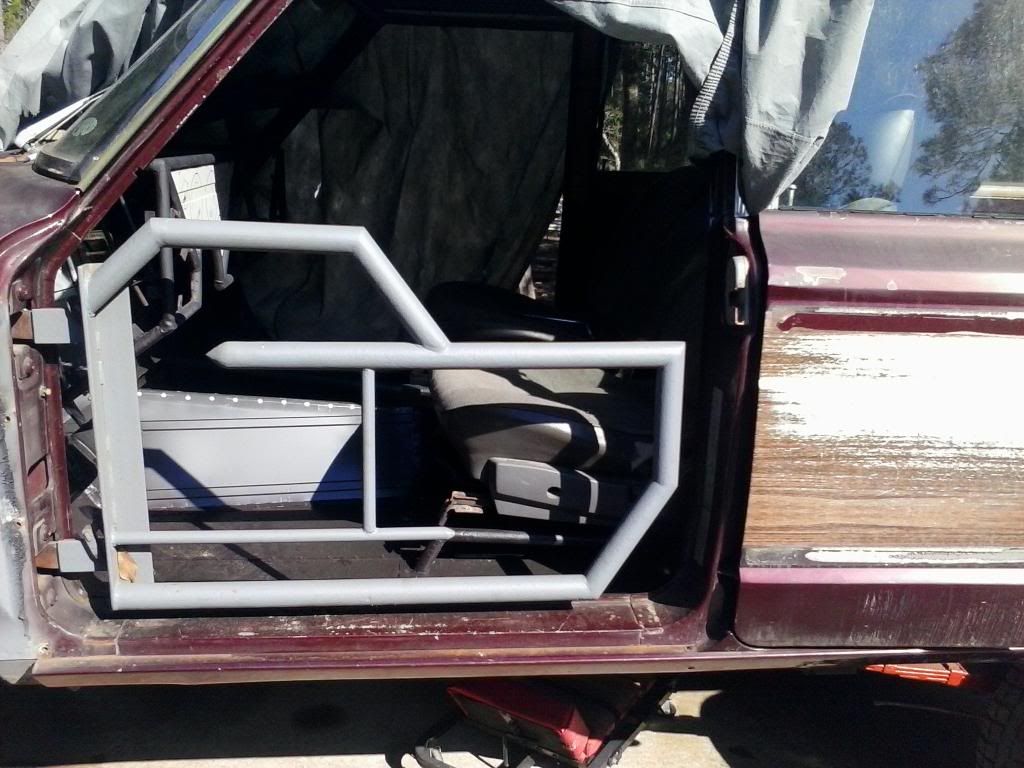
Tube door I whipped up one night. You can see the floor and trans tunnel more or less together here. Its quite a bit higher then the stock tunnel but makes it easy to get the motor trans up in the chassis and still be able to work on it
IMG_20140210_095739_zpskj609jxr.jpg


IMG_20140210_095815_zpsegt6zibh.jpg


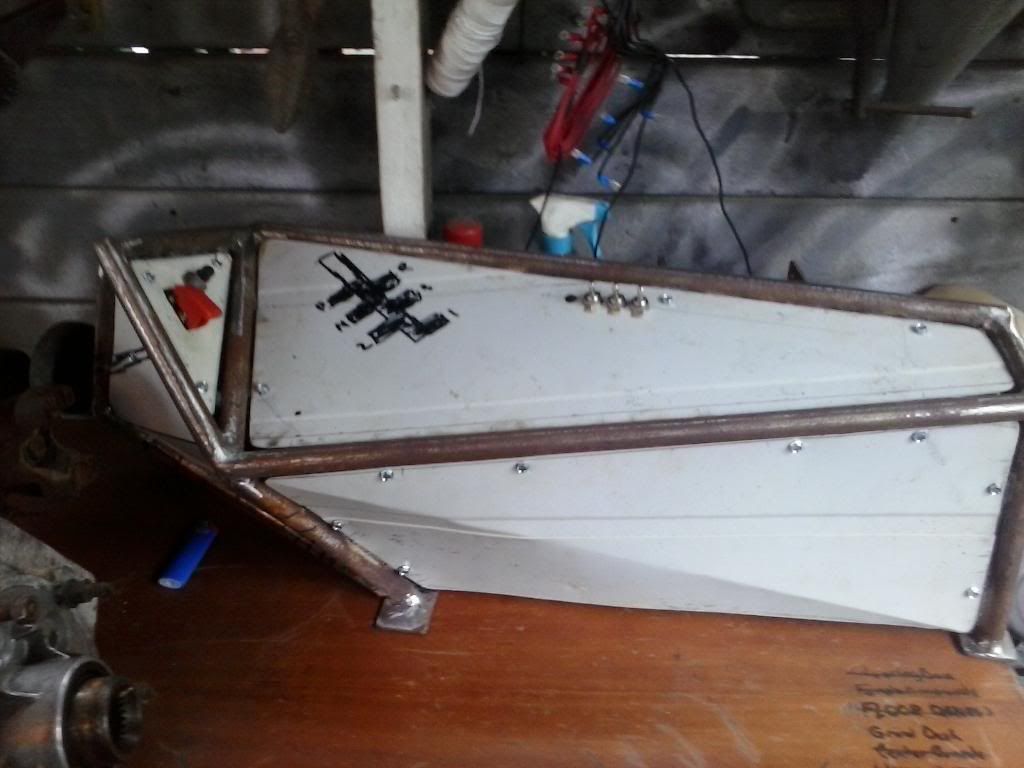
Skip forward a bit and this is what the dash/floor/console ended up coming out like
IMG_20141110_164554_zpsx42htiau.jpg


Will update a little later today, with more story and build pics.
 
Once I had the body back where it wasn't trying to spread apart like a hookers legs, I started messing around with rebuilding the front spring packs/hangers/shackles to hold the big block up and achieve a ride height I could live with. I built the hangers/shackles with a 40" plywood mock up "tire" for reference as that is the max size I really plan on ever running. It rides a little high in the front now that I swapped to a lighter engine/trans combo.


IMG_20140310_111145_zpsypl8syvv.jpg


Rear of the front springs, Ive thought about redoing this a few times but havent got around to it yet, its all 1/4" but I still have concerns of it ripping off the frame.
IMG_20140221_112416_zpsv3c2qgle.jpg


Rear shackle flip/shackle
IMG_20140221_112402_zpsjihhq0xy.jpg


Breaking down old pack
IMG_20140228_122154_zpse0hu5gmc.jpg


Used a couple of clamps to control the pack as it unloaded with the nut off the center bolt
IMG_20140228_105810_zpsxfdqnpr4.jpg


Got that all back together and went back to doing little stuff while I waited for halfprice junkyard day for parts.

Started messing with latches for the tube doors, sadly I never got it to work just right. Still have the tube doors and latches but it needs a rework to keep the door from rattling so I chopped up my full doors and havent made time to get the latches just right.

Small box to contain the spring to hold the "bolt"
IMG_20140331_130053_zpsfr5mgtgr.jpg


Bottom nut adjusts spring tension and the top nut sets how far the "bolt" is allowed to spring out and catch the hole in the jam
IMG_20140331_142224_zps1mvk7eeu.jpg


In the end it worked ok, but would rattle like tin can filled with lug nuts mainly do to the sloppy holes drilled to guide the "bolt"

Started messing with getting the dash wired up, not as fancy as 12v guy or some of the other pros here but it didnt turn into a rats nest so Im happy with it.
IMG_20140305_143559_zpsppnfnmqz.jpg


Any guesses?
IMG_20140305_160648_zpsfu8s3yeg.jpg


Yup it's one of 3 buss bars I drilled and tapped by hand, no drill press around here :wtflol:
IMG_20140305_162351_zpstrm9xb4e.jpg


Not to many more pictures, I end up wiring for 5 mins then moving on to something else. Basically tho, main power runs in through the kill switch and a big fuse to the 12+ buss bar. From there it runs through an appropriate sized fuse to a relay. The switches pull power from a separate buss bar and run back to trigger the relay, relays are also grounded to a common buss bar and then it's grounded directly to the frame. In the event of a relay failure, it should be easy enough to unplug the item and then jump to the 12+ buss bar if needed. I wired all the relays/fuses/buss bars on a piece of emdf and isolated the bars with little rubber washers. You can kinda see it in some pictures, it sits in the dash behind the panel in front of the passenger.

Considering swapping the fuses to the power out side of the relay instead of the power in side. Hopefully will stop it from burning a relay instead of popping a fuse.

This is about were it sat when i fully committed to it no longer being streetable.
BigBlock crammed in there, kicking around ideas on shock hoops( yea i know miters are bad, but give it a chance, it got plated in pretty well)
IMG_20140311_190732_zpsdo98mdtz.jpg


Giant 1/4" plate to tie the frowned on miter cuts together
IMG_20140325_112320_zpsf2lwmg0z.jpg


Messing with the front "cage" if you will.
IMG_20140314_175622_zpsfzcpefis.jpg


More or less what it came out like, will it fold over in a roll...hell if i know.
IMG_20140321_104536_zpsdewbaq1o.jpg


Tie in for the shock hoops, squeezed it between the dist and carb and under the stock air cleaner for the 454.
IMG_20140327_134419_zpsxkhaf0st.jpg


It will retain all its stock sheet metal with no holes
IMG_20140323_181718_zpsutaox0p9.jpg


Drilling body mount holes, not sure where I remember seeing this trick but it worked awesome. Drill+floor jack= upside down free standing drill press.
IMG_20140327_160447_zpsp5uftkqw.jpg


Finishing out the floor, no fancy shrinker/stretcher here, couple slits and call it good.
IMG_20140331_114200_zpssfnde6zg.jpg


More, later when I feel like typing
 
Woke up to a lake in the yard one morning, managed to get a little done between down pours.
IMG_20140430_091420_zpsgm9sivbw.jpg


Whipped these out on the burntable AKA my 4.5" grinder. Shock tabs,misc other tabs for stuff
IMG_20140426_105604_zpshgowkkmp.jpg


Some trimming and got these kinda placed.
IMG_20140424_125424_zpslvb8xbw3.jpg


Moved to situation in the back, didnt really like were the axle was so i moved it
After a good bit of reading I grabbed the drill and 4 bits later I had a 5" rear stretch.
I read that these will probably crack where the old spring retainer bolt was, some guys weld up the old hole, doing it that way leads to metal changing,molecules moving blah blah stuff over my head blah blah. Decided on not welding the old hole and gonna see what happens.

Thought maybe putting a bolt back in the hole as its only 2" or so from the edge of my perch/top plate, dont see it affecting the spring that much??

IMG_20140422_115111_zpslkcwg7kb.jpg


Decided against the good ole sawzall to fit approach and took a more subtle route
IMG_20140426_172438_zpsmjklpqkb.jpg


Chop chop tack tack and it came back together ~5" longer
** INSERT PICTURE WHEN IT'S FOUND**

Little better shot of how the floor turned out after 5 hours with sandblaster that has a tank that holds like 3lbs of media
IMG_20140420_172459_zpsql3ir9bo.jpg


And yes...those are rivets and no I don't have a fancy air riveter, betcha I can squeeze the hell out of a bathroom scale tho :****:

More to come
 
mdo817 said:
For door latch pins I went this route:
http://www.ebay.com/itm/1-2-POP-PINS-SPRING-LOADED-T-OR-BALL-HANDLE-/200588324998?pt=LH_DefaultDomain_0&hash=item2eb3fef086

They are solid, and with a nice reamed hole after welding it all in they are a great fit, with little to no rattle.

I will have to look into something like this if I decided to go back tube doors, as much as I wanted to make the latch work I threw in the towel on it for now. I just don't think I can get the tolerances needed for it not to rattle without a drillpress.
 
paradisepwoffrd said:
did you taper the latch to allow closing without pulling the handle? Im looking to build tube doors that wont come unlatched or push into the pass compartment if layed into a rock.
No, I thought about that, but decided against it for rigidity purposes. The passenger door I welded a solid stop on the lower inside - using the pin for the top to ensure that in a flop the door would be solid and not push in on my wife. Drivers side I have done nothing to, but the pin, flopped it pretty good into a nice bunch of rocks at Hale Mtn., door held up, pin still fine, pretty impressed with them.
1f65283d5fc5197be7e433bf3450c807.jpg


Sent from my iPad using Tapatalk
 
jp fan said:
great work I like the FSJ's, good job on the inside
Thanks

I've always had a softspot for the fullsize ones, waggies more then others tho. Just ugly enough to be good looking :wtflol:

Small teaser of what its looking like now. Ill get back to updating the thread with stuff in a bit. Im having to organize pics and re-upload stuff and all that fun to get the thread going.
*edit for poser shot instead*
unnamed_zps0766d17e.jpg


And although I ditched the bench up front, it will still seat 5 people pretty dam comfy, after the cage goes in...probably not so much
 
Thanks guys ;D Been a little busy swapping a motor out in my friends grand cherokee.

paradisepwoffrd said:
Looking forward to more. I have a soft spot for FSJs also, esp after seeing Cappas j-truck on rocks and 49s .

This is one of the pics that made me decide I was chopping it up to go wheeling in it
WagTurk_zpsngcukxzh.jpg
 
Started messing around with mounting a few different things now that the motor and "cage" are set where they are going to be. The front of the crank pulley on the 454 ended up 2 inches behind the front of the old 360, made keeping mech fan and a decent sized rad pretty easy.

Tossed the battery up here. Waiting to get my real battery before i make a tie down.Plan is to run a sealed KinetiK flipped on its side,Ive had great experience with these batteries during my car audio days and def would recommend them to anyone, you can get some big CCA batteries in tiny tiny packages. The MechMan alts alot of people are running now came from the car audio side of the world as well :dblthumb:
IMG_20140408_132919_zpsvw05g5ur.jpg


Also got the overflow and the power steering res mounted. No pics of this since i chopped them off when I found out they were in the way of the radiator.

Grabbed some **** outta the scrap pile and stuck it together randomly, ok maybe not randomly. I had an idea of what i kinda wanted the console to look like but was still just kinda winging it on this one.

IMG_20140401_125130_zps9zktd0mq.jpg


IMG_20140402_123835_zpsmm2imszb.jpg


Leftovers from the floor getting used in the console

IMG_20140402_123852_zpsve4eaqib.jpg


Boom. Crazy ass console that everyone besides me has loved so far. Ill admit once I took the time and smoothed the joints out in it and got it painted it looked alot better

IMG_20140419_111155_zpsriq3gjmn.jpg
 
Top