• Help Support Hardline Crawlers :

Yum... Tacos

crash2

-Oh no I picked a side-
Joined
Mar 26, 2001
Messages
39,839
Location
Da gold bar
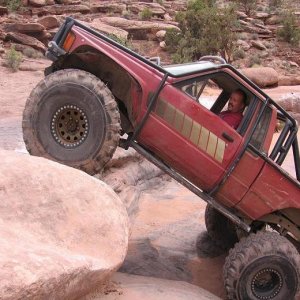
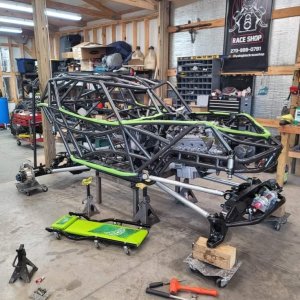
This is my brother in laws 97' taco. A few years back I bobbed it and built a rear bumper. Over the last couple years he had been talking about wanting to sas it and wanted to link it. After a bunch of discussion I convinced him to do a simple leaf setup since that really will fit his needs far more than a linked rig.

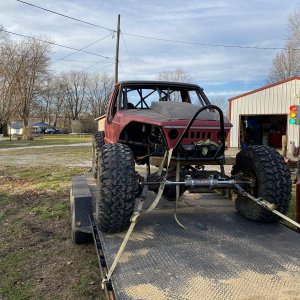
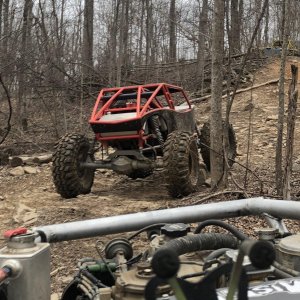
This is my last big project before I start mine.
 

Attachments

  • tmp_17519-20161002_125939-1221519136.jpg
    tmp_17519-20161002_125939-1221519136.jpg
    87.8 KB · Views: 281
  • tmp_17519-20161002_125952-1056695835.jpg
    tmp_17519-20161002_125952-1056695835.jpg
    75.3 KB · Views: 290
A pallet of parts arrived....
 

Attachments

  • tmp_25908-20160930_203232-1056695835.jpg
    tmp_25908-20160930_203232-1056695835.jpg
    54.2 KB · Views: 289
Unboxed everything and organized it.

I am no big fan of trail gear stuff but this isn't mine and it really does make the job easy--especially for the taco's.

He got everything, housing, six shooters the whole works.

Will also be doing a rear disk conversion also.
 

Attachments

  • tmp_25908-20161001_102221308333195.jpg
    tmp_25908-20161001_102221308333195.jpg
    59.4 KB · Views: 283
in the shop and all leveled out.
 

Attachments

  • tmp_32329-20161002_200333-1221519136.jpg
    tmp_32329-20161002_200333-1221519136.jpg
    29.6 KB · Views: 278
Got the front all torn apart.

Are these taco parts worth anything?
 

Attachments

  • tmp_32329-20161003_213522-1056695835.jpg
    tmp_32329-20161003_213522-1056695835.jpg
    76.8 KB · Views: 279
  • tmp_32329-20161003_213539308333195.jpg
    tmp_32329-20161003_213539308333195.jpg
    44.7 KB · Views: 279
I remember wheeling with him the first time he ever went out up at Reiter. Tell him I said hello!
 
So the tacos have no front frame cross member like the mini trucks.

So before you cut out the IFS subframe its important to get the front cross member welded into place first so the frame horns don't go all goofy on ya.
 

Attachments

  • tmp_11986-20161005_190701-377938503.jpg
    tmp_11986-20161005_190701-377938503.jpg
    38.1 KB · Views: 241
  • tmp_11986-20161005_190710-1221519136.jpg
    tmp_11986-20161005_190710-1221519136.jpg
    40.9 KB · Views: 243
Getting the new crossmember situated and aligned was fairly easy with the aligning brackets that come with the kit.

Got it burned in so now its ready to have **** cut off...
 

Attachments

  • 20161005_190715[1].jpg
    20161005_190715[1].jpg
    47.5 KB · Views: 232
  • 20161005_193111[1].jpg
    20161005_193111[1].jpg
    58.2 KB · Views: 231
  • 20161005_203104.jpg
    20161005_203104.jpg
    51.1 KB · Views: 235
  • 20161005_203111.jpg
    20161005_203111.jpg
    45.8 KB · Views: 232
Burned myself a few times, had my arms go numb a few times but got the front frame rails cleaned. One thing that I can't stand is when portions of old brackets are still left--drives me nuts. The underside and inside of the rails is where the hard work was.

One thing I say invest in is full leathers--saved my butt a number of times over the years. One thing thats different from the mini trucks is no need for a plate at the motor mount--simply weld the edge to the rail.
 

Attachments

  • 20161008_110118.jpg
    20161008_110118.jpg
    48.3 KB · Views: 199
  • 20161008_110107.jpg
    20161008_110107.jpg
    54.3 KB · Views: 203
  • 20161008_110101.jpg
    20161008_110101.jpg
    56.6 KB · Views: 194
  • 20161008_110051.jpg
    20161008_110051.jpg
    32.4 KB · Views: 192
  • 20161006_200151.jpg
    20161006_200151.jpg
    54.2 KB · Views: 193
Time to get the front shackle mounts done. Like the mini truck the kit comes with jigs for the shackles. The big difference with the taco's to run a 29" spring center diff its ALLOT more work since the shackles are in boarded on the frame. Now running a wider housing would definitely simplify this part of it.

Got the frame rails cut.
 

Attachments

  • 20161008_173829.jpg
    20161008_173829.jpg
    46.6 KB · Views: 190
  • 20161008_173842.jpg
    20161008_173842.jpg
    42 KB · Views: 194
Got the shackle mounts in place and the kit comes with an alignment bar which makes it really nice to get them square.
 

Attachments

  • 20161008_185935.jpg
    20161008_185935.jpg
    49.6 KB · Views: 205
The mount is multiple pieces. The main part is welded into place then there is a frame plate that goes around the mount, one above the mount and then the bottom frame plate. Took a bit of work to get this part completed.
 

Attachments

  • 20161009_134725.jpg
    20161009_134725.jpg
    58.6 KB · Views: 192
  • 20161009_134720.jpg
    20161009_134720.jpg
    47.7 KB · Views: 201
  • 20161009_134711.jpg
    20161009_134711.jpg
    55.1 KB · Views: 197
  • 20161009_121240.jpg
    20161009_121240.jpg
    62.3 KB · Views: 198
Of course the oil pan needs replaced to move the pickup to the rear of the motor like the mini trucks.
 

Attachments

  • 20161009_153955.jpg
    20161009_153955.jpg
    61.6 KB · Views: 195
  • 20161009_135401.jpg
    20161009_135401.jpg
    36 KB · Views: 193
  • 20161009_135353.jpg
    20161009_135353.jpg
    56.3 KB · Views: 198
I got the front spring hanger clamped into a rough location and springs tossed on..
 

Attachments

  • 20161009_163239.jpg
    20161009_163239.jpg
    59.2 KB · Views: 184
I ended up having to hit the housing with a 9/16" drill bit. The holes were stamped and had a small edge to where I could not get the spring center pins to go in.
 

Attachments

  • 20161009_170522.jpg
    20161009_170522.jpg
    49.7 KB · Views: 183
And the rig is sitting under its own weight. I was able to get the hanger tweeked a hair and tacked into place.
 

Attachments

  • 20161009_173344.jpg
    20161009_173344.jpg
    53.2 KB · Views: 184
  • 20161009_173353.jpg
    20161009_173353.jpg
    58.2 KB · Views: 185
And to the part thats going to be slow going with ALLOT of welding.. Starting with the easier/passenger side then onto the driver side.

You can never have enough clamps :redneck:
 

Attachments

  • 20161009_180742.jpg
    20161009_180742.jpg
    52.6 KB · Views: 184
  • 20161009_181755.jpg
    20161009_181755.jpg
    51.8 KB · Views: 195
Top