• Help Support Hardline Crawlers :

Finally....Da new rig..

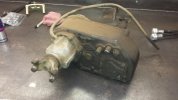
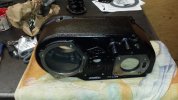
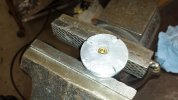
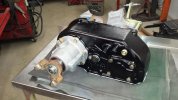
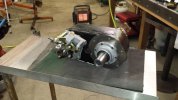
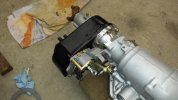
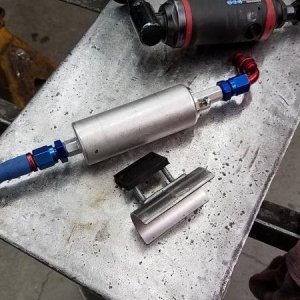
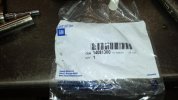
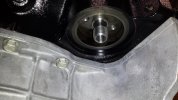
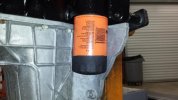
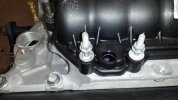
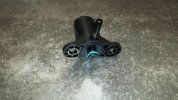
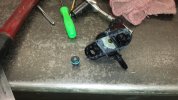
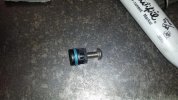
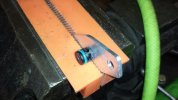
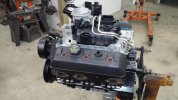
So being as how the motor came out of a 4x4 s-10 it had the remote oil filter and I didn't wanna mess with more hose crap and wanted the typical on the motor filter. As I had stated on earlier builds its a matter of getting the nipple (Gm part #14081300) and using a 10mm hex screw it into the block--bam done..
 

Attachments

  • 20161203_181255.jpg
    20161203_181255.jpg
    50.1 KB · Views: 301
  • 20161203_181901.jpg
    20161203_181901.jpg
    55.5 KB · Views: 301
  • 20161203_181925.jpg
    20161203_181925.jpg
    50.7 KB · Views: 303
So one thing I did not find any source for was a block off plate for the purge solenoid and I really didn't want it on the motor. Found lots for LS series motor but nothing for vortec's. So I came up with a plan.
 

Attachments

  • 20161203_181951.jpg
    20161203_181951.jpg
    53.8 KB · Views: 300
  • 20161203_182000.jpg
    20161203_182000.jpg
    66.4 KB · Views: 306
So first I cut the nipple off the solenoid. I made vertical cuts into it and found it protrudes 1/2" into the body leaving almost 1" worth to play with.
 

Attachments

  • 20161203_190425.jpg
    20161203_190425.jpg
    65.8 KB · Views: 301
I shaved the nipple down to make sure the extra depth fit the hole and then cut it down to about 5/8" long. The hole in the middle is perfect to tap to 10-24.
 

Attachments

  • 20161203_193220.jpg
    20161203_193220.jpg
    75.9 KB · Views: 308
I made a plate out of 1/8" aluminum and bolted the nipple to it.
 

Attachments

  • 20161203_193320.jpg
    20161203_193320.jpg
    42.1 KB · Views: 299
  • 20161203_193007.jpg
    20161203_193007.jpg
    44.3 KB · Views: 307
It would have been nice to have a mill and make a one piece plate but I think it turned out pretty decent and should to the job nicely...
 

Attachments

  • 20161203_202121.jpg
    20161203_202121.jpg
    58.2 KB · Views: 303
So I got the motor as far as I could with the parts I had. Waiting for the egr block off plate and plug and my new sanderson headers.

Going to get the motor moved out of the way and work on getting the axles into the shop next.
 

Attachments

  • 20161203_203017.jpg
    20161203_203017.jpg
    54.5 KB · Views: 295
  • 20161203_203027.jpg
    20161203_203027.jpg
    55.2 KB · Views: 296
Onto another step...
 

Attachments

  • 20161204_162507.jpg
    20161204_162507.jpg
    70.6 KB · Views: 362
  • 20161204_170435.jpg
    20161204_170435.jpg
    49.7 KB · Views: 364
So I got all the crap like brakes and such off the axles and both cleaned up and put into place at 105" wheelbase.
 

Attachments

  • 20161209_193532.jpg
    20161209_193532.jpg
    50.2 KB · Views: 258
  • 20161208_204749.jpg
    20161208_204749.jpg
    52 KB · Views: 254
  • 20161208_200542.jpg
    20161208_200542.jpg
    59.4 KB · Views: 260
Time to tear this thing down.
 

Attachments

  • 20161204_193457.jpg
    20161204_193457.jpg
    41.4 KB · Views: 248
  • 20161205_202057.jpg
    20161205_202057.jpg
    55.5 KB · Views: 253
I got the boxes pulled out of parts I had been hording for a while now. New 4.1(lomax) and also Advanced Adapters twin stick along with the novak input shaft for the th350 adapter.
 

Attachments

  • 20161207_190602.jpg
    20161207_190602.jpg
    52.5 KB · Views: 255
  • 20161207_190607.jpg
    20161207_190607.jpg
    52.6 KB · Views: 250
So I have never used the speedo gear and no plans to. I looked for a source for a plug to just remove it. Only thing I found was one for an atlas II or a bunch of guys who made one off's.

So what I did was lop off the threaded portion and shave it flat and then tap the hole for a 1/8" npt plug. The bore size for the speed gear is damn near perfect to simply tap it.
 

Attachments

  • 20161210_100651.jpg
    20161210_100651.jpg
    50.8 KB · Views: 250
So I finally got it all assembled and tossed it onto the tranny.
 

Attachments

  • 20161211_153114.jpg
    20161211_153114.jpg
    54.4 KB · Views: 247
  • 20161211_153123.jpg
    20161211_153123.jpg
    46.9 KB · Views: 247
  • 20161211_155813.jpg
    20161211_155813.jpg
    47.9 KB · Views: 246
So I did a bunch of research and found the 2wd oil pan.

So the 4x4 pan is 9 7/8" tall and the 2wd is 8 1/4" tall. The 2wd pan also has a better slope from the short to tall side compared to the 4x4 pan so doing some armor to protect it should be easier.

So the pan is Dorman#264-482. I could not find a dorman number for the pickup but found Melling#258s.

I got the new pan put onto the motor and fits like it should..
 

Attachments

  • 20161211_165846.jpg
    20161211_165846.jpg
    55.3 KB · Views: 239
  • 20161211_170154.jpg
    20161211_170154.jpg
    43.6 KB · Views: 241
Top