Haulin4alivin
Well-Known Member
- Joined
- Mar 7, 2013
- Messages
- 62
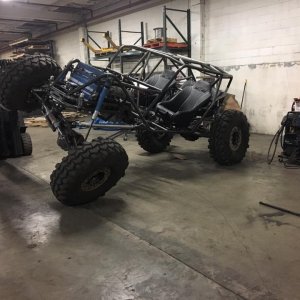
This thing is sick! 
Thanks.Haulin4alivin said:This thing is sick!


Thanks again.Ethann said:As I said on the other forum, looking awesome guys! Really enjoying the tech side of things too
Noted and thanks, will box those mounts.rock mafia said:Those motor mount plates are going to bend with that small tab on there. You need to spread the load out across a larger area.


SomewhiteGuy said:It was a pain in the ass. :****: