• Help Support Hardline Crawlers :

Project Joining the Dark side!

Damn Mike....I love watching your work progress. Your attention to detail and perfection is unbelievable. :awesomework:

Sam, you gonna wheel this thing more than once this time? :corn:

Not my fault the engine gave up the ghost before i could use it much, if funds allow i will be out every chance i get once its done!
 
sweet runner dude it riminds me of my old one it was a 90 on a 84 truck frame moved the rear wheel openings back 10 inches or so it was a cool rig. good luck with the build up its looking good.:awesomework:
 
sweet runner dude it riminds me of my old one it was a 90 on a 84 truck frame moved the rear wheel openings back 10 inches or so it was a cool rig. good luck with the build up its looking good.:awesomework:

Thanks!

Its already pretty built just getting a fresh motor, im sure this wont be the last time its in the crashfab shop though:stirpot:
 
Ok update--time to get rolling again and get caught up.

Ok the motor is in the rig finally.

sam100.jpg


Time to put the 02 sensor in. I chose this spot on the header--where all 4 chambers meet and it was the cleanest spot.

sam101.jpg


Buzzed a hole and welded in the bung.

sam102.jpg


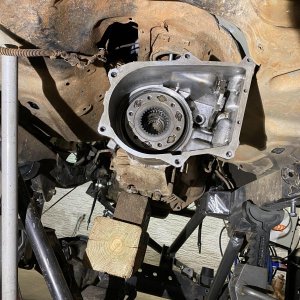
I also wanted to use the stiffeners from the motor to the tranny. Now these were desinged for a later W series tranny so they had to be modified to use with this L series tranny. The passenger side required drilling the threads out of one hole. The passenger you can only use on hole and that one had to be drilled and flattened.

sam103.jpg
 
mike- what trany is sam running? thats odd that it didn't come factory with the stay brackets...

sam- do you no who made your canvas top?
 
I forget the model designation of it--but its the early cast iron case 5 speed. They never used them on those trannys---didn't see them till the Alum. bell housings.

The top was already done when sam got it. Zukkev might know more about it.
 
oh okay that makes sense that the cast would not need the extra support, cool i will pm kevin on that, also is sam getting you steal degree shims or alum? i think i might need a couple of steal ones for the back of the runner

when will the runner be back in action?:cool:
whats left to fab/install
 
I don't know who did the canvas, but I can get ahold of the guy that cut the back off, and find out for ya James....
 
Update time......

So I am steam rolling thru Sam's rig..

Ok here is where I ran the harness from the motor to the fenderwell.

sam104.jpg


When I origionally wired the rig I ran the ARB wiring thru the large grommet but I wanted to wire the rig so the engine harness was a modular harness like the factory. So I redid that portion and ran it with the harness that goes thru the inner fender.But here is the harness where it goes thru the firewall.

sam105.jpg


I mounted the injector resister below the wiper motor---the spot just fit...

sam106.jpg
 
I removed the blower and connector assy from the blower to the heater box.

So one nice aspect about toyota is how there subsystems are designed and wired. Thru the years since there first EFI in the trucks they have kept extreemly close for a number of years. Some circuits have retained there wire colors even. So I had to map all the circuits from the 93 to the 85'. Since we no longer had both sides of the cross body connector/motor harness I chose to swap it all over the the 85' style of connectors. So it got a little tricky but I was able to pull it off. Another tricky part with the 93' is the fact that the MAF/Ignighter came off the engine harness and were not stand alone like prior body styles. So I chose to just add the systems on the body side rather than on the engine side.

But here is the cross body/engine harness connectors.

sam107.jpg


And just followed the cross harness

sam108.jpg


Since the body has some cracks and the origional ECM mount location was no longer straight I chose to put the ECm in a better location. I still have to make a couple mounts to secure it.

sam109.jpg


Pulled the cluster and continued down and out the grommet near the master cylinder.

sam110.jpg


Now time to wire the last few items. Since Sam got the igniter by itself I had to make the mount for it.

sam111.jpg


but the game continues
 
Wahooo!!!! Its getting close! Man i cant wait to wheel again!

And yes Ryan we need to get crankin on your rig for sure!
 
Wahooo!!!! Its getting close! Man i cant wait to wheel again!

And yes Ryan we need to get crankin on your rig for sure!

guess what sam.... met with the guy who designed the shop and are having new plans drawn up 36X36 ish 2 story with living on 2nd story and the septic is also geting designed so should be ready to go soooon
i forgot to meet with the guy about the property but one of the neighbors came over and saw the buggy and they all wanna see it up at the island lol


(HyJACK OvER)
 
Ok I got the drivers side all done.

sam112.jpg


O2 sensor wiring

sam113.jpg


I wired in the check connector right next to the igniter (plug with the rubber sealed cap).

sam114.jpg


I went and found TDC and threw the distributor back in (was removed before I got the motor). I also chose to redo the alternator wiring--it was a mess and didn't route the right way.

sam115.jpg


I made bractets to hold the wires and plug.

sam116.jpg
 
Ok so at this point it was time to do some preliminary circuit testing so I hooked the battery up. Right off the bat it would not turn over which did not suprise me(found a wire tied into the starting system when I wired the ecm). So I pulled the hush panel and sure enough they had bypassed everything for the start circuit at the switch. Not to mention look at the wiring mess.

sam117.jpg


So I tied the system back into its origional form.

sam118.jpg


I suspect this was done for a possable couple reasons. First being somebody could not figure out what was the start circuit at the cross body connector or they wanted to bypass the "push to start" system. In any case I just went ahead and figured out how to easily bypass the system and still retain the factory system. Just jumper terminals 1/2 at the switch in the dash.

sam119.jpg


So once that was done it turns over perfectly. So checking the guages the 4wd lamp works (I did wire the B/u lamp circuit and the 4wd circuit) but the only one that does not is the "check engine lamp"
 
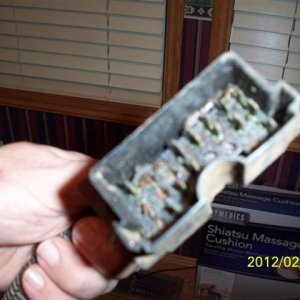
So my first step was to check for voltage at the MAF since that gets voltage from the efi circuit and no voltage. So I went to the underhood fuse/relay center and this was what I found---You can see the cut marks of where the EFI relay used to be :haha:

sam120.jpg


And the wires cut--ya the whole shootin match is simply gone.

sam121.jpg


So I corrected the wiring and installed one of my relays.

sam122.jpg


So I rechecked the system. "SES" lamp now on and I have voltage is all the apropriet areas :awesomework:
 
So me being me and I absolutely hate to ship anything that might have an issue that I can correct--I gutted all the add on wiring. There were 5 circuits where the wires were shoved in with the fuses--thats one of the wirse things to do. I also ripped the aftermarket guages out of it. But here is how it looks with the needed circuits tied back into the rig properly that should cause zero issues.

sam123.jpg


I got the ecm mounted. I ended up taking the stock mount brackets and bent/ground and drilled in them and now the ecm is secured.

sam124.jpg


I went and threw the dash back together.

sam125.jpg
 

Latest posts

Top