crash2
-Oh no I picked a side-
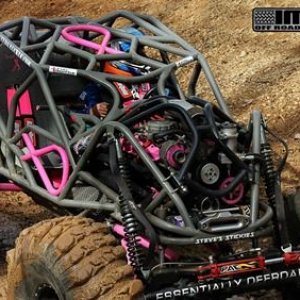
:redneck: :redneck: :redneck:Very nice looking rig!You are a fabbing machine Mike!!!:awesomework:
:redneck: :redneck: :redneck:Very nice looking rig!
Watching this project from the first post, to seeing it collecting dust for a while, and now....
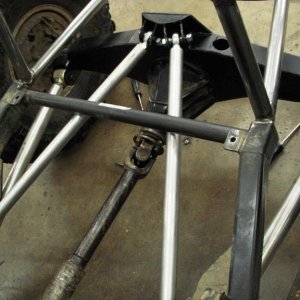
This entire rig is a work of art... Almost makes one afraid of taking it on the trails.
Almost....:stirpot:
nice progress. this thing looks great.
I'm not sure what looks better, the wiring or the welds, and I don't know why you don't do this full time, you have pure talent Mike. :awesomework:
Wow, your plumbing and wiring is such an art. That looks better than factory!
Watching this project from the first post, to seeing it collecting dust for a while, and now....
This entire rig is a work of art... Almost makes one afraid of taking it on the trails.
Almost....:stirpot: