• Help Support Hardline Crawlers :

YJ 4.3/4L60E conversion

picture.php


picture.php


It's going in there...

We used a hoist, a jack and the cherry picker... We lined it up and said, "Let's get it in!!" So we welded in motor mounts (Advanced Adaptors as well).

picture.php


picture.php


I did weld a little (those would be the booger welds), but I thought best to leave it to someone who knows what he's doing.

picture.php


and here it sits!! Here's where we left off. We had hoped to have been here on the previous day, but whatever. I don't have a specific time-line so the extra day didn't hurt too bad.

picture.php


Plenty of axle space... Back far enough to allow two more cylinders and hopefully transferring the weight more between the axles than one (the front one).

I can't really believe it, but it's there.... Next comes the wiring (Howell harness) and plumbing (power steering, fuel lines & heater)... I still need to install front and rear dive-lines and coolers (steering and transmission).

I think that I'm a week away, my buddy thinks it'll be running tomorrow... We'll see...
 
Last edited:
Not enough accomplished today, but a step here and a step there gets me closer...

Lock-tited the bell housing to tranny, installed the torque converter cover (or inspection plate) and installed rear drive-shaft.

We mounted it further back than I would have wanted, but we put it where the mounting bolts were best suited. So with that, the rear Tom Woods drive-shaft needed to be shortened. So we broke out the chop saw and made it shorter... Great! Just what a YJ needs... a shorter rear drive-line. I'm not going to worry about the front yet, but that's gotta be longer by about 2"... It's one of the few things remaining on the Jeep that was stock, so I can't complain too much.

Next step will be the shifters... I got a cool bracket that came with the kit to allow for the factory NP231 shifter to sit beautifully right on top of the transmission. So that will be next, then maybe build a box and figure out the Winters shifter that I got.

No pictures this time...
 
Here's some really crappy pictures from last week.

This is a top view (taken sideways) of that bracket Advanced Adaptors supplied

picture.php


Here it is from the bottom

picture.php


And here's how it looks with the shifter kind of mocked in place (drivers seat view)

picture.php


I really needed help to get the shifter to sit correctly. So it sat around for a week...

Finally I got some much needed help and enthusiasm. I needed to cut a piece from the factory shifter bracket off and it sits in there much better!

picture.php


I still may have to bend the shifter lever some, but it sits in there much better.

picture.php


Yesterday I was able to get the help I needed with some coolers too.

We mounted the power steering and transmission cooler right behind the jeeps grill.

picture.php


picture.php


I also got help in building a little bracket to mount the transmission dipstick. So I took a picture of the welding of the bracket, but not a picture of the finished work. (It looks good!) I'll take that picture tomorrow and start the next post with it.

So here's the before pic...

picture.php


Today I went out and bought the hoses for the coolers and extra 'emergency couplers & hose clamps'. I also got a 3' x 3' sheet of aluminum. My partners in crime seem to think we'll build a pretty baddass fan shroud out of it... We'll see... :corn:
 
Today we had gotten soo much accomplished!!

And some help from Bobby Long! :cheer:

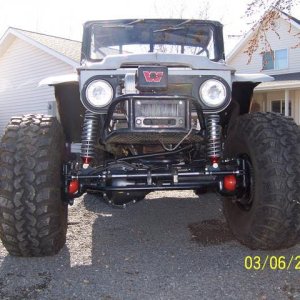
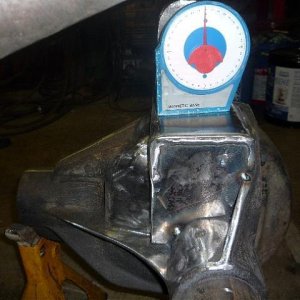
First, here's the picture of the finished bracket.

picture.php


While my buddy Aaron was fabbing up the Bobby Long surprise, I had a chance to finish up all the plumbing on the coolers...

picture.php


The radiator is next. I picked up some .125 aluminum that we're going to make a shroud out of. We also used a chunk of it for the center console Aaron was about to put to good use from Mr. Long himself!! This is a beautiful piece of work and solves my worries that the auto shifter was going to be down to low.

So here's alot of pictures of the fabbing stages...

This first picture was taken a bit late into the fabbing. After figuring out how and where it will look good, we cut out the center stereo and vent/defrost/heat controls and cigarette light and ash tray.

picture.php


Then we tucked it in to see how it would look.

picture.php


It would look awesome if I threw a 19" LCD and an Xbox in there. :awesomework: It's TIG welded stainless steel... Not Aluminum! The plate is, but this whole piece is awesome stainless!! :awesomework:

Aaron cut up some aluminum.

picture.php


We ran to McClendon's for some fancy hardware. Swirled the plate up some.

picture.php


and we got an idea of how awesome this is going to look. Also worked to strengthen it up while cutting on this masterpiece had to be done.

Some cutting from the floorboard and T/C shifter had already begun.

picture.php


Here's the cuts that needed to be done to clear the T/C shifter.

picture.php


I see that I didn't get pictures of one crucial part of this process. The shifter lever was so over and stuck under my knee that we had to pull it out (for like the umptheen time) and heat it and almost straighten it and bend it in. The later pictures should show how low and down it is.

picture.php


to end, the hole was made to get an idea on the heater controls... We looked at where the stereo, ARB switches, maybe some light and/or winch controls...

picture.php


and this last picture... I want cup holders!! So angling this like so gets me two cup holders!!

picture.php


We'll be back at it tomorrow :cheer:
 
Awesome console...:awesomework:

Thanks!


Looking really good Scott!!

Thank you too, Jeremy

Aaron gets all the credit... He's spent a few hours on it and he wants to spend lots more. All day was spent working on the Jeep again today, but the console had to sit second fiddle to the radiator. Which again, giving credit where credit is due, Aaron really brought out some quality workmanship.

Although today's first step was clean.... we knew where tools were, but having a clean work space was getting harder to find. So the first 1/2 an hour spent straightening up.

picture.php


Then, "a cutting we will go"...

We measured out and cut that 1/8th inch aluminum to fit just above the fins.

picture.php


Test fit

picture.php


It's hard to really notice, but we picked up some aluminum C-channel to border and enclose the sides. It was designed to get riveted onto the frame of the radiator, then bolted (or unbolted if need be) onto the bracket. We also cut out the circle to fit the fan.

picture.php


Silicone and foam seals aren't even seen in this picture, but the fan shroud is completely enclosed... Aaron deserves to be proud of this. I'm stoked to have it in my Jeep.

picture.php


It's purty!! I can't wait to get it all muddy!! :haha:

picture.php


picture.php


I'm really excited about it... The upper and lower hoses are on tight so aside from wiring the fan, the cooling system is done.


I'll have some time on my own this coming work week. So my goals are fairly simply. I have to remove the clutch pedal (complete system), install the spark plugs and run all the spark plug wires. An intake system and fuel delivery are on the top of the list too. The Howell wiring harness and MSD needs to go in too.

And cup holders for my console! :awesomework: :awesomework:
 
I went shopping (again) for the cosmetics and protection of the engine.

I put in the NGK v-power plugs, MSD 8.5mm Super Conductor wires and an Accel cap & rotor. I saw that the plug wires were fed right between the headers, so I bought those spark plug boot protectors. What a bitch those are to put on!!! I also bought some wire guides or separators. Fat wires and not touching... I don't think I'll have anything to worry there.

picture.php


The throttle cable is draped there in front (over the MAP sensor). That looks like a nice custom support bracket, a few mounts to the firewall and it's done.

The MSD Blaster coil is hidden way back in there and I've remounted the MSD 6AL on the fender. So those need to be wired in too.


I knew I needed to do something about the air intake and the idea of the factory box just wasn't working out. So I ditched the factory bracket in the fender.

picture.php


I figured that the open space is perfect for the remote oil filter. I think I knew that it was going to go there eventually.

picture.php


I'm trying to get a Lokar oil dipstick in there, but that's not working. Tomorrow I'm going to pull the oil pan and take a look from the bottom up. I hate these kind of delays. :mad:
 
I am in the middle of this swap, and I have the advanced adapters headers also. Do you have clearance issues with the header and the temp sender on the drivers side?

Looks good so far, cant wait to see some pics of the howell harness. Im debating on spending the cash and getting one or spending the time doing it myself.
 
Last edited:
Looks good so far, cant wait to see some pics of the howell harness. Im debating on spending the cash and getting one or spending the time doing it myself.

I did mine with a Howell harness last year. It's a super easy and clean looking install.

Although, once you see how simple it is you'll wonder why you spent the money and didn't thin your harness. With that being said I still think it's worth it if your harness is butchered or your not real good with wiring diagrams.
 
I am in the middle of this swap, and I have the advanced adapters headers also. Do you have clearance issues with the header and the temp sender on the drivers side?

Looks good so far, cant wait to see some pics of the howell harness. Im debating on spending the cash and getting one or spending the time doing it myself.

I'll have to look at it. I did have to notch the header to clear a sensor or two. I know that the knock sensor sucked, and probably that temp sensor too.

Also, I posted pictures of the Howell harness back at the beginning of this thread. I'll try to take pictures as we're connecting it (if I remember).

As ain'tstuckjustresting says... It should be simple and easy. We're getting really close to that stage. And from the looks of it, it's worth every penny spent.
 
The throttle cable is draped there in front (over the MAP sensor). That looks like a nice custom support bracket, a few mounts to the firewall and it's done.

I'm trying to get a Lokar oil dipstick in there, but that's not working. Tomorrow I'm going to pull the oil pan and take a look from the bottom up. I hate these kind of delays. :mad:

Oil dipstick problem half solved. I put the gasket on, I guess I should have trimmed that part off.

picture.php


picture.php


The other problem is the Lokar dipstick tube is 11/32, with o-rings the hole needs to be 3/8th inch. Mine is not. I could stick a stock one in there or drill out the hole for the Lokar. I'll see next Monday since I needed Lokar to 2nd day air me a replacement lower piece.

I did have a chance to build a bracket for my throttle cable.

picture.php


I bent it around to get a good angle and painted it black. It's really a shitty picture, oh well...

picture.php


Next stop could be junkyard reconnaissance mission unless someone has an idea. I unplugged the fuel line from the Jeep at the frame well. I can't get a good line of sight on the GM fuel connectors... The idea here is to keep the Jeep one on one side and a GM on the other.

So, I could go to an auto part store to see if they sell the fuel lines with those connectors on it. I could either buy those lines or measure them up and just head to a fittings place. Then, this same fittings place could connect my factory lines with the GM ends or vise versa. Or just head to a junkyard, find the CPI engine, since this one seems to be a bit different, lop it off and get them to connect those. Either way, I need the GM ends.

picture.php


I also picked up one of those on-board winch control panels and a few more Carling switches. I guess I'm getting some ideas on how I want to lay out that console. :cool:
 
That sounds like what I need... I went to a local O'Rielly's and they really didn't have anything. The guy tried looking stuff up but wasn't so efficient. I did see a few on the shelf but the flanges looked to small. Again, it's hard to judge because I can't see the fittings in there.

It's gotta get to the top of the list because as soon as I finish with the oil dipstick issue, I need to move on to the fuel.

Lokar sent the lower piece via UPS 2nd day air... It showed up at 4pm.

It's too tight to fit in the factory hole... So I drilled the factory hole out to 3/8th" and it still didn't want to go in. I hated to have to do this but I trimmed off about 3/4" off the bottom and bent it so it would clear the side of the block.

picture.php


A little fudging, a little fanagaling and it dropped in. I did put some silicone around it before I set it in for that upcoming roll over that my buddy is sure he's going to get me in. :wtf:

picture.php


Mounting it up top sucks too. It's soo friggin short! I need to remove a bolt from the header and bend, twist and manipulate the top bracket to sit right. It comes up right between the header and the spark plug.

I was soo excited on how good it was going to look, but it sits down so low, I should have just saved my money and kept the stock one in there.

Today I'll get the oil pan in and add the oil back in.

Yesterday I added power steering fluid, 3 gallons of 50/50 antifreeze (and it still needs one more) and transmission fluid. Man this is getting close!!!
 
Hey get a hold of me :D

I messaged you my cell #...

Today I added about half of a 4th gallon of antifreeze, although it may need one more full gallon after the system gets burps (5 gallons :rolleyes:
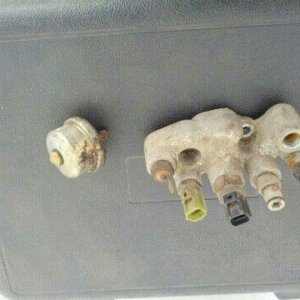
). I installed the oil pan and tightened up the dipstick.

It's right up on that header :(

picture.php


We added about 5 quarts of oil and it looks like I'll need about 2-3 more quarts as soon as we get it turned over. I'm not going to run an oil cooler but there's alot of oil that needs to run through the remote filter lines and I installed a taller oil filter.

I filled up the power steering reservoir and that may need two more of those little containers to make it all through the power steering cooler and lines.

Center console and shifting mechanism is up on the schedule still and that friggin' clutch pedal does not want to come out without a fight (sawsall!!).

I picked up the wrong fittings from NAPA (for the fuel lines) but it will work for us. I got the inside fuel lines... The ones that go inside the plenum and connect to the injector spider. But that's ok because I can see the exact thread and fittings I need. So tomorrow I'll get that fittings company to mate the Jeep fuel line to have the Chevy ends... Then I'll return that part back to NAPA. I should have fuel tomorrow...

At the end of the night we got into another spidery mess.

:fawkdancesmiley:
picture.php
:fawkdancesmiley:

I still don't think this is easy, but so far not alot really was easy.... But Aaron has a good idea on what he's doing and so far, everything's plugging in... We need to do some custom MSD stuff and tachometer but I guess that's something that may be easier for someone who knows what he's doing.

but here it goes...

picture.php


If this thing starts after a few cranks, I'll be amazed.
 
If Lokar's dipstick is built with the same liner that they had a decade ago, you may melt it being that close to the header:mad:
 
Top