• Help Support Hardline Crawlers :

YJ 4.3/4L60E conversion

Not sure if it helps but here are the fuel lines at orielly. http://www.oreillyauto.com/site/c/s...let&model=Blazer&vi=1029608&keyword=fuel+line

The inlet is a 3/8 line w/ 16mm fitting and the return is 5/16 w/ a 14mm fitting.

This page is perfect! This will help with what we were looking for. I'll print it up and write down your specifications. That's tomorrow's goal!

Thanks a lot!!

If Lokar's dipstick is built with the same liner that they had a decade ago, you may melt it being that close to the header:mad:

I'm actually worried that the o-rings in the handle part of the dipstick don't melt. The only thing actually touching the header is the side of the bracket... But still, it's channeled right up through the heat. The dipstick came with a bracket and the instructions plainly stated to connect it to the header bolt.

LOK-ED-5001.jpg


http://static.summitracing.com/global/images/instructions/lok-ed-5001flexibleenginedipstic.pdf

Aaron says, "As long as oil doesn't come out when you're upside down". He really wants to see me play in the same park as the buggies. :flipoff:
 
lemme know when the shakedown is scott, if at all possible fit the dipstick evenly between the headers, the swap looks good:cool::beer:
 
lemme know when the shakedown is scott, if at all possible fit the dipstick evenly between the headers, the swap looks good:cool::beer:

Thanks! I haven't paid much attention to it now that it's there... I'll look at it when it gets running and hope that I won't have to deal with it. I may have to rethink my bracket.

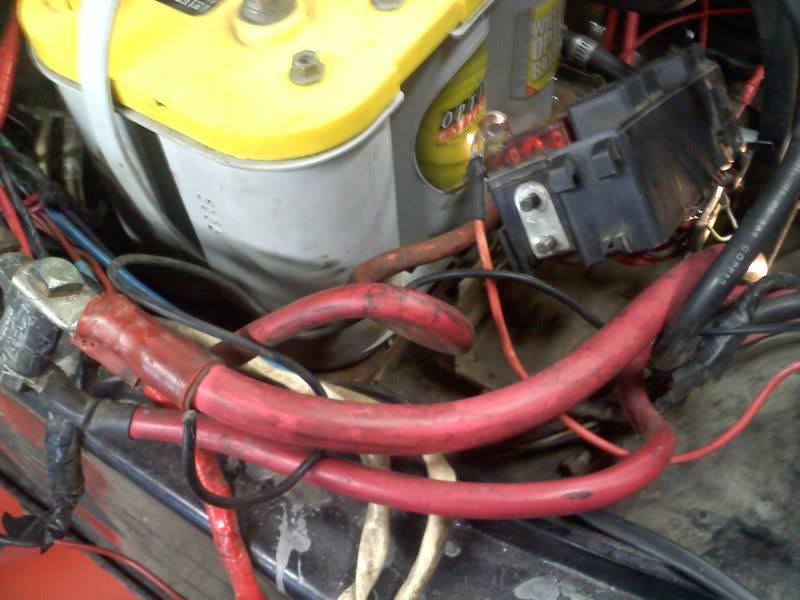
And then to continue this idea of spending money on something I could have gone a cheaper route the first time... :mad:

I went to this fitting place that I was so sure they'd be able to do a million times better than anything I could have done...

And here's what (ready for this?), $80+ dollars got me...

picture.php


about 30" each in length, Jeep fittings on one end, the two different GM one's on the other...

Well it didn't work :mad: :mad: The combination of fittings made it too long and hits hard on the firewall. They got on, but the rubber is soo kinked that it's stupid. They stayed on for ten minutes too long.

picture.php


Our first request was 90 degree fittings but that wouldn't have shortened them, it actually would have lengthened them. I dunno, I'm thinking I pretty much got ripped off. I'm going to return the fittings that I don't need because we headed to O'Rielly's and bought the Dorman fittings that ain'tstuckjustresting suggested TWICE! I think it was like $20.00 for both. Since I asked the fitting company to cut the Jeep line and go with all rubber, I'm going to have to use that hose and connect the Dorman fittings to it. The Dorman fittings need to be bent, cut and flared.

It's just one of those things about having the engine those 2" back.

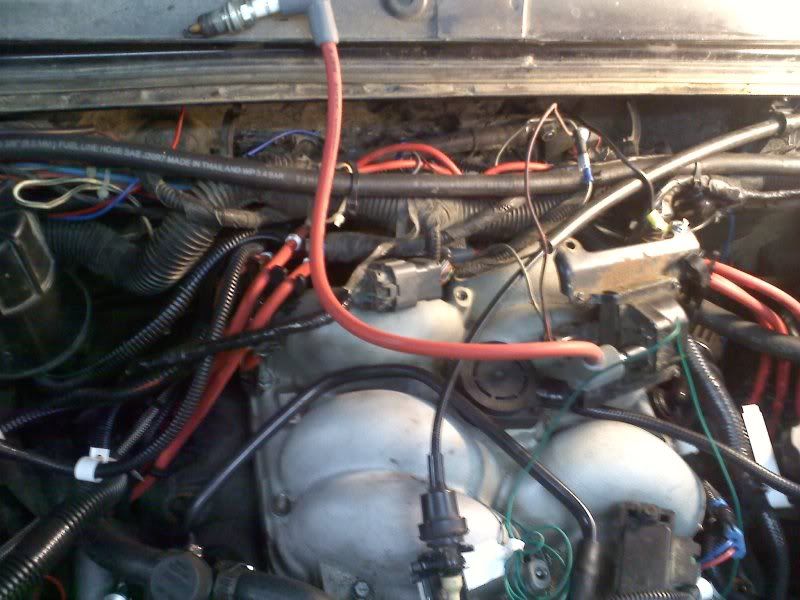
But while at O'Rielly's I did spend more money on the first bling thing I've bought since that Walmart 3 inlet cigarette lighter.

picture.php


This is top of the line Spectra stuff!! That's O'Rielly's and Walmart blingy-est stuff!! It's way cheaper (quality and cost) than the Airaid DIY kits... And at least they had K&N filter in stock so I didn't have to go somewhere else for that. I was not going to run a Spectra filter. :awesomework:

This looks just as good in a riceburner! :cool:

picture.php


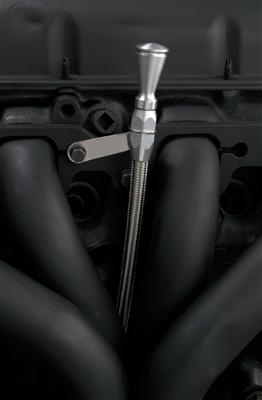
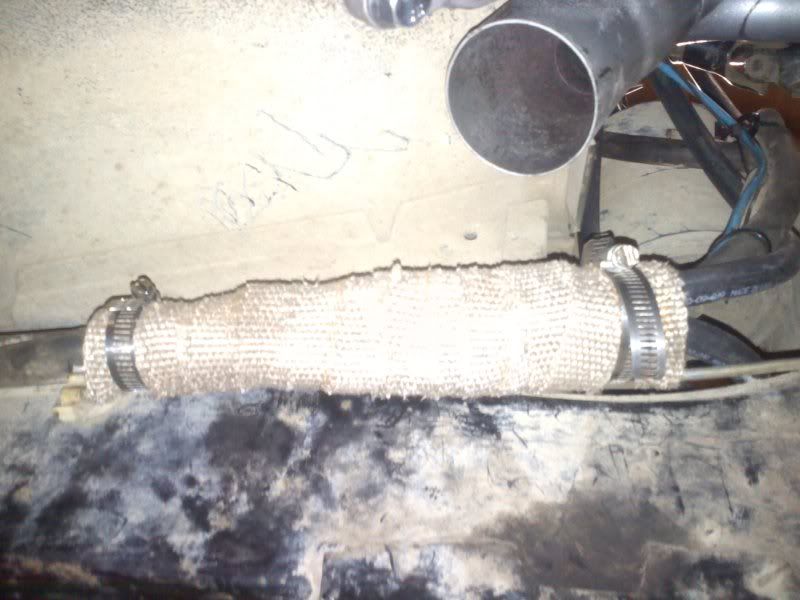
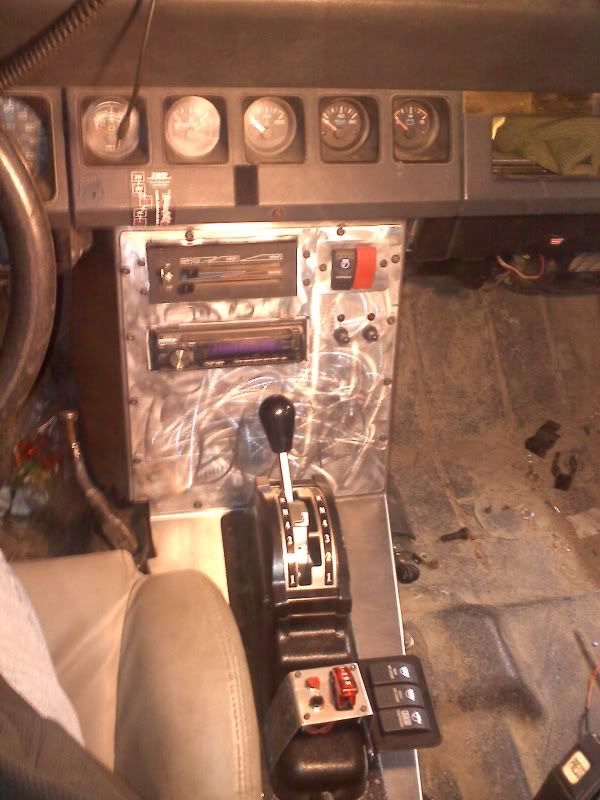
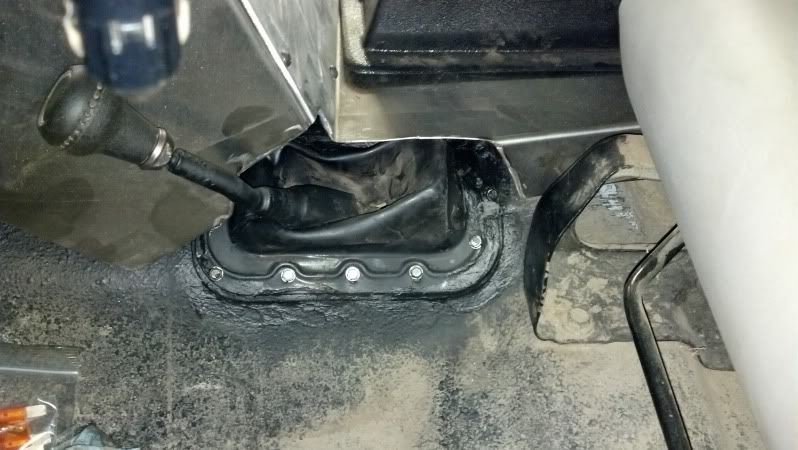
I have to build a few brackets for the fuses from the Howell harness; I'll build a little bracket for this too and weld it to that grill support rod, just like the tranny dipstick.
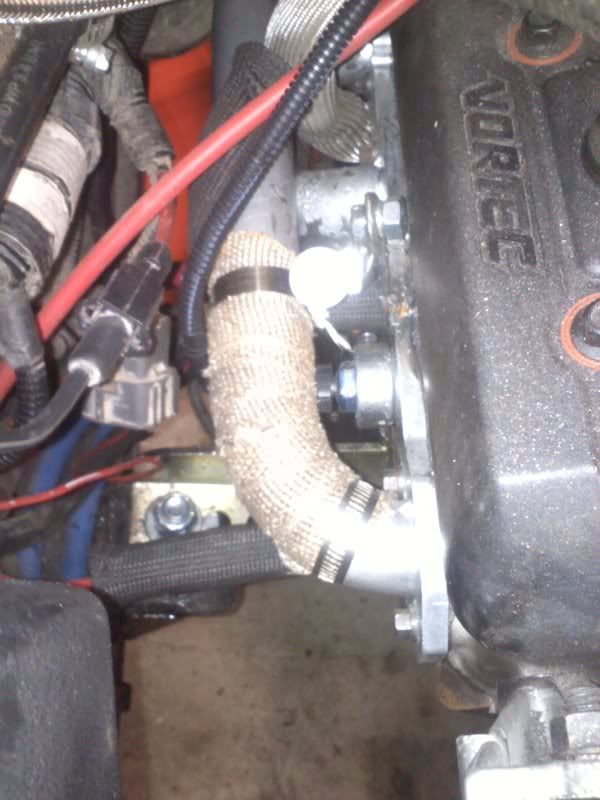
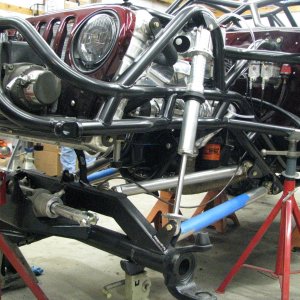
Intake done!

Now before all this fitting fiasco happened, I finally conquered something that should not have been as hard as it was... But I've said a few times. Nothing really has been easy and that's really what's keeping this so nerve racking.

picture.php


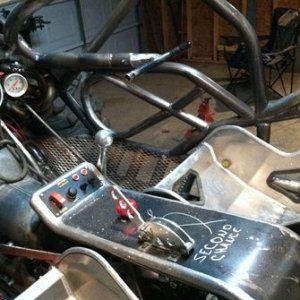
There it sits! On the table... out at last. All it takes is a mirror, a pair of the tiniest o-clip tool (bent at 90 degrees!) and a completely upside down, curved over the door sill lower back. Since I really only had socket wrenches and a big friggin' hammer I had to work a little harder. It didn't kick my a$$ tho'. I got it. So I pulled out that rod with the retainer welded to it, and it slipped right back into place and tightened the brake pedal back up (they teetered off the same rod).

picture.php


Now I need to get a footrest for the left side.

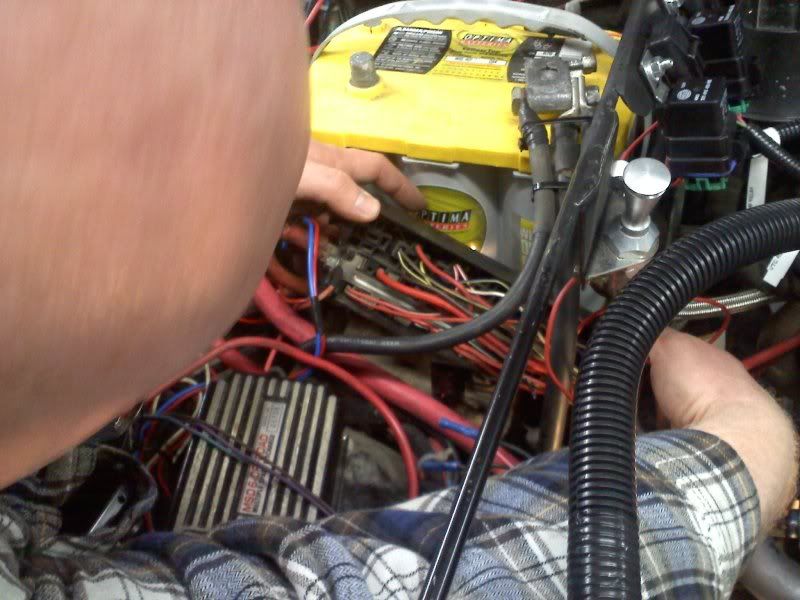
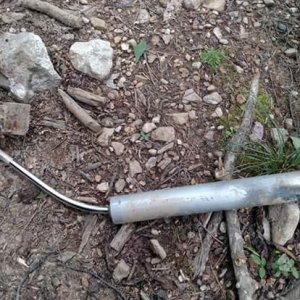
As soon as we get the fuel line situated we're about 4-5 wires away from starting it. I can't work on it tomorrow so Friday or Saturday it may get loud without an exhaust :beer: :beer:
 
Aahhh... So close tonight, so close. Maybe three wires away.

I brought my other kids to see what's been going on and why I've been gone for so long. Well after today (and tonight) they know.

picture.php


picture.php


And back to those dreaded three wires. I pulled the factory loom from the gas tank forward. Well that still needed to be connected so the Howell harness can tie into the fuel pump power, relay and ground. So that was at the end of the night and the kids were done. The wiring to the starter was within that loom too and that's were I left it.

Here's what I did accomplish.

I made another little plate and welded it to the grill support.

picture.php


Painted it black and mounted the relays and fuses.

picture.php


Here's another view of it with the battery in there.

picture.php


I also modified a battery hold down and it's done. But it's not ready to be mounted in just yet.

Here are those Dorman fuel lines I got from O'Rielly's

picture.php


Bent to be test fitted into place and the other hoses were cut to accept the hard lines.

picture.php


Here's one of the two hoses...

picture.php


and here it is, connected and ready to go.

picture.php


not a great picture but the radius is off the firewall and steel. So no binding around that curve. I'm much happier with this setup.

After that was done we tried to get the fuel pump to pump. That way I would know which line (on the Jeep frame rail) was the inlet... And after figuring out the wiring issue, we got it figured out.

So tomorrow I'll finish with a positive cable to the starter and a positive to the battery. I think that's it to start it.

I'm anxious to hear it run and really hoping for the best! :cheer:
 
picture.php

On Jim's, I actually swapped the entire manual pedal assy for the auto assy with the wider brake pedal--what a PITA that was (instrument cluster, and column has to come out to do it...)......He's happy tho, that it looks factory...
 
^^ I think maybe I'll get some of those no skid pedal covers... A wider one for the brake. We'll see when I get in it and drive.

And that's not quite there yet. Those three (plus) wires were connected but still no spark. Tried disconnecting the MSD from the system and still nothing. We're fairly certain that we wouldn't have two bad ignitions (MSD & factory) so the next thing to look at is the igniter (??) off the distributor. Luckily for me, the dizzy is so far back and under all the wiring.

Soo close!!

Sunday I went to the Best of the West race at Straddleline! What a great time!! For those who weren't able to see the event, or hear about it, check out some of the pictures and write ups of the race >here<
 
Well finally some stress has been removed...

I've been trying to post pictures for 3 days but I can't. I may have used up my allotment.

20120414161740.jpg


20120414174355.jpg


He's some of the wiring mess my buddy Aaron has to deal with.

20120417144925.jpg


We were getting power to the CPU but not the coil. I wanted to be safe (not sorry), so I went out and bought a new distributor.

We just didn't trust the one that was on there.

20120417151406.jpg


20120417145115.jpg


20120417151628.jpg


After installing the new dizzy, still no power. So we started pulling plugs and checking in the book for wiring schematics...

It took all but 10 minutes to figure out what I thought all along. One wire wasn't right, or wasn't connected right or something. I just knew, it was one simple. stupid thing.

And it was!! A jumper wire from the stock coil needed to be hooked to the battery for power. We had the connection from the dizzy to the coil, but the coil needed to be connected to the power.

We did that, cranked it and got a spark from the spark plug on the hood. So we now had spark.

Not knowing what to expect, I started videoing. I was waiting for a big backfire, or flames from the intake...

Watch and see for yourselves...

[YT]<iframe width="420" height="315" src="http://www.youtube.com/embed/_xC1jRjtxhA" frameborder="0" allowfullscreen></iframe>[/YT]
http://youtu.be/_xC1jRjtxhA

Today I'll go back to the junkyard and get that factory jumper wire, a few more wires for the alternator and start the mess of cleaning it all up to look good.

But finally, after sooo long. "It lives!!!" :cheer:

While he was working on the ignition, I played a bit with the center console. I did a lot more to it (stereo mount, some switches and toggles) but this was the only pic I took.

20120417174609.jpg


I may be on the road with this thing fairly soon.
 
Last edited:
http://www.oreillyauto.com/site/c/d...=Search_05778_1029608_2985&pt=05778&ppt=C0189


The connector for the coil is:
Napa EC26 or Oreilly PT251 but they're like $25 so like you said the wrecking yard is a good place to start.

On mine the harness was melted but on the spare TBI harness I had the connectors were ok. I stripped out the large pink (coil hot) and small white (tach sig) and left them as long as I could. Then ran them through the firewall with the main harness to hook up to ign+ and the tach.

FWIW the harness is super easy to route on the engine before it's installed. :stirpot:

Keep up the good work, you're almost there! :awesomework:
 
Last edited:
http://www.oreillyauto.com/site/c/d...=Search_05778_1029608_2985&pt=05778&ppt=C0189


The connector for the coil is:
Napa EC26 or Oreilly PT251 but they're like $25 so like you said the wrecking yard is a good place to start.

You're a ****!! (please read this sarcastically). That is also exactly what I needed. But needed is the word. I did go to a local junkyard and paid $2.00 for both of those coil connectors, an alternator wire and two little pieces... But I'm the type of guy that if, what I got was wrong, I'll just go to O'Rielly's and buy it. But I think I did ok on this one.

I also bought a thermo switch for the e-fan, some coil conduit stuff to hide wires and a totally badass crack lighter (butane torch) to solder wires and shrink heat wrap.

I'll still continue with pictures and video. I'll set a goal of May 6th to be done so I can take it to Straddlelines next 'Best of the West' series. (No racing!!)

ain'tstuckjustresting, thanks man! You're a great help! :awesomework:
 
Slow progress... I'm still messing with the center console and wiring for the in-cab winch controller...

I messed with the electric fan switch too, but that's going need a bit of thought behind it as I don't want to have to take apart the shroud. But the thermostat goes into the fins... (I might just push it in from the front and call it done).

I did wrap some stuff up so I don't **** my pants next time we start it...

I wrapped the fuel lines and brake lines that were right next to the header.

20120420180948.jpg


I also wrapped the transmission lines. That O2 sensor will be attached to the exhaust so that won't be left hanging there.

20120420181007.jpg


Then I wrapped by the knock sensor and a bit but the engine oil dipstick.

20120420182607.jpg


That's about all...

I don't know if I'll be able to get much accomplished over the weekend :rolleyes:

I've got to get it towed out to an exhaust shop soon.
 
Today I almost finalized the wiring for the e-fan... I wired the alternator and prepped wires for a good 'switched, run & start' wiring source...

Tomorrow I think I'll make sure the T/C shifter is bolted in place and maybe even look to see how easy it is to connect the transmission linkage. I haven't even open that box yet. :rolleyes:

I put on the tires and wheels and got it off the jack-stands...

I really wanted to run it again since I cut it off too soon last time and I did wrap up some of the stuff that worried me...

So here's a second video... I really suck video'ing!! And it sounds soo shitting on the video compared to how beefy it sounds live. The computer is still in limp mode and the timing is wayy off.

http://youtu.be/uOF5cAwLMFo
[YT]http://youtu.be/uOF5cAwLMFo[/YT]
(Why doesn't the video show??)

So it's pretty much ready to go to the exhaust shop and get something juicy underneath. I'm not looking for too obnoxious, but something that will let it breathe happily and sound like there's something underneath the hood.

We'll see what we come up with.

I've still been drilling holes and making a mess of that center console. That should be tied up soon as well.
 
Last edited:
20120424172903.jpg


20120424173024.jpg


Aside from plugging in the wires, center console is done for now.

Heater/vent up top... Stereo below it. Switches will do rock lights & under carriage LED's, the other two up top of those will do e-fan bypass and A/C compressor (on-board air). ARB switches & winch controls are within arm's reach.

More wiring tomorrow.
 
The computer is still in limp mode and the timing is wayy off.
.[/quote]


ohhh timing these engines can be a issue if you camnt get it to time using the book and the existing timing marks send me a PM. ill get ya through it. my method worked for aintstuck also....:D
 
Thanks Hip!

I'm still taking little steps per day of wiring and console stuff. I also need to put away and seal the ECU.

When I get it back from the exhaust shop, I guess we'll start on the timing. I'll PM you and sure, I'll take all the help I can get.

By the way, thanks for reading along Hip. I saw you at the Best of the West race (green Willy's, right?). I'll say hi to you on the 6th if your there. I'm hoping to bring my Jeep there (but not to race).
 
Bought a friggin' motorhome and put the Jeep on the back burner... I bought the motorhome for the Jeep...

So Friday I went back to my buddy's place and it was a tornado in there... Kinda got frustrated and left. Today I went more prepared and cleaned house... I spent the first few hours cleaning tools putting things back where they belonged... Then I assessed what I need to do to get it towed to the muffler shop...

Passenger rear tire was constantly going flat... Passenger rear axle seal was soo wasted that, by pulling the jackstand supporting the rear axle, fluid ended up all over the shop floor... So I cleaned that up and pulled the rear axle. SET10 bearings are just that, a set... so to replace that seal I have press off the retainer, pull the bearing and replace the seal. Since I've done that, it's a given that I replace the bearing too.

2012-05-14_16-47-59_384.jpg


I tried popping the bead on the tire by using a highlift and a Samurai... LOL, the Sami kept lifting and the tire wouldn't pop. So I guess for the fun of it, we tried sucking all the air out of it... It looked insane, but didn't work for ****.

2012-05-14_17-57-30_915.jpg

2012-05-14_17-56-35_363.jpg

2012-05-14_17-57-21_988.jpg


I pulled the valve core and let it go back to shape, I'll try it again tomorrow....

I did trim a little bit more of the console, to make it look a little better around the T/C shifter... I've just got to bolt that down, mount the shifter (I've got to simply drill a hole in the floorboard and bolt it down). I can wire the stereo, winch, lockers... All that stuff at anytime...

2012-05-14_16-48-39_526.jpg


But that's about all... I started projects but didn't complete a lot.

I just need to get back on it and at least have it ready by Memorial Day... Sheez.. A motorhome, camping at Liberty and no Jeep? No way! :mad:
 
Bead is sticking real nice.......

What sucks so much is that the tire is leaking from the bead. :rolleyes: All
I wanted to do was to clean out whatever Elbe bark I have in there with a screwdriver and re-set the bead. At least if the Jeep isn't laying on it's side, diff fluid isn't pouring out out it.
 
Top