• Help Support Hardline Crawlers :

Project M_ans J_eep

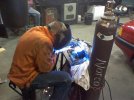
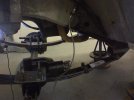
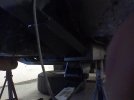
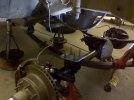
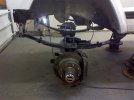
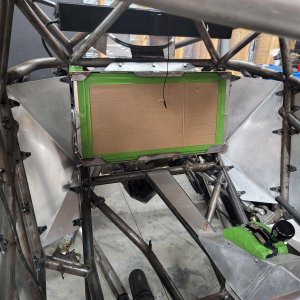
as you can see....I removed the clutch/brake pedal assembly which was the last thing that made this a 5sp. WHAT A BITCH! GETTING THE TOP BOLTS AND JUST WIGGLING THIS THIS OUT TOOK ME AT LEAST AN HOUR AND A HALF! I recommend buying what you want from the beginning! ANYWAYS, I'M VERY HAPPY ITS ALL DONE....

Why didn't you leave the bracket and just switch the pedals?

Willy
 
hmm.....dont ruin my day.....i didnt realize the brackets were so similar....until you questioned it...i thought that i couldnt take the clutch pedal off cause its on the same rod as the brake....but after closer inspection....i could have done that..DAMMIT!!! OH WELL...ITS DONE NOW...its good when people put you in your place now and then. keeps you on your toes!
 
I was not trying to make you feel like an ass. I tried to ask without being too much of a ****. :awesomework:

I didn't look forward to swapping the pedals on mine either. I put it off and tried to get the wife to do it. But, like most things I put off, it ended up being pretty easy.

Willy
 
I slid the axles out of the 60 just now and pulled the carrier....I'm gonna weld it up this evening and make my stock cover extra burly with some plate steel down the flat spot of it....can't afford another Riddler just yet.
 
the 60 is all welded up with the help from my buddy Denny....he's welded up lots of these and never had a single one break yet....

the guy in the chair is Vinnie he is the one that donated the aw4 and 231 and lots of other misc.
 

Attachments

  • 1003081949.jpg
    1003081949.jpg
    45.3 KB · Views: 219
  • 1003082019a.jpg
    1003082019a.jpg
    32.9 KB · Views: 217
  • 1003082042.jpg
    1003082042.jpg
    55.2 KB · Views: 211
Since I can't afford another Riddler cover, and we had it off, we thought it would be a good idea to add some gerth to the stock diff cover....

And then drive over the top of it with Vinnie's audi.....over....and over....and over....

DIDN'T cave in...good sign.
 

Attachments

  • 1003082050.jpg
    1003082050.jpg
    32.9 KB · Views: 217
  • 1003082050a.jpg
    1003082050a.jpg
    39.1 KB · Views: 216
  • 1003082152.jpg
    1003082152.jpg
    24.6 KB · Views: 215
  • 1003082152a.jpg
    1003082152a.jpg
    26.4 KB · Views: 229
Here is the finished products....60 and Riddler cover silver hammer finished.

And Denny gave me some almost new long travel shocks for the front...and some procomp 3000 is decent shape for the rear.
 

Attachments

  • 1004080028.jpg
    1004080028.jpg
    21.7 KB · Views: 256
  • 1004080028a.jpg
    1004080028a.jpg
    37.8 KB · Views: 258
  • 1004080028b.jpg
    1004080028b.jpg
    70.9 KB · Views: 259
well, the last few nights have been fun and interesting...I've been boxing in the frame around the old LCA mounts(where I ripped them off)....during this adventure I've managed to learn alot about making templates and welding in weird positions...as well as catching my shirt on fire and recentering my front axle...that was sweet...then once I put the spool in the front and when I was putting the calipers back on I broke the bolt that holds the caliper on to the bracket...so I went and got this nifty new style of a bolt extractor that worked magical! Everybody says they don't work...well...when a bolt with a shoulder busts off half way down in there, they work great!....then my buddy gave me a tap and I drilled the hole out and tapped it for a 3/8 bolt, which is considerably bigger than stock...looks like someone already had to do that on the other side....everything is welded and painted and tomorrow will be assembled...hopefully I will get it full of fluids and drive this bitch around the block on Wednesday.....we'll see....**** always seems to work out differently...
 
okay...so in the midst of trying to REcenter the front axle......I ended up welding the stock perch and redrilling which F....ed up everything....so I had to redrill the ubolt plates and now I'm realizing that my drivers side axle shaft is hitting the blocks in the mini spool...so I need to tear all that back apart and grind down the shaft at least an 1/8 of an inch...the pinion yoke is changed out but i'm not sure that the seal will seal that good do to some dumb ass before me messing up the seat for it in the diff....we'll see I guess....if not I will need to see about fixing that somehow...lots of good stuff...

Frame is completely done, everything welded and painted...90% assembled:mad:
 
Spool install from start to finish....
 

Attachments

  • 1004081406.jpg
    1004081406.jpg
    49.7 KB · Views: 202
  • 1004081406a.jpg
    1004081406a.jpg
    38.7 KB · Views: 202
  • 1004082203.jpg
    1004082203.jpg
    56.2 KB · Views: 202
  • 1004082204.jpg
    1004082204.jpg
    61.5 KB · Views: 194
  • 1004082252.jpg
    1004082252.jpg
    29.2 KB · Views: 191
finish bending, welding, and painting u-bolt plates....
 

Attachments

  • 1005081447.jpg
    1005081447.jpg
    40.8 KB · Views: 191
  • 1005081832.jpg
    1005081832.jpg
    42.6 KB · Views: 195
Frame is done being boxed and reinforced for now...

Just got the 24in brake lines on...

and the rear cover is on...needs fluid.

The pinion yoke has also been changed from 1350 to 1310.

oh yeah...and I ground down the drivers side axle shaft(spool end) about 1/4 inch...so it would quit binding up...works like a champ.
 

Attachments

  • 1011080014.jpg
    1011080014.jpg
    30.6 KB · Views: 193
  • 1011080014a.jpg
    1011080014a.jpg
    25.7 KB · Views: 192
  • 1011080015.jpg
    1011080015.jpg
    44.3 KB · Views: 194
  • 1011080014b.jpg
    1011080014b.jpg
    41.8 KB · Views: 189
  • 1011080016.jpg
    1011080016.jpg
    25.9 KB · Views: 181
Last edited:
Top