• Help Support Hardline Crawlers :

Project M_ans J_eep

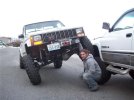
Why didn't you leave the bracket and just switch the pedals?

Willy

hmm.....dont ruin my day.....i didnt realize the brackets were so similar....until you questioned it...i thought that i couldnt take the clutch pedal off cause its on the same rod as the brake....but after closer inspection....i could have done that..DAMMIT!!! OH WELL...ITS DONE NOW...its good when people put you in your place now and then. keeps you on your toes!
i questioned the same. i read later why you did it. the "untouched" look. on my yota, i just zip-tied the clutch pedal under the edge of the carpet.

I just welded my clutch and brake pedals together to give me the "factory" large brake pedal when I put in my auto. :awesomework:
nice.
i always hate doing things PERMANENTLY. i like to give myself an out.
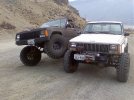
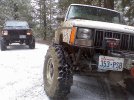
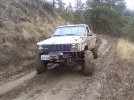
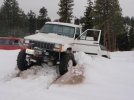
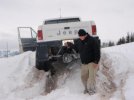
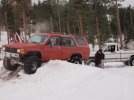
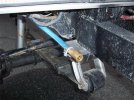
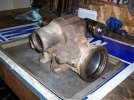
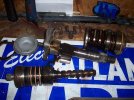
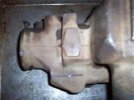
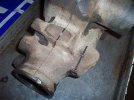
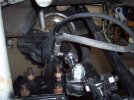
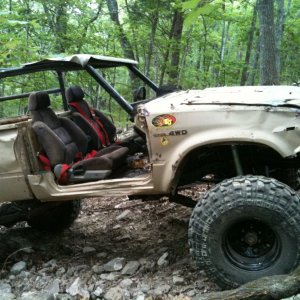
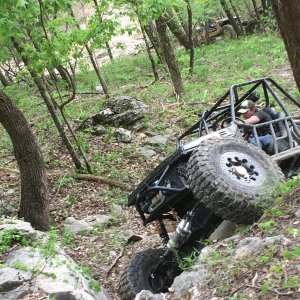
Finished the rear shocks and installed the steering box brace with some modification...must have been a different steering box in the xj or frame a tid bit different, anyways...the back of this pile is completely done....onward to the front...needs shocks and front driveline.
lookin good.
i like the build. good job. thats quite a swap, pretty much exactly opposite of what it was before, on everything.
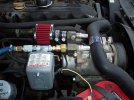
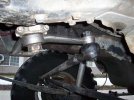
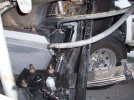
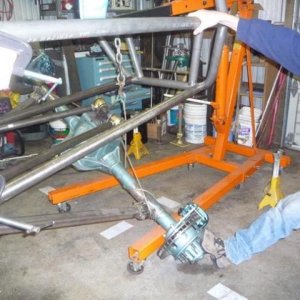
i made some rear, upper shock mounts almost exactly like yours.

not sure if uve had any problems...but,
on mine, i drilled holes, then slid the bolts through, and welded them on front, and the back side. i think it has a bit more support that way.
 
Last edited:
no, I haven't had any issues with it so far....i'm gonna be taking the bed off here shortly....gonna make a tall flatbed....eventially gonna cut all of it off and link it with coil overs on the rear...but thats a way out....flatbed for now I think...we'll see.
 
Some pics from our xmas tree run, everything is holding up good so far, lovin the build so far, added an electric fan finally also.:redneck:
 

Attachments

  • 1207080842.jpg
    1207080842.jpg
    64.5 KB · Views: 249
  • 1207081028a.jpg
    1207081028a.jpg
    77.5 KB · Views: 264
  • 1207081213.jpg
    1207081213.jpg
    86.2 KB · Views: 248
That was a fun day. Coupla pimpin' Comanches out wheelin'. The brown one is my brother's (Co-Man-Che on here), I just stole it for the day.
 
Last edited:
Played in the snow today...got hi centered....so did Matt...still don't think I learned my lesson....haha.:mad: :mad: :mad: :cool:
 

Attachments

  • l_7f21a002ad71491aad3911473758a6b7.jpg
    l_7f21a002ad71491aad3911473758a6b7.jpg
    36.6 KB · Views: 211
  • l_b3dbb612914d4509b9b826783f07cc39.jpg
    l_b3dbb612914d4509b9b826783f07cc39.jpg
    24.3 KB · Views: 217
  • l_e2dd138c49c044ae923e68cbc77e940a.jpg
    l_e2dd138c49c044ae923e68cbc77e940a.jpg
    38.1 KB · Views: 212
  • l_2368fa21a3054a82a578b07f6d2347de.jpg
    l_2368fa21a3054a82a578b07f6d2347de.jpg
    24.8 KB · Views: 214
God damn dirt piles.... :haha:

Oh yeah, and I left my nice Warn clevis out there in the snow. I went back and looked for it before we left but I couldn't find it. :booo:
 
YOUR nice Warn clevis or MY nice Warn clevis???????

:flipoff:

MY Warn clevis. Yours is the one that's half rusted in the back of the 4runner... or maybe Jeff has it, I'm not sure. :haha:

Guess I'm going down to Fasteners on Friday to get a couple new clevises. :haha:
 
Got my steering issues all delt with...used a waggy pitman arm reamed for GM tie rod end. finally got full steering bump to bump.

On board air is finished also, will post pics later...
 
I ALSO ORDERED EVERYTHING FOR MY HYDRO ASSIST...GONNA TAP MY BOX THIS WEEKEND....

QTY Stock Status Product Name
1 in stock 1.5X8X1 DA HYD CYL SWIVEL EYES
Item # 9-7258-8
2 in stock 3/8" X 48" JIC 6F X JIC 6F 4000 PSI HYD HOSE
Item # 930-2248
2 in stock JIC 6M x JIC 6M 90 ELBOW
Item # 9-2500-6-6
2 in stock JIC 6M x 1/4 NPTM 45 ELBOW
Item # 9-2503-6-4

Pricing
Subtotal: $117.43
Tax: $.00
Shipping: $15.24
Handling: $2.00
Total Cost: $134.67


not bad...:stirpot:
 
On board Air, Made with Square D pressure switch, some fittings, quick disconnects, and an air filter...oiler to come.
 

Attachments

  • 100_0856.jpg
    100_0856.jpg
    55.4 KB · Views: 182
  • 100_0857.jpg
    100_0857.jpg
    69.1 KB · Views: 190
A homemade intake(actually gained me some horses)...and added a PA speaker to the CB..
 

Attachments

  • 100_0855.jpg
    100_0855.jpg
    71.5 KB · Views: 196
Mounted a CB antanna...hid it behind the cab for protection...seems to work good and it is still about a foot over the cab, says you are supposed to have 2/3 over roof, but It hit my garage when I pulled in and was annoying.
 

Attachments

  • 100_0859.jpg
    100_0859.jpg
    37.9 KB · Views: 201
Like I said before....here is the pitman arm I went with reamed out from PARTS MIKE....full steering finally from LOCK TO LOCK...much better.
 

Attachments

  • 100_0858.jpg
    100_0858.jpg
    51 KB · Views: 190
Before drilling the holes for the Hydraulic lines you will need to fully disassemble the power stering box. Thats one reason to do a full rebuild with new seals and bearings at this time.

1. First remove the pittman arm
2. Remove the 3 steering box bolts holding it to the frame.
3. Remove the high pressure and low pressure line going to the power steering box. place a oil sheet on the floor about a qt of fluid will come out. keep the lines tied up and clean.
4. Remove the shaft from the steering wheel to the box, be carfull the box is heavy.
5. Now work on the box at a clean bench, use pliers to remove the c-clip on the pittmanarm shaft. Remove the top 4 bolts at the other end of the shaft. make sure the pittman arm was centered, then this shaft will pull out. A lot more fluid will spill out, get a bucket.
6. Now remove the LARGE c-clip at the end of the box that goes against your bumper. At the top of your box there is a pin hole push through the pin hole to help get the clip out. Slide the pittman arm shaft back in, and turn it. This will move the big pistion and push the cap out of the end of the box. Now pull the pittman arm shaft out again.
7. Keep turning the steering wheel shaft till the piston comes out of the end of the box. You will probibly hear the bearings fall into the big piston. they will, so dont loose any.
8. Now remove the c-clip at the steering wheel shaft side.
9. With a hammer you should be able to tap the ring (yellow in my pics). The ring has three indentations on it you can tap on. Just screw it out. Then the spiral shaped shaft and the smaller piston will pull out.

10. Now you can drill the holes for the ram. The top hole will drill all the way through. I used an 1/8in bit for pilot holes to keep it centered. The bottom hole only drills half way till you hit the hydraulic line hidden inside the casting. Both holes are 7/16in (look at the pics for locations)
11. Tapp the new holes with a 1/4in NPT tap. The top hole is easy, the bottom hole will only go till the tap bottoms out. Then I cut about 3/16in off the tip of the tap, then continued with the bottom hole till it bottomed out again. The tap was like $6 at Home depot.
12. Clean the box with paint thiner to get all the grit out, then use a air sprayer to get all the metal shavings out. Paint it and stuff. Then put the 3/8in to -6aN fittings on the box using pipe tape.
13. Put new seals on the pistons. kinda tideious. (see pics)
14. Re assemble.


Did this last night, want it done before hydro stuff gets here...:cool:

Notice where I punched to drill and tap on the box...need to get the tap tonight and a new seal kit.
 

Attachments

  • 100_0862.jpg
    100_0862.jpg
    66 KB · Views: 189
  • 100_0861.jpg
    100_0861.jpg
    63.2 KB · Views: 194
  • 100_0864.jpg
    100_0864.jpg
    32.9 KB · Views: 188
  • 100_0865.jpg
    100_0865.jpg
    64.3 KB · Views: 190
box done:masturbanana[1]:

i had no problems putting the balls back in....but thats cause i know a couple of gangsta indian tricks...:fawkdancesmiley:
 
here it is...all wrapped up, had to take a alittle off of the passenger ubolt plate, and cut down one of the ubolts...just need to get the damn thing blead all the way...???
 

Attachments

  • 100_0884.jpg
    100_0884.jpg
    52.1 KB · Views: 139
  • 100_0887.jpg
    100_0887.jpg
    44.8 KB · Views: 140
  • 100_0893.jpg
    100_0893.jpg
    52.3 KB · Views: 137
  • 100_0894.jpg
    100_0894.jpg
    57.3 KB · Views: 139
  • 100_0890.jpg
    100_0890.jpg
    39.7 KB · Views: 139
Top