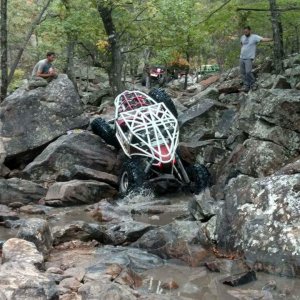
• Help Support Hardline Crawlers :

Revive Retro

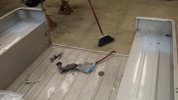
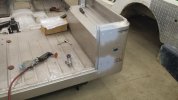
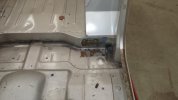
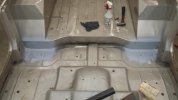
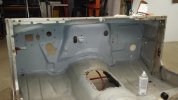
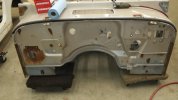
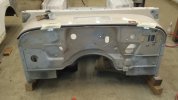
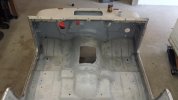
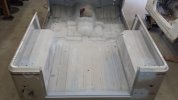
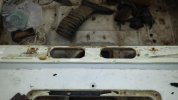
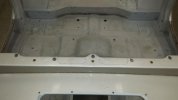
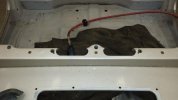
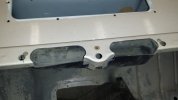
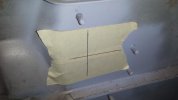
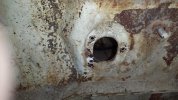
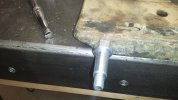
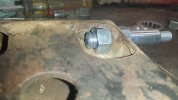
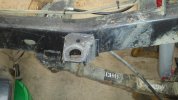
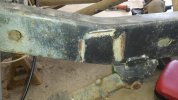
The only places I found any rust with any pitting is there something was mated against the body and removed. The tub had been sitting outside for some time and I suspect when painted at the factory they are painted assembled with minimal(if any) primer under the assembled items.
 

Attachments

  • 20151007_190719.jpg
    20151007_190719.jpg
    34.3 KB · Views: 215
  • 20151007_190729.jpg
    20151007_190729.jpg
    40.7 KB · Views: 209
Front rollbar mount area.
 

Attachments

  • 20151007_192148.jpg
    20151007_192148.jpg
    31.2 KB · Views: 213
  • 20151008_185226.jpg
    20151008_185226.jpg
    33.7 KB · Views: 209
Inside firewall. This was more of a surface rust with no pitting..
 

Attachments

  • 20151007_194007.jpg
    20151007_194007.jpg
    48.3 KB · Views: 203
  • 20151009_203742.jpg
    20151009_203742.jpg
    36.2 KB · Views: 214
Firewall. There was a little rust and like everywhere else minimal pitting. Since its going to be painted I scuffed all the areas that will be painted.
 

Attachments

  • 20151007_194018.jpg
    20151007_194018.jpg
    40.2 KB · Views: 214
  • 20151010_195854.jpg
    20151010_195854.jpg
    37.6 KB · Views: 212
I also had to fix where the lower door hinges are and then completely sanded the inside of the tub. I have a little sanding on the primed areas to finish up and then its pretty much ready to paint.
 

Attachments

  • 20151011_111352.jpg
    20151011_111352.jpg
    31.8 KB · Views: 210
  • 20151011_111342.jpg
    20151011_111342.jpg
    31.4 KB · Views: 203
So I got the old tub pretty much all stripped down now..

Damn worse wiring in the world,lol.
 

Attachments

  • 20151011_121101.jpg
    20151011_121101.jpg
    56.5 KB · Views: 137
  • 20151011_124505.jpg
    20151011_124505.jpg
    50.1 KB · Views: 139
  • 20151011_124516.jpg
    20151011_124516.jpg
    49.4 KB · Views: 133
Now onto modifying the yj tub to fit the CJ8 needs. First thing will be the defroster vents where the windshield frame meets the body. I simply used the old tub and made a template--pretty simple really..

Made sure to test fit...
 

Attachments

  • 20151011_181205.jpg
    20151011_181205.jpg
    41.8 KB · Views: 146
  • 20151011_181546.jpg
    20151011_181546.jpg
    23.4 KB · Views: 144
  • 20151013_200537.jpg
    20151013_200537.jpg
    29.6 KB · Views: 135
  • 20151013_201019.jpg
    20151013_201019.jpg
    28.8 KB · Views: 137
Next was the clutch rod hole. Again it was simply just a matter of measuring the old hole...
 

Attachments

  • 20151014_190859.jpg
    20151014_190859.jpg
    23.3 KB · Views: 138
  • 20151013_201730.jpg
    20151013_201730.jpg
    26.4 KB · Views: 137
  • 20151013_201721.jpg
    20151013_201721.jpg
    69.1 KB · Views: 148
Ok so since the tub is done on the front I went ahead and painted the engine side of the firewall...
 

Attachments

  • 20151014_193954.jpg
    20151014_193954.jpg
    33.5 KB · Views: 168
  • 20151014_203424.jpg
    20151014_203424.jpg
    32.1 KB · Views: 172
One of the many boxes--new shocks. Unfortunately the fronts were a little wrong. :haha:
 

Attachments

  • 20151014_203727.jpg
    20151014_203727.jpg
    44.2 KB · Views: 170
  • 20151015_193425.jpg
    20151015_193425.jpg
    33.5 KB · Views: 172
The rears were right but took some work to get them in. For starters I had to replace the lower stud/bolt (one was missing).

First off one of my big pet peeves is those who torch cut u-bolts. Ya I had to rework them back into shape (had I known I would have just replaced them)..

But I finally got them all done.
 

Attachments

  • 20151016_205049.jpg
    20151016_205049.jpg
    59.3 KB · Views: 166
  • 20151015_204354.jpg
    20151015_204354.jpg
    51.4 KB · Views: 168
  • 20151015_204346.jpg
    20151015_204346.jpg
    39.7 KB · Views: 164
  • 20151015_200602.jpg
    20151015_200602.jpg
    45 KB · Views: 181
  • 20151015_195604.jpg
    20151015_195604.jpg
    49.1 KB · Views: 168
More chassis work--time to get it ready to set the tub on it.

The 3rd tub mount will need to be moved forward like 6" or so. I wanted to reuse the mounts so I carefully cut them off and the frame is prepped. Will weld them into place once the tub is in place...
 

Attachments

  • 20151016_205649.jpg
    20151016_205649.jpg
    57.9 KB · Views: 173
  • 20151017_133415.jpg
    20151017_133415.jpg
    58.9 KB · Views: 167
  • 20151017_133435.jpg
    20151017_133435.jpg
    26 KB · Views: 166
  • 20151017_134745.jpg
    20151017_134745.jpg
    52.3 KB · Views: 163
Last modification (I think---I am new,lol) is the rear mounts--they are farther out. I measures and its 2" wider so I just ob longed the hole an inch..
 

Attachments

  • 20151017_142933.jpg
    20151017_142933.jpg
    51.3 KB · Views: 167
  • 20151017_151700.jpg
    20151017_151700.jpg
    51.6 KB · Views: 170
Love a clean shop. Had to roll the chassis out and clean the big mess..
 

Attachments

  • 20151017_164215.jpg
    20151017_164215.jpg
    69.4 KB · Views: 169
CJ7 was a wrangler.
CJ8 was a stretched wheelbase, typically with a half cab and pickup bed.
CJ8 was the designation for 'Scrambler"
And what's the plan for fuel tank. IIRC, most CJs had 15, and most YJs had 20s
 
CJ7 was a wrangler.
CJ8 was a stretched wheelbase, typically with a half cab and pickup bed.
CJ8 was the designation for 'Scrambler"
And what's the plan for fuel tank. IIRC, most CJs had 15, and most YJs had 20s

Ordered armor so will just buzz a hole on the passenger side...
 
Top