• Help Support Hardline Crawlers :

Revive Retro

Pretty close....
 

Attachments

  • 20151025_111635.jpg
    20151025_111635.jpg
    39.5 KB · Views: 202
  • 20151025_111644.jpg
    20151025_111644.jpg
    45.1 KB · Views: 197
Down she goes :redneck:
 

Attachments

  • 20151025_133724.jpg
    20151025_133724.jpg
    57.9 KB · Views: 200
  • 20151025_134600.jpg
    20151025_134600.jpg
    55.4 KB · Views: 191
  • 20151025_161500.jpg
    20151025_161500.jpg
    61.8 KB · Views: 210
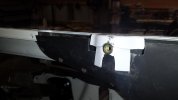
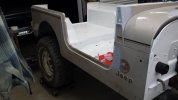
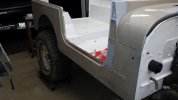
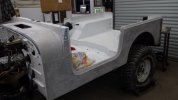
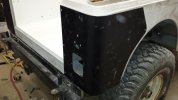
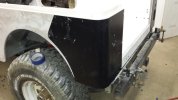
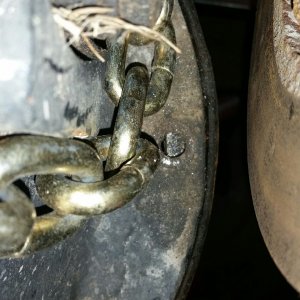
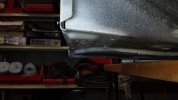
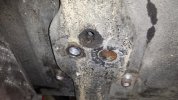
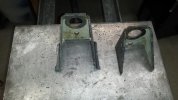
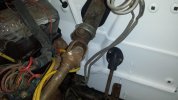
So now that its on the frame and somewhat in place its time to get the one mount done. Where the mount bolts to the tub there are actually 2 holes in the insert one being threaded and the other blank and the mounts as they sat landed right inbetween them. I had a choice to make a new mount or see if I can tap the inner hole to 1/2" and cut down the mount. Well the insert tapped perfectly and cut the mounts(one shown).
 

Attachments

  • 20151025_173938.jpg
    20151025_173938.jpg
    61.5 KB · Views: 206
  • 20151025_173948.jpg
    20151025_173948.jpg
    57.2 KB · Views: 203
So got the mounts burned and painted--so the tub is on :cheer:
 

Attachments

  • 20151025_194006.jpg
    20151025_194006.jpg
    65.5 KB · Views: 212
Got another box of goodies and---ya somebody dropped it :mad:
 

Attachments

  • 20151026_191546.jpg
    20151026_191546.jpg
    22.4 KB · Views: 153
  • 20151026_191622.jpg
    20151026_191622.jpg
    20.7 KB · Views: 143
  • 20151026_192548.jpg
    20151026_192548.jpg
    29.1 KB · Views: 151
So the fresh air door also needed some love so it got rebuilt with new foam.
 

Attachments

  • 20151029_192539.jpg
    20151029_192539.jpg
    39.2 KB · Views: 140
So its time to start filling the jeep with parts. I got the heater box all installed and fitment was really good.
 

Attachments

  • 20151029_195724.jpg
    20151029_195724.jpg
    34.6 KB · Views: 144
  • 20151029_195554.jpg
    20151029_195554.jpg
    43.9 KB · Views: 140
  • 20151029_195546.jpg
    20151029_195546.jpg
    33.6 KB · Views: 147
  • 20151029_194900.jpg
    20151029_194900.jpg
    36.4 KB · Views: 143
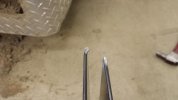
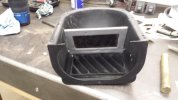
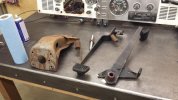
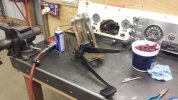
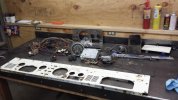
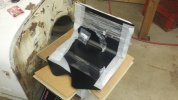
Next the pedal assembly. I tore it down and cleaned/inspected it. Its is great shape and the only worn parts were the link rod for the clutch (still usable but a little worn).
 

Attachments

  • 20151029_201544.jpg
    20151029_201544.jpg
    55.8 KB · Views: 137
  • 20151030_191617.jpg
    20151030_191617.jpg
    55.3 KB · Views: 136
  • 20151030_193601.jpg
    20151030_193601.jpg
    51.3 KB · Views: 140
I got the pedal assembly installed. I had to drill holes for the brake master but that was simple and just used the holes in the pedal assy as a guide.
 

Attachments

  • 20151030_203047.jpg
    20151030_203047.jpg
    35.3 KB · Views: 137
  • 20151030_202209.jpg
    20151030_202209.jpg
    47.6 KB · Views: 148
Next it was time to get the dash I had pulled out stripped down.
 

Attachments

  • 20151031_093459.jpg
    20151031_093459.jpg
    45.7 KB · Views: 135
  • 20151031_111544.jpg
    20151031_111544.jpg
    55.5 KB · Views: 144
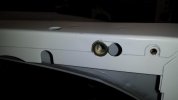
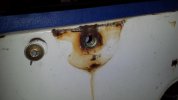
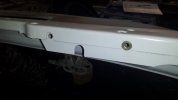
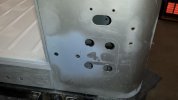
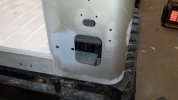
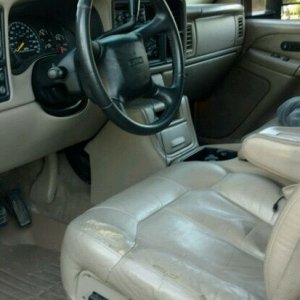
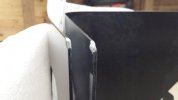
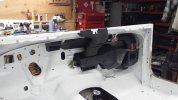
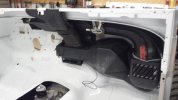
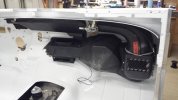
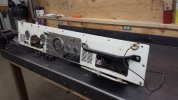
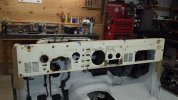
So before I start working on the dash itself I wanted to mount it and check its fitment and a good thing. I found the windshield hold down holes did not line up. I also found lack of threaded inserts for the dash on the passenger side and one hole that needed to be drilled. Otherwise the fitment was good.
 

Attachments

  • 20151031_134305.jpg
    20151031_134305.jpg
    52.4 KB · Views: 171
  • 20151031_134159.jpg
    20151031_134159.jpg
    44.2 KB · Views: 173
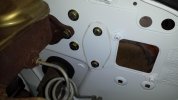
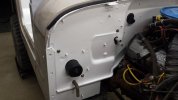
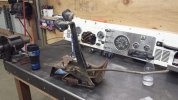
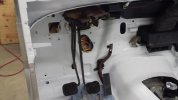
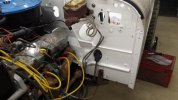
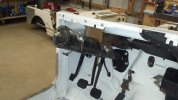
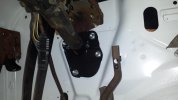
Next I decided to get the steering column done up. Went thru it and replaced the lock cylinder and cleaned up the base mount. Got it installed with the new firewall seal.
 

Attachments

  • 20151102_204118.jpg
    20151102_204118.jpg
    46.4 KB · Views: 167
  • 20151102_204220.jpg
    20151102_204220.jpg
    45.4 KB · Views: 169
  • 20151102_204230.jpg
    20151102_204230.jpg
    32.3 KB · Views: 169
So the corners got sent back and got another set that--are not damaged :awesomework:

I also got a new tool to add to my collection...
 

Attachments

  • 20151104_192224.jpg
    20151104_192224.jpg
    47.3 KB · Views: 173
  • 20151104_203303.jpg
    20151104_203303.jpg
    47.9 KB · Views: 173
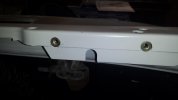
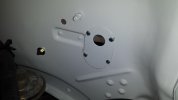
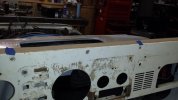
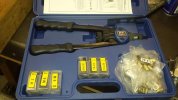
So I got the inserts installed. For the 1/4" one in the center and 2 on the passenger side. The windshield hold down are 3/8" and they had to be moved over about 3/4". But now the dash can be stripped and reworked a bit.
 

Attachments

  • 20151112_203349.jpg
    20151112_203349.jpg
    18.5 KB · Views: 166
  • 20151112_203224.jpg
    20151112_203224.jpg
    29.5 KB · Views: 164
  • 20151105_202307.jpg
    20151105_202307.jpg
    25.9 KB · Views: 171
  • 20151105_202302.jpg
    20151105_202302.jpg
    17.7 KB · Views: 166
  • 20151105_194207.jpg
    20151105_194207.jpg
    20.1 KB · Views: 170
I had made caps for the holes on the firewall last week and time to install them.
 

Attachments

  • 20151113_202428.jpg
    20151113_202428.jpg
    17.1 KB · Views: 164
  • 20151113_202424.jpg
    20151113_202424.jpg
    32.1 KB · Views: 174
Onto some more tub work--time to make ready it for paint. Started with removing the sticker crap. It was very simple with my heat gun.
 

Attachments

  • 20151113_200443.jpg
    20151113_200443.jpg
    40.6 KB · Views: 164
  • 20151113_201137.jpg
    20151113_201137.jpg
    35.4 KB · Views: 162
  • 20151113_202415.jpg
    20151113_202415.jpg
    31.5 KB · Views: 163
Now this part sucked.
 

Attachments

  • 20151113_212933.jpg
    20151113_212933.jpg
    37.2 KB · Views: 164
  • 20151113_220353.jpg
    20151113_220353.jpg
    20.4 KB · Views: 164
I got the outside of the tub all scuffed up.....
 

Attachments

  • 20151114_165959.jpg
    20151114_165959.jpg
    37.2 KB · Views: 118
  • 20151114_165950.jpg
    20151114_165950.jpg
    40 KB · Views: 112
With the YJ tub you either put a different tank in or you cut the new hole in the passenger side. This is where the new steel corners came in handy for marking the new hole.
 

Attachments

  • 20151114_185258.jpg
    20151114_185258.jpg
    32.2 KB · Views: 113
  • 20151114_190426.jpg
    20151114_190426.jpg
    32.2 KB · Views: 113
So before I painted I figured it was smart to go ahead and test fit/drill the new corners.
 

Attachments

  • 20151114_202950.jpg
    20151114_202950.jpg
    39.4 KB · Views: 116
  • 20151114_203000.jpg
    20151114_203000.jpg
    41.3 KB · Views: 113
Top