-
Help Support Hardline Crawlers :
You are using an out of date browser. It may not display this or other websites correctly.
You should upgrade or use an alternative browser.
You should upgrade or use an alternative browser.
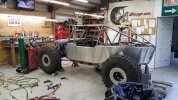
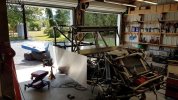
Finally....Da new rig..
- Thread starter crash2
- Start date
crash2
-Oh no I picked a side-

zukkev
Cornfuzzled yet again...
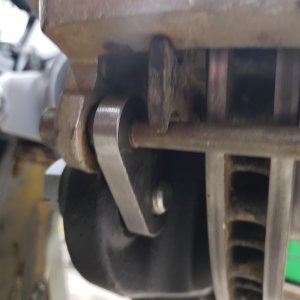
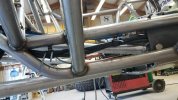
So next onto the last 2 vents--tranny and t-case.
Started by pulling that goofy plastic vent and tapped the case to 1/8" NPT (the hole size is PERFECT to simply run the tap down it).
I don't know why tranny builders don't just do this as part of a rebuild
 ... so as to not potentially get shavings into the case...:beer:
crash2
-Oh no I picked a side-
I don't know why tranny builders don't just do this as part of a rebuild
I know right--the tv cable had a plug in it,lol.. Slow and grease is certainly your friend.
Clark
Well-Known Member
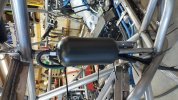
Thanks for at least using SOME zip ties. Makes me feel a little better about mine....
Glenn
Well-Known Member
:haha:Thanks for at least using SOME zip ties. Makes me feel a little better about mine....
Amazing work Crash. Keep on keeping on.
crash2
-Oh no I picked a side-
Thanks for at least using SOME zip ties. Makes me feel a little better about mine....
:redneck:
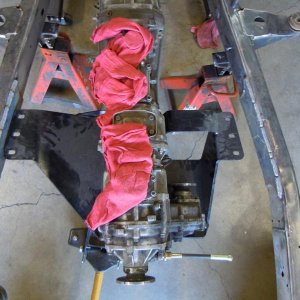
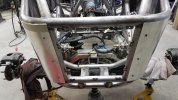
The rear to front wire harness will be ziptied to the tranny lines since there wasn't enough room to give the harness its own mounts
:haha:
Amazing work Crash. Keep on keeping on.
Thanks Glenn...
crash2
-Oh no I picked a side-

crash2
-Oh no I picked a side-
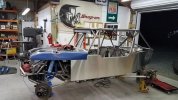
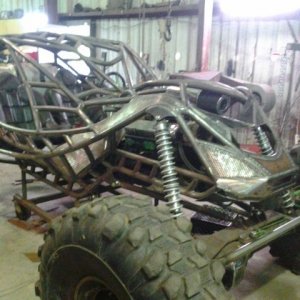
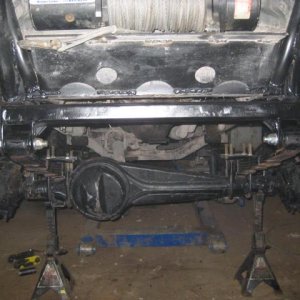
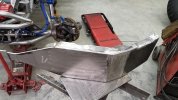
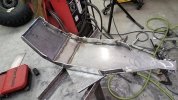
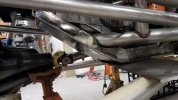
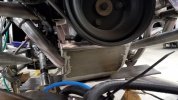
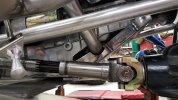
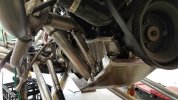
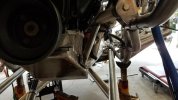
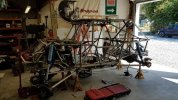
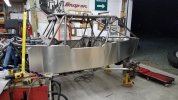
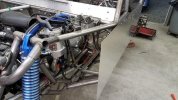
So I went ahead and tackled the next big thing. As anybody knows aluminum cannot withstand being smacked like steel can. Since the rig is lower so is the motor/tranny both those need some protection. So this is what I came up with. It contours every thing as best as possible and I was also bale to give the driveshaft some decent clearance. So Fist step build it...
Attachments
crash2
-Oh no I picked a side-
crash2
-Oh no I picked a side-
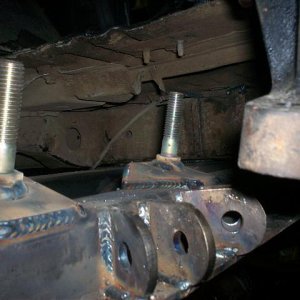
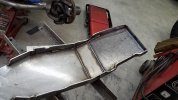
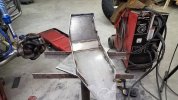
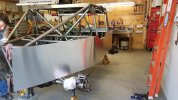
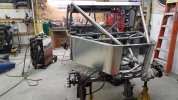
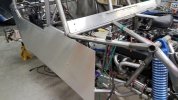
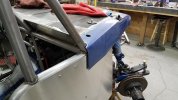
So my original intention was to make supports of the motor mounts and make the skid/mounts one who assembly and then add holes to access the drain plug. Well this is where I found the motor mounts sit on top of the chassis rails and the rear shock mounts kinda go over top the mounts so if it was one whole assembly there would be no way to remove it. So it required more thinking to figure that out. So I ended up making stand offs and adding a little more support to the skid to help keep it from being able to be shoved to one side. The stand offs need to be fully welded and the back part of the skid mount made under the tranny pan but that will be done once I get the motor/trans pulled out of the rig.
Attachments
crash2
-Oh no I picked a side-
crash2
-Oh no I picked a side-
So onto the last thing before I can fully disassemble the whole rig..
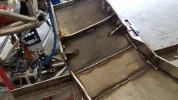
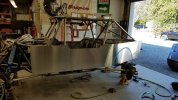
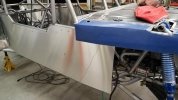
Time for skins. I started by getting many tabs welded to the chassis and then plain sheets bolted to it (measuring for holes ect)..
As the panels went on I started by rough cutting them since my final cuts are all measured from the tube.
Time for skins. I started by getting many tabs welded to the chassis and then plain sheets bolted to it (measuring for holes ect)..
As the panels went on I started by rough cutting them since my final cuts are all measured from the tube.
Attachments
crash2
-Oh no I picked a side-
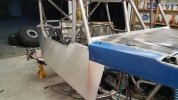
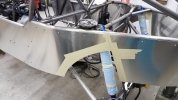
So I got both panels finish cut from the A-piller to the tail. The wrap around at the tail was a little tricky and not 100% flush like I was hoping but its very close--and I think it looks good...
Attachments
crash2
-Oh no I picked a side-
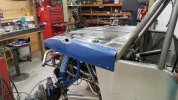
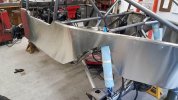
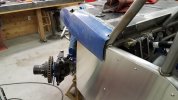
Now onto the front. I had no game plan going into this and was just going to wing it. From the get go I knew the transition from the body to the hood was not going to be spot on due to the angle of the hood and such...
Attachments
crash2
-Oh no I picked a side-
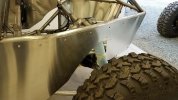
As you can see its not perfect. Hindsight is certainly 20/20 and I would have made it 1" narrower at the A-pillar. Despite that I think I got it pretty decent considering all the angles I had to look at when it was built. It will take a little work but I think I can make it workable,,,
Attachments
crash2
-Oh no I picked a side-
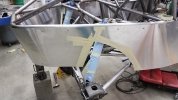
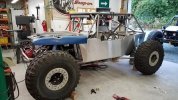
So started by angling the panel inward to match the hood and cut the panel. Added one tab at the bottom and a long plate behind where the panel/hood overlap to suck the hood to the panel. I plan on using some Dzus fasteners and made the plate behind wide enough. It certainly looks much better and I think once the hood/body panels are the same color it won't stand out quite as much.