You are using an out of date browser. It may not display this or other websites correctly.
You should upgrade or use an alternative browser.
You should upgrade or use an alternative browser.
90's throw back....Manche build
- Thread starter mcutler
- Start date

Help Support Hardline Crawlers:


mcutler
Well-Known Member
Re: Re: 90's throw back....Manche build
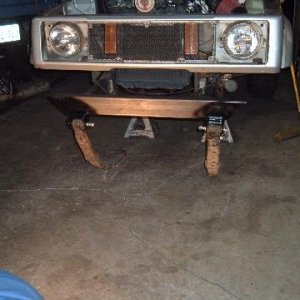
Yea, the bumper is disposable, so didn't want to put too much into it.
I actually prefer round lights on front of the grill like this, more of a pre runner look. I may change to them later on.
Matt
Right on!ridered3 said:Looks awesome! I like how the heims used for the front push bumper are bigger than some folks 4 link heims.
NP said:The awesomeness continues
Thanks guys!scrambled said:The light bar looks like an afterthought.
Yea, the bumper is disposable, so didn't want to put too much into it.
I actually prefer round lights on front of the grill like this, more of a pre runner look. I may change to them later on.
Matt
mcutler
Well-Known Member
Let the fun begin....
All items that require plumbing are here. (Except heater)
Time to make some stuffs...
Surge tank, overflow, washer fluid, catch cans, mount trans cooler, steering cooler, weld on AN bungs for- radiator and above mentioned tanks, fuel filter/ regulator, fuel pump, exhaust parts, dzus fastener parts for- rad shrouding and inner fenders, etc, etc...Lots to do.

Also spent a many hours in the last week honing my tig work, playing with different tungsten and cups. I'm pretty much a rookie, so be kind or offer advice[emoji41].


#6 gas cup for AL

Big ass pyrex gas for steel

Testing different tungsten

Couple different fillers

I've made progress in tig, this was from my last practice session...


Will have some photo worthy progress through the weekend.
Matt
All items that require plumbing are here. (Except heater)
Time to make some stuffs...
Surge tank, overflow, washer fluid, catch cans, mount trans cooler, steering cooler, weld on AN bungs for- radiator and above mentioned tanks, fuel filter/ regulator, fuel pump, exhaust parts, dzus fastener parts for- rad shrouding and inner fenders, etc, etc...Lots to do.
Also spent a many hours in the last week honing my tig work, playing with different tungsten and cups. I'm pretty much a rookie, so be kind or offer advice[emoji41].
#6 gas cup for AL
Big ass pyrex gas for steel
Testing different tungsten
Couple different fillers
I've made progress in tig, this was from my last practice session...
Will have some photo worthy progress through the weekend.
Matt

Beerj
Sonzabitches!
One thing I learned while teaching myself tig was cleanliness, expecially with aluminum. Wipe your pieces and rod with acetone. Also, when terminating a weld, gently bring the pedal back and go in a small circular motion over the puddle to avoid that little crater which I'm told will be more inclined to crack.
Looks like a great start from what I can tell. I'm sure you'll be just fine.
Looks like a great start from what I can tell. I'm sure you'll be just fine.
mcutler
Well-Known Member
Thanks beerj! Yes sir on the clean. Copper brush, and acetone everything, (even when I mig weld! ). The outside edge on the cube is where I need the practice most, especially being that most things I need to build will be a tank of sorts. I have a spool gun for aluminum, but that ***** is way too fast for me!
I'm limited some what, only have the miller diversion 165, it doesn't have any of the fine tuning that the synchro or dynasty has.
Matt
I'm limited some what, only have the miller diversion 165, it doesn't have any of the fine tuning that the synchro or dynasty has.
Matt
Toddy
Well-Known Member
If you haven't looked YouTube is a great place to learn.
I'll ask my boss tomm on the tungsten and cup to use for alum. He is a bad ass welder. He worked as a weld tech for ORNL and has welded some of wicked ****.
I'll ask my boss tomm on the tungsten and cup to use for alum. He is a bad ass welder. He worked as a weld tech for ORNL and has welded some of wicked ****.
mcutler
Well-Known Member
Thanks toddy, yes watched many videos.
All the research I've done says no green tungsten for alum on inverter machines. Only green on transformer style units. But I swear the green worked great on my diversion, except for the lap joint, red and grey worked better there. The ball on the green didn't seem to spread the heat as well on a lap, but the red and grey kept a nice point which seemed to help in that position. Imma keep on practicing ...
Matt
All the research I've done says no green tungsten for alum on inverter machines. Only green on transformer style units. But I swear the green worked great on my diversion, except for the lap joint, red and grey worked better there. The ball on the green didn't seem to spread the heat as well on a lap, but the red and grey kept a nice point which seemed to help in that position. Imma keep on practicing ...
Matt

stuftmunky2k
Well-Known Member
I run 2% thoriated tungsten (red) for 99.9% of what i tig weld. Everything from stainless, chromoly, inconel, hastealloy, ***anium. On aluminum i always start with a point and let the tungsten morph itself into a tiny ball. Ditch the copper brush and get you a stainless brush that you only use on aluminum. Aluminum loves heat absolutly loves it. Crank your machine wide open and controll the puddle with the peddle till you get a good wet action. With aluminum it loves the rod so being able to fed the rod fast and consistant is a huge plus. Practicing on aluminum will make you a better tig welder on every other metal becuase it trains your hand how to feed the rod fast and consistant. If your welder is a little under power adding helium to the gas mixture will help with the lack of amps the welder is putting out. Keep practicing but my suggestion is stainless brush and follow the 3 rules of aluminum. Clean, clean, and clean.
Beerj
Sonzabitches!
I really like the gold for aluminum. I think it's 1.5% lanthinated. I hear 2% is even better and the closest thing you'll find to an all purpose tungsten.
mcutler
Well-Known Member
Re: Re: 90's throw back....Manche build
I have both brushes dedicated for aluminum only. I had read that about helium. I figure doing automotive stuff; dashes, tanks, inner fender, and other applications, that 1/8 AL will be the thickest material I'll use.
Did some research on tungsten grinding last night, mainly about the different angles, penetration and prep. How steep of an angle do you like to have on aluminum inside and outside corners? (Obviously before the ball forms)
Thanks for laying some tips or for me.
Matt
stuftmunky2k said:I run 2% thoriated tungsten (red) for 99.9% of what i tig weld. Everything from stainless, chromoly, inconel, hastealloy, ***anium. On aluminum i always start with a point and let the tungsten morph itself into a tiny ball. Ditch the copper brush and get you a stainless brush that you only use on aluminum. Aluminum loves heat absolutly loves it. Crank your machine wide open and controll the puddle with the peddle till you get a good wet action. With aluminum it loves the rod so being able to fed the rod fast and consistant is a huge plus. Practicing on aluminum will make you a better tig welder on every other metal becuase it trains your hand how to feed the rod fast and consistant. If your welder is a little under power adding helium to the gas mixture will help with the lack of amps the welder is putting out. Keep practicing but my suggestion is stainless brush and follow the 3 rules of aluminum. Clean, clean, and clean.
I have both brushes dedicated for aluminum only. I had read that about helium. I figure doing automotive stuff; dashes, tanks, inner fender, and other applications, that 1/8 AL will be the thickest material I'll use.
Did some research on tungsten grinding last night, mainly about the different angles, penetration and prep. How steep of an angle do you like to have on aluminum inside and outside corners? (Obviously before the ball forms)
Thanks for laying some tips or for me.
I was going to pick up soon lan yesterday, but ARC3 was out. I've got some coming. I need to get a rainbow pack just to play with. I'd like to step up to a dynasty machine at some point. I figure the diversion is a good hobby machine to get started with...so long as is lack of settings doesn't create bad habits.Beerj said:I really like the gold for aluminum. I think it's 1.5% lanthinated. I hear 2% is even better and the closest thing you'll find to an all purpose tungsten.
Matt
stuftmunky2k
Well-Known Member
My tungsten i generally grind from the point back 1/8'' to 3/16 of an inch or so and grind to a point. Now i just take the hole pack of tungsten and grind both ends on a bench grinder. Less time stopping getting up and grinding. More torch is a wp20 with a #7 cup. i run #7 on all more torches. I prefer smaller tig torches over anything else. It helps with your hands not cramping and more mobility. You will get it just takes lots n lots n lots of practice. Ive been tig welding sanitary stainless in food processing plants and exotic metal pipe for 10 years and still learn new tricks and stuff every day. Its a never ending cycle.

sledneck
Well-Known Member
Leave the monster cup for stainless and mild steel. They don't work that great for alum. Looks like that other gas lens was a 6 or 7 just run that for your aluminum work and run 12-15 cfh unless someone else is paying for your argon. As a few others posted you can not get aluminum clean enough. Be patient and wait for the puddle to wet if you start trying to add filler rod before you get a nice puddle on both sides it usually just blows up and contaminates your work. I use a scotch brite pad to clean my filler rod before I start sometimes I think it works better than acetone and others I don't know if there is a difference. Guess it just depends on what is in front of you.
mcutler
Well-Known Member
My first completed workpiece with tig welding aluminum...or basically period for that matter. Finally got a rhythm, there are a couple hiccups, but that's why I started on the sides that will be unseen... There will be another unit for overflow with the same dimensions as this surge tank, just less weld bungs. If these two pass pressure testing, I will make a couple more at a later date once my skills become more fluid. I appreciate everyone's advice!


And my little helper joined me in the shop for a bit today.

Matt
And my little helper joined me in the shop for a bit today.
Matt

5BrothersFabrication
Zzzzz....
Those are my favorite times, when the wee fellas want to join the party. loller.gif


mcutler
Well-Known Member
I got the radiator prepped for AN fittings today, -16 on the tanks, and removed the radiator cap and replaced it with a -4 fitting. (I'm using a surge tank system rather than a cap on the radiator. Let's me get the cap to a higher point, more capacity, and it works great in factory vehicles.)
Very unnerving cutting up a brand new radiator...


Nice short connection to the surge tank.

The -12 and -10 fittings on the surge tank will go to the rad side of the thermostat and the hot side of the heater core, respectively; then the return of the core will go to the engine side of t-stat. Obviously the hoses can be rerouted in case of heater core failure. The radiator cap is 18-22lb. The -4 fittings are for the steam ports on the heads and the steam vent from radiator.

Got the steering cooler mounted, easily done with the tanks on this flexalite radiator.


Almost finished the overflow tank today as well. The neck will house a second (spare) cap, but the sealing surface has been vented to let fluid through to the overflow port.

Starting to feel much more comfortable with this tig stuff. I love mig, but tig is more fun.

Matt
Very unnerving cutting up a brand new radiator...
Nice short connection to the surge tank.
The -12 and -10 fittings on the surge tank will go to the rad side of the thermostat and the hot side of the heater core, respectively; then the return of the core will go to the engine side of t-stat. Obviously the hoses can be rerouted in case of heater core failure. The radiator cap is 18-22lb. The -4 fittings are for the steam ports on the heads and the steam vent from radiator.
Got the steering cooler mounted, easily done with the tanks on this flexalite radiator.
Almost finished the overflow tank today as well. The neck will house a second (spare) cap, but the sealing surface has been vented to let fluid through to the overflow port.
Starting to feel much more comfortable with this tig stuff. I love mig, but tig is more fun.
Matt

FlatlandFSJ
Well-Known Member
Dam....I didn't think about putting a heater in mine. My headers will probably keep it plenty warm inside though.
Love the expansion tank set up, I was almost thinking we'd see a miller motorsports style heat ex-changer set up in it though ;D
Love the expansion tank set up, I was almost thinking we'd see a miller motorsports style heat ex-changer set up in it though ;D
Beerj
Sonzabitches!
I'll just leave this here
https://youtu.be/1DYW7ZRfZ9o
https://youtu.be/1DYW7ZRfZ9o
mcutler
Well-Known Member
Re: Re: 90's throw back....Manche build
Matt
Good stuff, thanks beerj!Beerj said:I'll just leave this here
https://youtu.be/1DYW7ZRfZ9o
Matt
Beerj
Sonzabitches!
No problem man. It came up in my feed so I figured I'd share it for those that don't follow Handsome Jay on youtube. thumb.gif


DAkk
Member
Your tiggin is lookin pretty good. Glad to see that lil diversion 165 can get it done, I've wanted one for a long time, but I've been spoiled by the big sycrowave at work I can use anytime, so I'm spending my money on buggy parts that I can't make for now, haha..
It looks like you're still getting a lil crater at the ends of your corner-to-corner welds. Like beerj said a page or two back, that's where cracks start and almost all the leaks I see in al TIG welds are in that damn lil crater... I usually just light it back up, stomp the pedal to dig in, give it one dip of filler, then ease off the pedal and long-arc it off the corner.. If you chop the throttle and pull out, TIG will almost always leave a crater, even on steel and stainless.
Be careful if you get into walking the cup on steel and stainless.. It's addicting :****: Once you get the hang of it, it's way too easy to walk over any ol mig weld and make it look like a robot did it...
It looks like you're still getting a lil crater at the ends of your corner-to-corner welds. Like beerj said a page or two back, that's where cracks start and almost all the leaks I see in al TIG welds are in that damn lil crater... I usually just light it back up, stomp the pedal to dig in, give it one dip of filler, then ease off the pedal and long-arc it off the corner.. If you chop the throttle and pull out, TIG will almost always leave a crater, even on steel and stainless.
Be careful if you get into walking the cup on steel and stainless.. It's addicting :****: Once you get the hang of it, it's way too easy to walk over any ol mig weld and make it look like a robot did it...
mcutler
Well-Known Member
Re:
Thanks dakk. I appreciate the tips. I figured when I pulled the tanks for pressure check, I'd clean those corners up a bit. Damn tickled and excited about hanging them in their place!
Matt
Thanks dakk. I appreciate the tips. I figured when I pulled the tanks for pressure check, I'd clean those corners up a bit. Damn tickled and excited about hanging them in their place!
Matt

d9marko
Well-Known Member
Damn man. This car just keeps getting better and better!


ridered3
Not Rigless
Nice washer fluid reservoir :dblthumb: Inquiring minds want to know, whats the plan for the 1/2 of the semi circle in picture #1 of that post ???
Burrito maker, hot dog steamer, Cuban cigar humidifier :dunno:
Burrito maker, hot dog steamer, Cuban cigar humidifier :dunno:
mcutler
Well-Known Member
Re: Re: 90's throw back....Manche build
Probably a catch can for trans and/or tcase
Matt
Hot wing deep fryer on #8 exhaust tube.....one wing at a time, co-driver will be a busy mofo!ridered3 said:Nice washer fluid reservoir :dblthumb: Inquiring minds want to know, whats the plan for the 1/2 of the semi circle in picture #1 of that post ???
Burrito maker, hot dog steamer, Cuban cigar humidifier :dunno:
Probably a catch can for trans and/or tcase
Matt
Latest posts
-
-

-
-
-
-
-
-

-
-
-
For Sale First Generation 4Runner Rock Crawler for sale or trade
- Latest: FirstGenFunRunner
-
-
-
Withdrawn First Generation 4Runner Rock Crawler for sale or trade
- Latest: FirstGenFunRunner
-