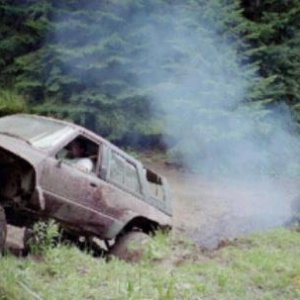
• Help Support Hardline Crawlers :

Dad's stang...

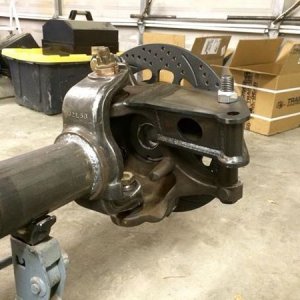
I was gonna suggest how easy it would be to just modify the linkage you have instead of going on a wild goose hunt for something you could make in less time than looking for one.
But then you wouldnt have done it.:D

Its too bad I did it before you suggested it. Ahh to be young and ---dumb :kiss::fawkdancesmiley:
 
So I got the painted parts put in. My dad is looking for a new boot where the rod goes thru the firewall--it has a small hole in it. if he can find one I will fix it.

dad232.jpg


dad233.jpg


It seems to be working excelent and very smooth. But thats by hand and hard to tell since we are trained to use out foot for the pedals and that will tell the story.

dad234.jpg
 
So I can put the accelorator under the "done" list.

My next chore is to fix the broken bolts on the front fenders. There are 8 holes and 7 broken bolts. So that should keep me busy for a while...

dad235.jpg
 
Well I was able to get all 7 broken 1/4" bolts done. My first one I tried an easyout and it was rock solid. You could tell they were throughly rusted in place.

dad236.jpg


The key was to start with a small drill bit to get you center and work your way up. If you are nads on with your center hole your golden. I then worked my way up to a 3/16" drill bit and I was able to get the bolt to unscrew inwards. If your nads on you will have a winding of threads with zero damage to the threads on the car.

dad237.jpg


I only had 2 holes that barely nicked the edges of the threads and left some threads that were easily removed with my tap.
 
So my list is growing small. I decided to clean the area behind the rear seat. The stock divider between the trunk and seat was glue to the body and left crap stuck to it.

dad238.jpg


I also cleaned both sides of the car where the steel panels go that are next to the rear seats. There was some sticky goo which I assume is to help with the panels to stay in place. In any case thats done.

dad239.jpg
 
Another day of chomping thru stuff.

So I had one broken bolt left to take care of. One of the front bumper bracket bolts broke off.

dad240.jpg


What I typicly do when they are broken off in this manner I just plug weld a nut to the bolt. After welded I soak it down with PB blaster. I have been very successfull using this technique.

dad241.jpg


I was able to crack the bolt back and forth about 1/4" when it popped the bolt again--these bolts are VERY soft.

dad242.jpg


So I just simply drilled the bolt out and ran the old threads out with a tap.

dad243.jpg


So I grabbed the my dedicated grinder with a big ol wire wheel and sucked on some red dust for a while. Got both sides cleaned and then killed the rust and painted them up.

dad244.jpg


dad245.jpg


So I can put that under my DONE list....
 
I went ahead and got a couple of the cables made to get that out of the way.

The starter cable.

dad246.jpg


The ground cable

dad247.jpg


Once I get the battery tray I can finish up the last 2 cables.
 
I decided to change gears and decided to tackle the passenger seat I started. So far the lower seat was the hardest. But I got it done with the seat tracks all bolted down. Thank goodness I chose to leave the drivers side togehter so I would remember how the springs/cross cable went. But the seat track works like silk..

dad248.jpg


It turned out pretty decent.

dad249.jpg


The back cover turned out harder than I thought. I thought I would be able to pop it right on--but it took some trimming where the clips go thru and I had to bend the clips a tad here and there.

dad250.jpg


One together--well almost. I need the trim parts to fully finish it. But I am getting there.

dad251.jpg


Just for giggles--and something else to get my dad excited.

dad252.jpg
 
Time to dig into the drivers seat.

dad253.jpg


Way back when I dragged the seats into the back area of my shop an insert had fallen out of one of the seats. I thought nothing of it but yet kept it and stuck it in the pile of removed seat parts. Well when I did the passenger seat I didn't notice anything missing.

Well when I tore the driver seat back apart I noticed the stop that lets you slightly adjust how far back it goes was not there. Well I looked at the spot the adjuster screws into and it was just a hole--found where the insert goes.

dad254.jpg


So I fixed that up and should be good to go now.

dad255.jpg


Now I knew the seat base frame was broken(have a new one sitting here).

dad256.jpg


But I didn't relize it was THAT bad.

dad257.jpg


So I got the seat back frame cleaned and painted

dad258.jpg


Just like the passenger seat tracks I tore these apart and cleaned them and replaced the studs and threw some paint on them.

dad259.jpg


I haven't completed the seats but I have completed the mess from tearing them apart--so I can put that under the DONE list,lol...
 
Ok I got the seat base all done with the new seat frame. It turned out just as nice as the passenger side. So now I can move the car in style and not sitting on a milk crate,lol.

dad260.jpg


The seat back frame took a little work mainly because the pivat arms (that connect it to the seat base) were bent out of shape from the broke seat base. So it took a little work to get them back into shape but the seat back is done except for the back cover.

dad261.jpg
 
I went and swapped over the trunk lid and threw in the latch so it will stay closed. I also put both doors on and somewhat got them aligned.

dad262.jpg
 
Now this will blow your socks off. This has to be some of my best work. Look at how nice the battery mount and cables turned out--its da ****,lol.. No Pm's please regarding me making more--ha ha ha..

dad263.jpg


dad264.jpg


dad265.jpg


See--total PIMP my ride stuff there...

The battery mount has not shown yet so I had to throw something in there for the time being---ya it looks like total butt,lol...
 
Now this will blow your socks off. This has to be some of my best work. Look at how nice the battery mount and cables turned out--its da ****,lol.. No Pm's please regarding me making more--ha ha ha..

See--total PIMP my ride stuff there.....

I knew you would come over to the dark side! :FIREdevil:
 
HA---I finally got the damn radio antenea off--little bugger...

dad266.jpg


I also did a bunch of odds and ends to get it ready.

Ohhh--loook. Dash lights work. Also the under dash lights are NICE---boy my dad is going to like that...

dad267.jpg


And here the car sits all ready to load onto my trailer tommorow night.

dad268.jpg


Stash of stuff I gotta take with me.

dad269.jpg


So the plan is to haul it to the guys place saturday after work. Once he gets it I won't have allot of updated pics. But I do have a few more things to finish up while its gone.
 
Top